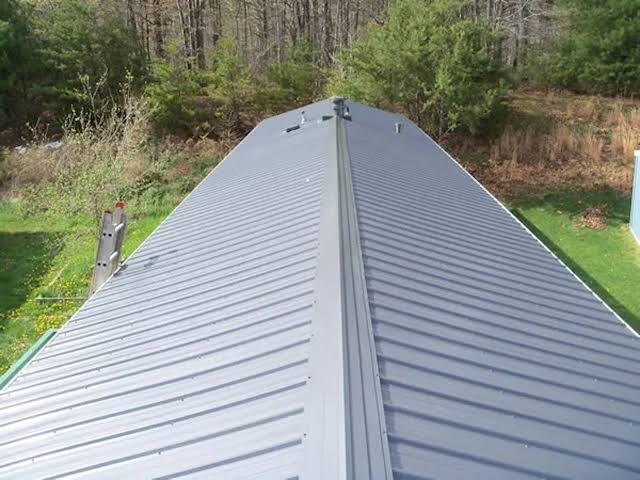
Replacing the roof on a mobile or trailer home is one of the most daunting yet rewarding DIY projects you can undertake. Many homeowners face leaking ceilings, rising energy bills, and the fear of structural damage due to aging asphalt shingles or worn-out rubber membranes. If you are looking for a durable, cost-effective solution, learning how to put a metal roof on a trailer house can extend the life of your home by decades while significantly improving its curb appeal.
This guide is designed to walk you through the process safely and efficiently, ensuring you meet industry standards without breaking the bank.
Why Choose Metal for Your Mobile Home?
Before diving into the tools and screws, it is crucial to understand why metal is often superior to traditional materials for manufactured housing. Mobile homes have unique structural requirements compared to site-built houses. They are lighter, and their frames are designed to be transported. Therefore, weight distribution is critical.
The Weight Advantage
Traditional asphalt shingles can weigh between 200 to 350 pounds per square (100 sq. ft.). In contrast, standing seam metal roofing typically weighs only 50 to 150 pounds per square. This significant reduction in load puts less stress on the trusses and walls of your trailer house, which is vital for older models that may have experienced some settling over time.
Durability and Longevity
According to data from the National Association of Home Builders, asphalt shingles last an average of 15–20 years. Metal roofs, however, can last 40–70 years. For a mobile homeowner, this means installing a roof once rather than two or three times over the lifespan of the home.
| Feature | Asphalt Shingles | Metal Roofing |
|---|---|---|
| Lifespan | 15–20 Years | 40–70 Years |
| Weight | Heavy (High Load) | Light (Low Load) |
| Fire Resistance | Low to Moderate | Class A Rating |
| Maintenance | High (Prone to Moss/Curling) | Low (Occasional Cleaning) |
| Energy Efficiency | Standard | High (Reflects Solar Heat) |
Essential Tools and Materials Checklist
You cannot learn how to put a metal roof on a trailer house without the right gear. Using improper tools can lead to leaks or injury. Here is what you will need:
- Safety Gear: OSHA-approved harness, non-slip boots, heavy-duty gloves, and safety glasses.
- Measurement Tools: Tape measure, chalk line, and a carpenter’s square.
- Cutting Tools: Electric metal shears (nibblers) or a circular saw with a metal-cutting blade. Avoid abrasive wheels as they burn off the protective coating.
- Fastening Tools: Cordless drill with a clutch setting (to prevent over-driving screws).
- Materials:
- Metal panels (corrugated or standing seam).
- Closure strips (foam strips that fit under the ribs of the metal).
- Screws with neoprene washers (specifically designed for metal roofing).
- Ridge cap flashing.
- Drip edge flashing.
- Butyl tape or sealant compatible with metal.
Step 1: Assessing and Preparing the Existing Roof
The most common mistake DIYers make is installing new metal directly over damaged substrates. You must ensure the foundation is solid.
- Inspect the Decking: Walk the roof carefully. Look for soft spots, which indicate rotting wood or compromised insulation. If the existing roof is rubber (EPDM) or asphalt, check for large tears or bubbling.
- Remove Loose Debris: Clear all leaves, branches, and old loose shingles.
- Repair Structural Issues: If you find rotten plywood or OSB decking, replace these sections immediately. A metal roof is only as strong as what it is screwed into.
- Check Local Codes: While many areas allow “roof-over” installations (installing metal over existing material), some jurisdictions require complete tear-offs. Check with your local building department. For more information on building code standards, you can refer to general construction guidelines on Wikipedia.
Step 2: Installing Furring Strips or Battens
Unlike standard houses, trailer homes often lack a solid plywood deck under the original roofing material. Instead, they may have thin paneling or insulation exposed. To create a solid surface for screwing in the metal panels, you need to install furring strips (also known as battens).
- Material: Use 1×4 or 2×4 pressure-treated lumber.
- Spacing: Install the strips vertically, spaced 24 inches on center. This aligns with the typical truss spacing in mobile homes.
- Attachment: Screw the strips directly into the roof trusses, not just the decking. Use long enough screws to penetrate the truss by at least 1.5 inches. This ensures the wind uplift resistance required for metal roofing.
Pro Tip: Ensure the strips are straight. Use a chalk line to mark your layout. If the strips are crooked, your metal panels will be crooked, leading to alignment issues at the ridge.
Step 3: Laying the Underlayment
While metal is waterproof, condensation can form underneath it due to temperature differences. An underlayment acts as a secondary moisture barrier.
- Choose Synthetic Underlayment: Avoid felt paper, which can trap moisture. Use a breathable synthetic underlayment rated for high temperatures.
- Roll It Out: Start at the eaves (bottom edge) and roll horizontally across the roof.
- Overlap: Overlap each row by at least 6 inches. Secure it with cap nails or staples, ensuring it lies flat against the furring strips.
Step 4: Installing Drip Edge and First Panel
Proper water diversion starts at the edges.
- Install Drip Edge: Attach metal drip edge flashing along the eaves and gable ends. Secure it with roofing nails every 12 inches. This prevents water from wicking back under the metal panels and rotting the wood.
- Place Closure Strips: If you are using corrugated metal, insert foam closure strips into the bottom of the first panel’s ribs. This blocks pests and wind-driven rain.
- Hang the First Panel: Lift the first metal panel onto the roof. Align it so it overhangs the drip edge by about 1 to 1.5 inches. Ensure it is perfectly square with the roof edge. If the first panel is off, every subsequent panel will be off.
Step 5: Fastening the Metal Panels
This is the core of learning how to put a metal roof on a trailer house. Precision here prevents leaks.
- Screw Placement: Drive screws through the flat part of the panel, not the raised rib (unless using specific standing seam clips). Screwing into the rib can cause the metal to distort and leak.
- Tightness: Use your drill’s clutch. The neoprene washer should compress slightly to form a seal but should not be squashed flat. Over-tightening will crack the washer; under-tightening will allow water ingress.
- Pattern: Follow the manufacturer’s recommended screw pattern, usually every 12 to 24 inches along the purlins (furring strips).
- Overlapping: Overlap subsequent panels according to the manufacturer’s specs (usually 6–12 inches sideways). Use sealant tape between overlaps if recommended.
Step 6: Ridge Cap and Flashing
The ridge is where two roof slopes meet, making it the most vulnerable spot for leaks.
- Install Ridge Vent (Optional but Recommended): For better attic ventilation, install a continuous ridge vent before the cap. This helps reduce heat buildup in the summer, lowering cooling costs.
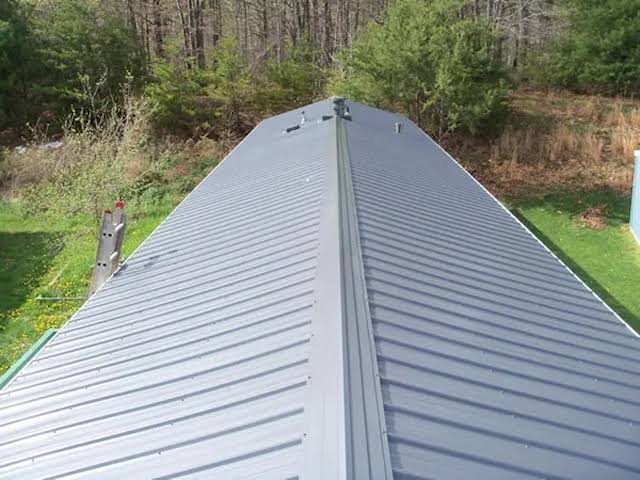
- Attach Ridge Cap: Place the pre-formed ridge cap over the peak. Secure it with screws every 12 inches.
- Seal Ends: Use butyl sealant or specialized ridge end caps to close off the open ends of the ridge cap. This prevents birds and insects from entering the roof cavity.
Frequently Asked Questions (FAQ)
1. Can I install a metal roof over my existing shingles?
Yes, in many cases, you can install metal over existing asphalt shingles. This saves on disposal fees and labor. However, you must ensure the existing roof is securely attached and not holding moisture. Installing furring strips over the shingles provides a flat, ventilated surface for the new metal.
2. How much does it cost to put a metal roof on a trailer house?
Costs vary by region and material quality, but generally, expect to pay between $3.50 and $8.00 per square foot for materials and DIY labor. For a typical 1,500 sq. ft. mobile home, the total material cost might range from $5,000 to $12,000. This is often cheaper than hiring a contractor for a full tear-off and replacement.
3. Do I need a permit to replace my mobile home roof?
Most jurisdictions require a building permit for re-roofing, even for mobile homes. Permits ensure that the work meets wind-load and fire-safety codes. Always check with your local county or city building department before starting. Failure to obtain a permit can result in fines and issues when selling the home.
4. Will a metal roof make my trailer house hotter?
No, actually the opposite. Modern metal roofs often come with reflective pigments (cool-roof technology) that reflect solar radiant heat. This can reduce cooling costs by 10–25%. Additionally, the air gap created by furring strips provides natural insulation, reducing heat transfer into the living space.
5. What gauge metal should I use for a mobile home?
For residential applications, 29-gauge or 26-gauge steel is standard. 29-gauge is lighter and more cost-effective, suitable for most mobile homes. 26-gauge is thicker and more durable, offering better resistance to hail and heavy foot traffic during maintenance. Avoid thinner gauges (like 30 or 32) as they can oil-can (pop in and out) due to thermal expansion.
Conclusion
Learning how to put a metal roof on a trailer house is a powerful way to take control of your home’s longevity and efficiency. By following these steps—preparing the surface, installing furring strips, and carefully fastening the panels—you can achieve a professional-looking result that protects your family from the elements.
Remember, safety is paramount. Never rush the process, and always double-check your measurements. A well-installed metal roof is an investment that pays dividends in lower energy bills and peace of mind for decades.
If you found this guide helpful, please share it on social media to help other mobile homeowners tackle their roofing projects with confidence!