Tag: Wood Stove Installation

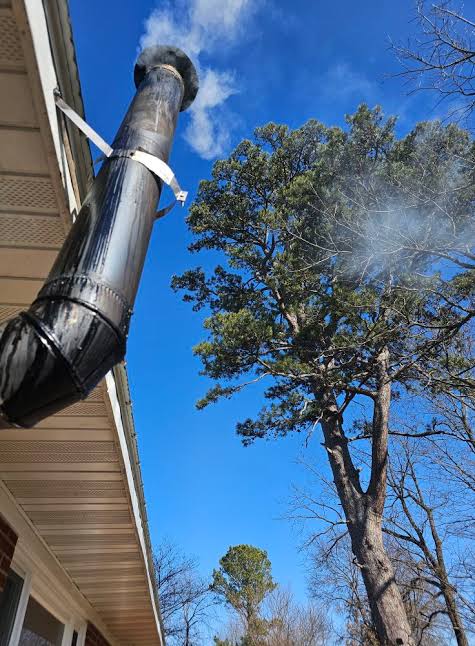
  • Must Wood Stove Pipe Go Above Roof Line?

    Must Wood Stove Pipe Go Above Roof Line?

    Installing a wood stove is one of the most rewarding upgrades you can make to your home, offering both cozy warmth and potential energy savings. However, the difference between a safe, efficient fire and a hazardous situation often comes down to one critical detail: proper venting. Many homeowners find themselves asking, does wood stove pipe have to be above roof line? The short answer is yes, but the specific height requirements are governed by strict safety codes designed to prevent fires and ensure your stove draws correctly. In this guide, we will break down exactly how high your pipe needs to go, why it matters, and how to get it right the first time.

    Why Height Matters: The Science of Draft and Safety

    Before diving into the specific measurements, it is essential to understand why the height of your chimney or stove pipe is so critical. It isn’t just about following rules; it is about physics and safety.

    The Chimney Effect

    Wood stoves rely on natural convection, often called the “chimney effect,” to pull smoke out of your home. Hot air rises because it is less dense than cold air. If your stove pipe terminates too low, it may not create enough vertical distance to generate the necessary suction (draft) to pull combustion gases out efficiently. A weak draft leads to smoky rooms, poor burning efficiency, and increased creosote buildup.

    Fire Safety and Spark Arrestors

    Beyond airflow, height is a primary defense against house fires. When wood burns, it emits sparks and embers. If your stove pipe ends below the roofline or too close to combustible materials like shingles, eaves, or nearby trees, those sparks can ignite a fire. Proper height ensures that hot embers cool down before they land on any surface.

    The Golden Rule: The 3-2-10 Formula

    When determining if your wood stove pipe has to be above roof line, you cannot simply guess. You must follow the universal standard known as the 3-2-10 Rule. This rule is widely accepted by building inspectors, insurance companies, and the National Fire Protection Association (NFPA).

    Here is how it works:

    1. 3 Feet Above the Roof Penetration: The chimney must extend at least 3 feet above the point where it passes through the roof surface.
    2. 2 Feet Higher Than Any Obstruction: The top of the chimney must be at least 2 feet higher than any part of the building structure (such as a ridge beam, parapet wall, or adjacent roof section) within a horizontal distance of 10 feet.
    3. 10 Feet Horizontal Radius: The “2 feet higher” rule applies to any obstruction within a 10-foot horizontal radius of the chimney.

    Visualizing the Rule

    Imagine drawing a circle with a 10-foot radius around your chimney. Look at everything inside that circle. Is there a roof peak, a dormer, or a tree branch? Your chimney tip must be at least 2 feet higher than the highest point of any of those objects. If there are no obstructions within 10 feet, you still must maintain the minimum 3-foot height above the roof penetration point.

    Does This Apply to All Stove Pipes?

    It is important to distinguish between different types of piping, as this often causes confusion among DIY installers.

    Class A Chimneys vs. Single-Wall Pipe

    The strict 3-2-10 rule generally applies to Class A insulated chimneys that pass through the roof. These are permanent installations designed for long-term use.

    If you are using a single-wall stove pipe that exits through a wall (not the roof), the rules are slightly different but equally strict. Wall-exit pipes must typically extend vertically outside the house before turning upward, and they must still clear the roofline by a significant margin to prevent downdrafts and spark hazards. However, roof penetrations are generally preferred for better draft and safety.

    Expert Note: Always check your local building codes. While the NFPA provides national standards, some municipalities in the US have stricter requirements due to local weather conditions or historical preservation laws.
    Does Wood Stove Pipe Have To Be Above Roof Line

    Common Mistakes Homeowners Make

    Even with the best intentions, many installations fail inspection or perform poorly due to common errors. Here are the most frequent pitfalls:

    • Ignoring the Ridge Line: Many homeowners measure from the spot where the pipe hits the roof but forget that the ridge line (the peak of the roof) is an “obstruction.” If your chimney is within 10 feet of the ridge, it must be 2 feet higher than the ridge, not just 3 feet above the penetration point.
    • Using Elbows Excessively: Every elbow in your pipe reduces draft. While not strictly a “height” issue, a complex pipe route often requires more height to compensate for the loss of suction. Keep the path as straight and vertical as possible.
    • Neglecting Wind Patterns: If you live in a particularly windy area, your chimney may need to be taller than the minimum code requirements to avoid wind-induced downdrafts, which can blow smoke back into the house.

    Step-by-Step: How to Measure Your Required Height

    To ensure your installation is compliant, follow these concrete steps. You will need a tape measure, a level, and possibly a ladder.

    1. Identify the Penetration Point: Locate exactly where your chimney pipe will exit the roof. Mark this spot.
    2. Measure the 10-Foot Radius: From your marked spot, measure 10 feet horizontally in all directions. Identify any structures (roof peaks, walls, vents) within this zone.
    3. Find the Highest Obstruction: Determine the highest point among the structures identified in step 2. Let’s call this Height A.
    4. Calculate Minimum Height:
      • If there are no obstructions within 10 feet, your minimum height is 3 feet above the roof surface at the penetration point.
      • If there are obstructions, your chimney top must be Height A + 2 feet.
    5. Compare and Choose: Whichever calculation results in a greater height is your required minimum. Always round up to be safe.

    Comparison: Roof Exit vs. Wall Exit

    FeatureRoof Exit (Class A Chimney)Wall Exit (Single/Double Wall Pipe)
    Draft EfficiencyExcellent (Vertical rise creates strong draft)Good (Requires vertical exterior section)
    Installation ComplexityModerate (Requires flashing and roof work)Easier (No roof penetration needed)
    Code StrictnessStrict 3-2-10 Rule appliesMust clear eaves and roofline significantly
    MaintenanceEasier to clean from topHarder to access for cleaning
    AestheticsTraditional lookVisible pipe on exterior wall

    For more detailed technical specifications on chimney construction, you can refer to the general standards outlined on Wikipedia’s Chimney page, which provides a broad overview of historical and modern construction techniques.

    FAQ Section

    1. Can I terminate my wood stove pipe flush with the roof?

    No. Terminating a stove pipe flush with the roof is dangerous and illegal under almost all building codes. It creates a severe fire hazard due to spark emission and will likely cause smoke to back up into your home due to poor draft and wind turbulence.

    2. What happens if my chimney is too short?

    If your chimney is too short, you will experience poor draft. This means the fire will struggle to stay lit, produce excessive smoke, and burn inefficiently. More dangerously, it increases the risk of creosote buildup, a highly flammable substance that can lead to chimney fires.

    3. Do I need a rain cap on my wood stove pipe?

    Yes, it is highly recommended. A rain cap prevents water, snow, and debris from entering the flue. Water inside the chimney can mix with creosote to form acidic compounds that corrode the liner. Ensure the cap is spark-arresting as well.

    4. Does the type of wood I burn affect the required height?

    Indirectly, yes. Burning wet or unseasoned wood produces more smoke and creosote. While this doesn’t change the legal height requirement, a taller chimney with better draft can help mitigate some of the negative effects of burning less-than-ideal fuel by ensuring gases are expelled more quickly.

    5. Can I use a existing fireplace chimney for my wood stove?

    Often, yes, but it must be inspected and likely relined. Old masonry chimneys may have cracks or gaps that allow heat to escape into wooden framing. You must install a certified stainless steel liner that meets current size and insulation standards. Never connect a wood stove directly to an unlined masonry chimney.

    Conclusion

    So, does wood stove pipe have to be above roof line? Absolutely. Adhering to the 3-2-10 rule is not just about passing inspection; it is about ensuring your home remains safe and your heating system works efficiently. By keeping your chimney at the correct height, you protect your family from fire hazards, prevent smoke damage, and enjoy the full warmth of your wood stove.

    Remember, when in doubt, always consult with a certified chimney sweep or HVAC professional. They can provide site-specific advice that accounts for your home’s unique architecture and local wind patterns.

    Found this guide helpful? Share it with your fellow DIY enthusiasts on social media to help keep homes safe and warm this winter!
  • How to Install a Wood Stove Chimney Through the Roof

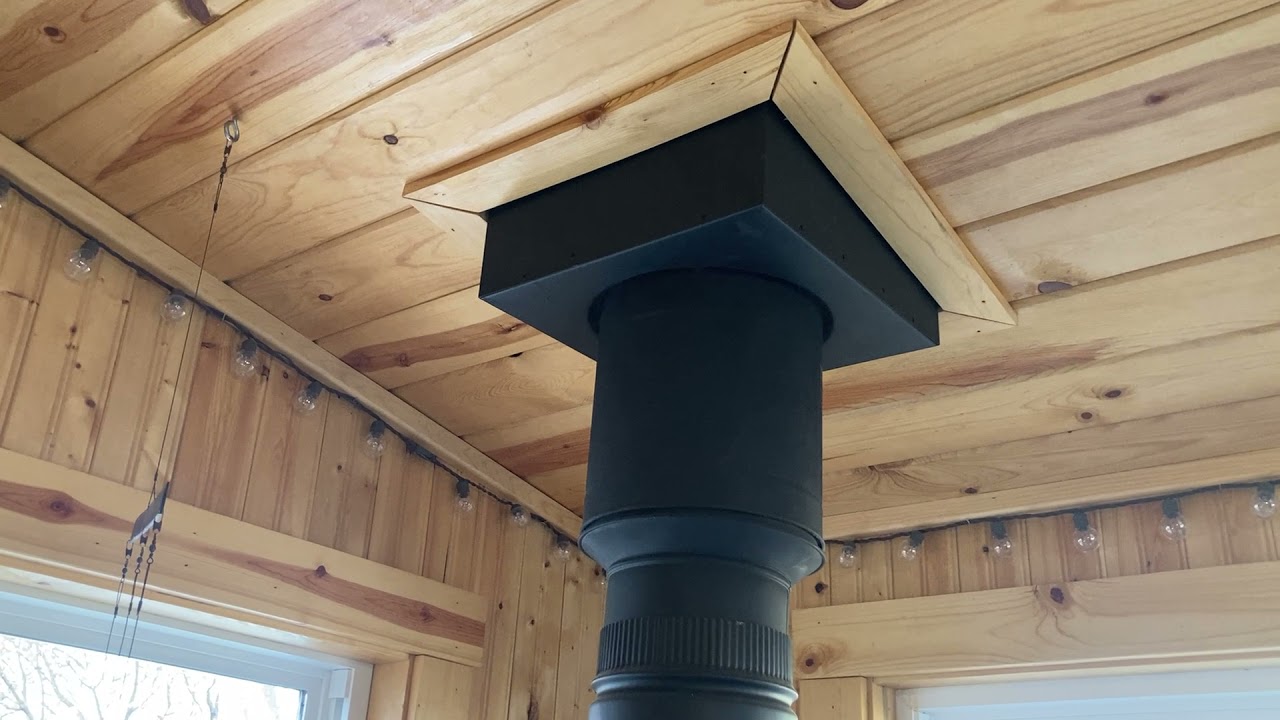
    How to Install a Wood Stove Chimney Through the Roof

    Installing a wood stove can transform your home into a cozy haven during chilly winters, but the installation process often feels daunting. Many homeowners worry about fire safety, structural integrity, and navigating complex building codes. If you are wondering how to install a wood stove chimney through the roof, you are not alone; proper execution is critical for both efficiency and safety.

    This guide breaks down the technical steps into manageable actions, ensuring you understand not just what to do, but why each step matters. We will cover everything from selecting the right components to sealing the roof penetration, helping you achieve a professional-grade result that meets modern safety standards.

    Why Proper Chimney Installation Matters for Safety

    Before picking up a drill, it is vital to understand the stakes. A poorly installed chimney is a leading cause of residential structure fires. According to the National Fire Protection Association (NFPA), heating equipment is involved in a significant percentage of home fire incidents annually, with chimneys and flues being common points of failure due to creosote buildup or improper clearances.

    When you route a chimney through the roof, you are creating a thermal breach in your home’s envelope. This requires precise flashing to prevent water leaks and adequate clearance to prevent heat transfer to combustible roofing materials. Ignoring these details can void your homeowner’s insurance and put your family at risk. Therefore, adherence to local building codes and manufacturer specifications is non-negotiable.

    Choosing the Right Chimney Components

    Not all pipes are created equal. For a roof-through installation, you must use Class A Stainless Steel Chimney Pipe. Unlike single-wall “connector pipe” used inside the house, Class A pipe is double-walled with insulation in between. This design keeps the outer wall cool enough to touch while maintaining high internal temperatures for a strong draft.

    Key Components Checklist:

    • Stainless Steel Chimney Pipe: Ensure it is listed for solid fuel appliances.
    • Roof Support Box: Provides structural support where the pipe passes through the roof.
    • Storm Collar: Diverts rainwater away from the pipe entry point.
    • Flashing Kit: Custom-fitted to your roof’s pitch (e.g., 3/12, 6/12).
    • Chimney Cap: Prevents rain, snow, and animals from entering the flue.
    • Firestop Spacer: Required if passing through any ceiling joists or attic floors before reaching the roof.

    Expert Tip: Always check the National Fire Protection Association guidelines for the latest standards on solid-fuel burning appliances. Compliance with NFPA 211 is the gold standard for chimney safety in the US.

    How To Install A Wood Stove Chimney Through The Roof

    Step-by-Step Guide: Installing the Chimney Through the Roof

    Follow these steps meticulously. If you feel uncomfortable working at heights or cutting into your roof, hire a certified professional.

    Step 1: Plan the Route and Check Clearances

    Identify the location for your stove inside the house. The chimney should rise vertically as much as possible. Horizontal runs reduce draft efficiency and increase creosote accumulation. Use a stud finder to locate rafters in the attic and roof. You must cut through the roof between rafters, not through them, unless you build a framed header box to support the structure.

    Critical Clearance Rule: Maintain at least 2 inches of air space between the chimney pipe and any combustible material (wood framing, insulation, drywall).

    Step 2: Cut the Hole in the Roof

    From the attic, mark the center point where the chimney will exit. Measure the diameter of your chimney pipe plus the required clearance (usually 2 inches on all sides). For a 6-inch pipe, you might need an 10×10 inch hole.

    Go onto the roof and align your mark. Using a reciprocating saw, cut the hole through the roofing shingles and sheathing. Be careful not to cut into the rafters. If you hit a rafter, adjust your plan or frame a new opening.

    Step 3: Install the Roof Support Box

    Place the roof support box over the hole from the outside. This box sits on top of the roof sheathing and provides a stable base for the chimney sections above. Secure it with roofing screws, ensuring it is level. Apply a bead of high-quality roofing sealant under the flange of the support box to create a watertight seal against the shingles.

    Step 4: Assemble the Chimney Sections

    From inside the attic, push the first section of Class A chimney pipe up through the support box. Connect subsequent sections from the roof side. Most systems use a twist-lock mechanism. Ensure each joint is fully engaged and locked.

    Note: Always install chimney sections with the male end (crimped end) facing up. This ensures that any condensation or creosote drips back into the stove rather than leaking out onto the roof or into the walls.

    Step 5: Install Flashing and Storm Collar

    Slide the flashing kit over the chimney pipe. The flashing should sit flat against the roof surface. Secure the flashing with roofing nails, starting from the bottom edge and working your way up to ensure proper water shedding.

    Next, slide the storm collar up the pipe until it rests snugly against the top of the flashing. Tighten the set screw on the collar. Apply a generous amount of silicone-based roofing cement around the gap between the storm collar and the chimney pipe. This is your primary defense against rain intrusion.

    Step 6: Add the Chimney Cap

    Attach the chimney cap to the top of the final pipe section. Secure it with sheet metal screws. The cap prevents downdrafts and keeps debris out. Ensure the cap is rated for high-temperature applications.

    Step 7: Insulate and Firestop in the Attic

    If your chimney passes through an attic space before exiting the roof, you must install a firestop spacer at every ceiling level. Fill the space around the chimney with non-combustible insulation (like mineral wool) if required by local code, but never pack combustible insulation tightly against the pipe. Maintain the 2-inch air gap.

    Common Mistakes to Avoid

    MistakeConsequenceSolution
    Using Single-Wall Pipe OutsideHigh fire risk, rapid coolingUse only Class A Double-Wall pipe for roof penetrations
    Insufficient ClearanceIgnition of roof framingMaintain minimum 2-inch air space on all sides
    Poor Flashing SealWater leaks, rot, moldUse high-temp silicone and proper overlapping techniques
    Too Many ElbowsPoor draft, smoke backupKeep the vertical rise as straight as possible

    FAQ: Common Questions About Roof Chimney Installation

    1. Do I need a permit to install a wood stove chimney?

    Yes, in most jurisdictions in the US, you need a building permit for wood stove installations. Local building departments require inspections to ensure compliance with fire codes and zoning laws. Skipping this step can lead to fines and issues when selling your home.

    2. How high does the chimney need to be above the roof?

    The general rule is the “3-2-10 Rule.” The chimney must extend at least 3 feet above the highest point where it passes through the roof, and at least 2 feet higher than any portion of the building within 10 feet horizontally. This ensures proper draft and prevents wind turbulence from pushing smoke back down.

    3. Can I install the chimney myself?

    While DIY is possible, it is recommended only for those with advanced carpentry and roofing skills. Incorrect installation can lead to house fires. If you are unsure about structural modifications or flashing details, hire a certified chimney sweep or installer.

    4. What type of insulation should I use around the chimney?

    Never use fiberglass or cellulose insulation directly against the chimney pipe. Use non-combustible insulation such as mineral wool or rock wool if filling gaps is necessary. However, maintaining an air gap is usually preferred over filling the space.

    5. How often should I clean the chimney?

    For regular wood stove users, annual cleaning is mandatory. If you burn green wood or use the stove daily, you may need cleaning twice a year. Creosote buildup is highly flammable and is the primary cause of chimney fires.

    Conclusion

    Learning how to install a wood stove chimney through the roof is a rewarding project that combines craftsmanship with safety awareness. By using Class A stainless steel components, maintaining proper clearances, and sealing your roof penetration correctly, you ensure a warm, safe, and efficient heating system for years to come.

    Remember, safety is paramount. Double-check every connection, respect the fire codes, and when in doubt, consult a professional. A well-installed chimney is the heart of a cozy home.

    Did you find this guide helpful? Share it with your friends on social media who are planning their own winter upgrades!