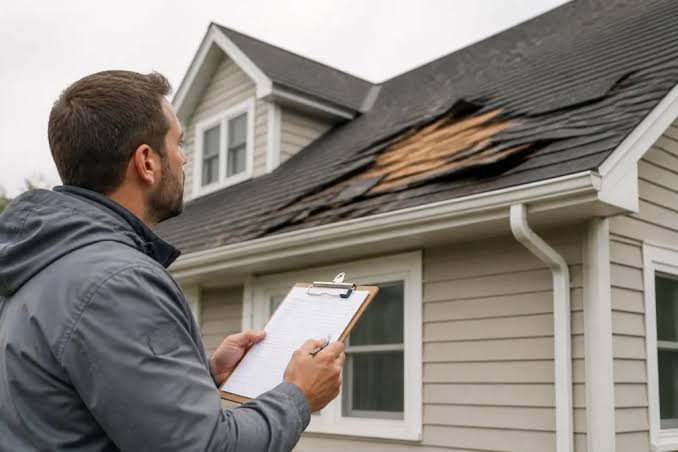
Dealing with a leaking or damaged roof is stressful enough without the added headache of navigating complex insurance paperwork. You want your home protected, but understanding the fine print can feel overwhelming. This guide simplifies the process, showing you exactly how to file a claim with insurance for roof damage efficiently and effectively.
Immediate Steps: Safety and Documentation First
Before you pick up the phone to call your insurer, your priority must be safety and evidence preservation. Insurance companies rely heavily on proof, and the quality of your initial documentation can significantly impact the speed and success of your claim.
1. Ensure Safety and Mitigate Further Damage
If the damage is severe, ensure no one is in immediate danger. Do not climb onto a wet or steeply pitched roof yourself; this is a job for professionals. However, you have a “duty to mitigate” further damage under most policies. This means you should take reasonable steps to prevent additional loss, such as placing tarps over leaks or moving furniture away from water intrusion. Keep receipts for any materials you buy for these temporary fixes, as they are often reimbursable.
2. Document Everything Thoroughly
Take clear, high-resolution photos and videos of the damage from multiple angles.
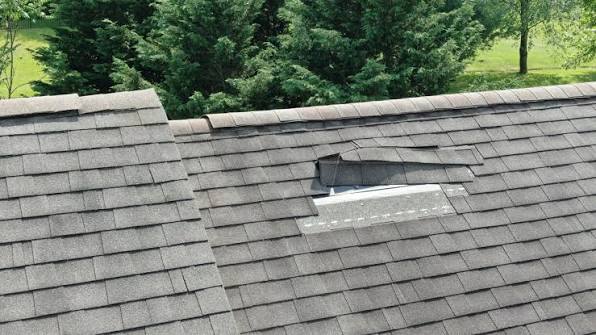
- Exterior Shots: Capture missing shingles, dents, holes, or debris impact points. Use a zoom lens if safe to do so, or use a drone if you own one.
- Interior Shots: Photograph water stains on ceilings, damaged insulation, or ruined personal property.
- Date Stamps: Ensure your camera or phone settings include date and time stamps.
According to industry data, claims with comprehensive visual evidence are processed 30% faster than those with sparse documentation. Create a digital folder specifically for this claim to keep everything organized.
Understanding Your Policy Coverage
Not all roof damage is covered. Before filing, you need to understand what your policy actually protects. Most standard homeowners insurance policies cover “sudden and accidental” damage caused by specific perils, but they exclude wear and tear.
Covered vs. Non-Covered Causes
| Cause of Damage | Typically Covered? | Notes |
|---|---|---|
| Wind/Hail Storms | Yes | Common in many US states; may have separate deductibles. |
| Falling Trees/Objects | Yes | If a tree falls due to a storm, it’s usually covered. |
| Fire/Lightning | Yes | Standard coverage in almost all policies. |
| Age/Wear and Tear | No | Gradual deterioration is considered maintenance. |
| Neglect | No | Failure to maintain the roof voids coverage. |
| Flooding | No | Requires separate flood insurance (FEMA). |
To better understand the historical context of property insurance standards, you can refer to general principles outlined on Wikipedia’s page on Property Insurance. However, always prioritize your specific policy document over general information.
Check Your Deductible
Your deductible is the amount you pay out-of-pocket before insurance kicks in. If your repair cost is $1,500 and your deductible is $2,000, filing a claim makes no financial sense. In fact, filing small claims can lead to higher premiums or even non-renewal of your policy. Always get a preliminary repair estimate before calling your insurer.
Step-by-Step: How to File the Claim
Once you have determined that the damage exceeds your deductible and is likely covered, follow these precise steps to initiate the process.
Step 1: Contact Your Insurance Provider
Call your insurance company’s claims department immediately. Have your policy number ready. Be clear and factual about what happened.
- Do say: “A hailstorm on November 1st caused significant shingle damage and interior leaking.”
- Don’t say: “My roof is old and finally gave out.” (This implies wear and tear).
Ask for a claim number and the name of the assigned adjuster. Request an email confirmation of your claim submission for your records.
Step 2: The Adjuster’s Inspection
The insurance company will send an adjuster to inspect the damage. This person works for the insurance company, not for you. Their goal is to assess the cost of repairs accurately according to their guidelines.
- Be Present: Try to be home during the inspection. Walk through the damage with them.
- Point Out Hidden Damage: Show them interior water damage, damaged gutters, or siding issues that might be related to the same event.
- Provide Evidence: Share the photos and videos you took earlier.
Step 3: Get Independent Contractor Estimates
Do not rely solely on the insurance adjuster’s estimate. Hire a licensed, reputable roofing contractor to provide a detailed written estimate. Many contractors offer free inspections for insurance purposes.
- Compare the contractor’s line items with the adjuster’s report.
- Look for discrepancies in square footage, material costs, or labor rates.
Step 4: Review the Settlement Offer
The insurer will send a settlement letter detailing what they will pay. This is often split into two payments:
- Actual Cash Value (ACV): The depreciated value of your roof.
- Recoverable Depreciation: Paid after repairs are completed and invoices are submitted (if you have Replacement Cost Value coverage).
If the offer seems low, do not accept it immediately. You have the right to negotiate.
Negotiating a Fair Settlement
It is common for the initial offer to be lower than the actual repair cost. Here is how to handle disputes professionally.
Submit a Supplemental Claim
If your contractor finds damage the adjuster missed, ask them to write a “supplemental report.” Submit this to your adjuster with photos. Most insurers have a process for reviewing supplements.
Hire a Public Adjuster
If the dispute is significant (e.g., thousands of dollars difference), consider hiring a public adjuster. They work for you, not the insurance company. They typically charge a percentage of the final settlement (usually 10–20%). For smaller claims, this fee might outweigh the benefit, so calculate carefully.
Know Your Rights
Each state has different regulations regarding insurance claims. Some states require insurers to respond within specific timeframes. If you feel you are being treated unfairly, you can contact your state’s Department of Insurance for assistance.
FAQ Section
1. Will filing a roof claim raise my insurance premiums?
Yes, it is highly likely. Filing a claim signals to the insurer that you are a higher risk. Depending on your state and carrier, premiums could increase by 10–20% for several years. In some cases, multiple claims within a short period can lead to policy cancellation.
2. How long do I have to file a claim for roof damage?
Most policies require you to report damage “promptly” or within a reasonable time. While there isn’t always a strict statutory deadline like 24 hours, waiting months can give the insurer grounds to deny the claim, arguing that the delay prevented proper investigation or caused further damage. Aim to report within a few days of discovery.
3. What if the adjuster says the damage is due to age?
This is a common denial reason. If you believe the damage was caused by a specific event (like a storm) rather than age, provide evidence. Weather reports from the date of the storm, neighbor’s claims, and a professional opinion from your roofing contractor stating the damage pattern is consistent with wind/hail can help overturn this decision.
4. Can I choose my own roofing contractor?
Yes, you have the right to choose any licensed contractor you prefer. Insurance companies may recommend vendors from their network, but you are not obligated to use them. However, using a preferred vendor might streamline the payment process.
5. What is the difference between ACV and RCV?
Actual Cash Value (ACV) pays for the replacement cost minus depreciation (age and wear). Replacement Cost Value (RCV) pays the full cost to replace the roof with new materials of similar kind and quality, without deducting for depreciation. RCV policies are more expensive but offer better protection.
Conclusion
Learning how to file a claim with insurance for roof damage is about preparation, documentation, and persistence. By acting quickly, documenting thoroughly, and understanding your policy’s nuances, you can navigate the system with confidence. Remember, the goal is to restore your home to its pre-loss condition, not just to patch a leak.
If you found this guide helpful, please share it on social media to help friends and neighbors protect their biggest investment. Stay safe, and keep your home secure!