Blog

  • Roof Material Pulley Platform Guide

    Roof Material Pulley Platform Guide

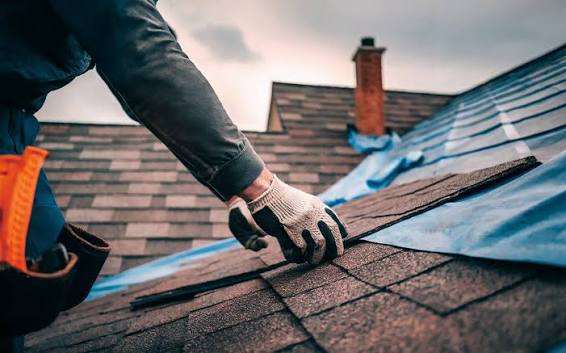
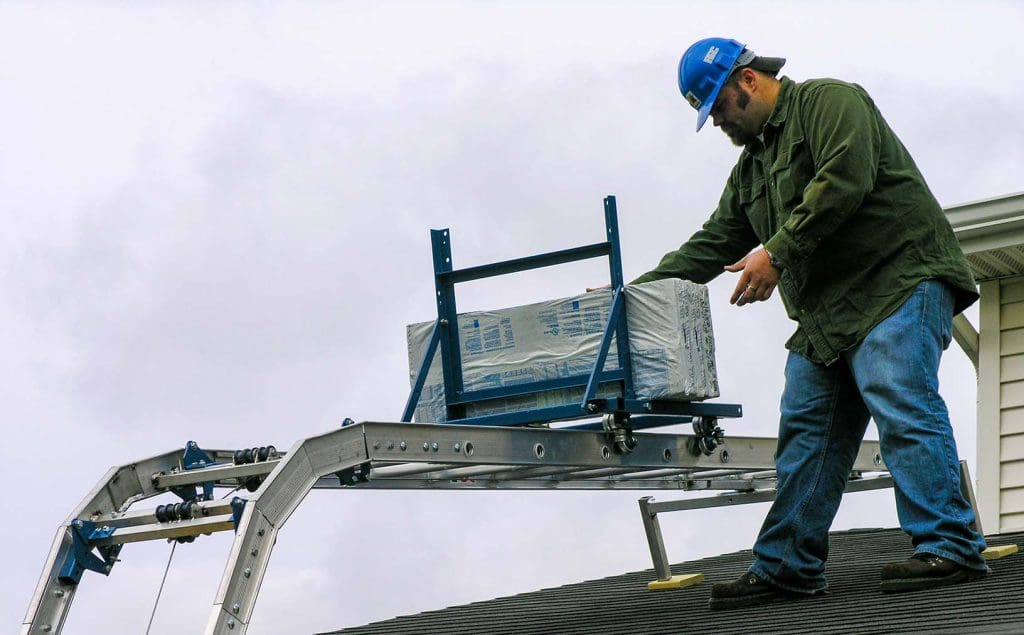
    Have you ever struggled with dragging heavy shingles or bundles of tiles across your roof, only to worry about damaging the underlying structure or slipping on loose granules? It is a common frustration for both professional roofers and ambitious DIY homeowners. Using a pulley platform to hold materials off of the roof is the smartest solution to keep your workspace clean, safe, and efficient.

    Why You Need a Pulley Platform for Roofing Projects

    Roofing is physically demanding work. Beyond the physical exertion of lifting, the logistics of getting materials from the ground to the working area can be a bottleneck. Many people assume that simply throwing bundles up or carrying them up the ladder one by one is the only way. However, this method is inefficient and risky.

    A pulley system designed specifically for roofing does more than just lift; it organizes. By using a platform, you create a staging area that keeps materials elevated above the roof surface. This distinction is critical. When materials sit directly on shingles, they can trap heat, cause indentations, or slide unexpectedly during wind gusts. A suspended or elevated platform mitigates these risks while keeping your primary work zone clear for movement.

    How Does a Roofing Pulley Platform Work?

    At its core, the system is simple mechanics applied to construction needs. It typically consists of a sturdy frame (the platform), high-tensile ropes or cables, and a set of pulleys anchored securely at the roof’s peak or eave.

    The Mechanics of Lift and Hold

    The platform acts as a counterbalance or a direct lift mechanism. Once the materials are loaded onto the platform at ground level, the user pulls the rope to hoist the load up. The “hold” feature is usually managed by a cleat, a friction brake, or a locking pulley system that allows the platform to remain suspended at a desired height without constant tension from the operator.

    This design ensures that the weight of the materials is transferred to the anchor points rather than the roof deck itself. For those interested in the physics behind simple machines, understanding mechanical advantage can help you choose the right gear ratio for heavier loads. You can read more about the basic principles of pulleys on Wikipedia.

    Key Components

    • The Platform: Usually made of aluminum or heavy-duty plastic to resist weather and impact.
    • The Pulleys: Must be rated for the total weight of the materials plus the platform.
    • The Anchor: A secure point at the roof ridge or a specialized stand that does not damage the roofing material.

    What Are the Benefits of Keeping Materials Off the Roof?

    You might wonder if the extra setup time is worth it. The data suggests it is. Here is why separating your materials from the roof surface is a game-changer.

    1. Protection of Roofing Integrity

    Asphalt shingles, clay tiles, and metal panels are durable but not invincible. Dragging heavy bundles across them can scrape off protective granules or crack tiles. By using a pulley platform to hold materials off of the roof, you eliminate friction damage entirely. This preserves the warranty of your roofing material and extends its lifespan.

    2. Enhanced Safety and Stability

    Loose materials on a sloped surface are a hazard. They can slide down, striking workers below or causing tripping hazards above. A secured platform keeps the center of gravity stable. Furthermore, it reduces the number of trips up and down the ladder, which is statistically one of the most dangerous aspects of roofing work.

    3. Improved Workflow Efficiency

    Time is money in construction. With a pulley system, you can pre-load multiple bundles. While one bundle is being installed, the next is already hoisted and waiting. This continuous workflow can reduce project time by up to 20%, according to industry estimates for small to mid-sized residential roofs.
    A Pulley Platform To Hold Materials Off Of The Roof

    Comparison: Traditional Methods vs. Pulley Platform

    To help you decide, let’s look at a direct comparison between traditional hauling and using a dedicated platform system.

    FeatureTraditional Ladder CarryThrow-and-Catch MethodPulley Platform System
    Physical StrainHigh (Repetitive lifting)Medium (Erratic movements)Low (Mechanical advantage)
    Risk of DamageModerate (Dropping items)High (Impact damage)Minimal (Controlled lift)
    SpeedSlowFast but chaoticConsistent and Fast
    Safety RatingLowVery LowHigh
    Setup TimeNoneNone15–30 Minutes

    As shown above, while the pulley platform requires initial setup, the long-term benefits in safety and speed outweigh the upfront investment of time.

    Step-by-Step Guide to Setting Up Your System

    Setting up a pulley platform to hold materials off of the roof requires precision. Follow these steps to ensure stability and safety.

    Step 1: Choose Your Anchor Point

    Identify a secure location at the ridge of your roof. If you have a chimney or a sturdy vent pipe, ensure it is not used as an anchor unless specifically rated for it. Ideally, use a ridge anchor strap that wraps over the peak and distributes weight evenly without piercing the roof membrane.

    Step 2: Install the Pulleys

    Attach the primary pulley to the anchor point. Ensure it is aligned with the path of the lift. If you are using a multi-pulley system for heavier loads, install the secondary pulleys according to the manufacturer’s diagram. Check that all carabiners and hooks are locked.

    Step 3: Prepare the Platform

    Inspect the platform for any cracks or wear. Attach the lifting ropes securely to the four corners of the platform to ensure it remains level during the ascent. Uneven lifting can cause materials to slide off.

    Step 4: Load and Lift

    Place your materials on the platform at ground level. Do not exceed the weight rating of the ropes or pulleys. For standard asphalt shingles, a platform can typically hold 3–4 bundles safely. Pull the rope steadily. Use a gloved hand to guide the platform as it approaches the roof edge to prevent swinging.

    Step 5: Secure the Load

    Once the platform reaches the desired height, engage the locking mechanism. If your system uses a cleat, wrap the rope in a figure-eight pattern to create friction. Test the hold by applying slight downward pressure before releasing the rope completely.

    Frequently Asked Questions (FAQ)

    1. Can I use a regular boat pulley for roofing?

    While boat pulleys are strong, they are not always designed for the abrasive nature of construction ropes or the specific angular stresses of roofing lifts. It is highly recommended to use pulleys specifically rated for construction or lifting applications to ensure safety and durability.

    2. How much weight can a typical roofing pulley platform hold?

    Most consumer-grade roofing platforms are rated between 150 to 300 pounds. Professional industrial systems can handle significantly more. Always check the manufacturer’s weight limit and never exceed it. Remember to account for the weight of the platform itself in your calculations.

    3. Is it safe to use a pulley system on a steep roof?

    Yes, it is often safer than climbing a steep roof with heavy loads. However, the anchor point must be exceptionally secure. On very steep pitches (over 8/12), consider using a ridge stabilizer to prevent the anchor from sliding down the slope.

    4. What type of rope should I use?

    Use a static kernmantle rope or a high-quality synthetic braided rope with low stretch. Avoid elastic bungee cords or old garden hoses. The rope should have a diameter compatible with your pulleys (usually 3/8 inch to 1/2 inch) and be rated for at least three times the maximum load you intend to lift.

    5. Can one person operate this system alone?

    Yes, one of the main advantages of a pulley platform to hold materials off of the roof is that it is designed for single-person operation. However, having a spotter on the ground to guide the platform during the initial lift can prevent swinging and improve accuracy.

    Conclusion

    Implementing a pulley platform to hold materials off of the roof is a small change that yields significant results. It protects your investment, safeguards your health, and streamlines your workflow. Whether you are a professional contractor looking to optimize your crew’s efficiency or a homeowner tackling a weekend project, this tool is indispensable.

    Don’t let heavy lifting slow you down or compromise the integrity of your new roof. Set up your system, lift with confidence, and enjoy a smoother roofing experience. If you found this guide helpful, please share it with your fellow builders or DIY enthusiasts on social media to help spread the word about safer roofing practices!
  • Red Roof Inn St Clairsville Wheeling: Best Budget Stay

    Red Roof Inn St Clairsville Wheeling: Best Budget Stay

    Traveling along Interstate 70 can be exhausting, especially when you are searching for a place that balances comfort, affordability, and convenience. Whether you are a business traveler heading to a meeting in Wheeling or a family on a road trip needing a quick overnight stop, finding the right hotel is crucial for a restful night. This guide explores everything you need to know about the Red Roof Inn St Clairsville Wheeling West St Clairsville Oh, ensuring you make an informed decision for your next stay.

    Located strategically between Ohio and West Virginia, this property serves as a vital hub for travelers navigating the tri-state area. In this comprehensive review, we will break down the amenities, location benefits, and practical tips to maximize your experience at this budget-friendly haven.

    Why Choose Red Roof Inn in St Clairsville?

    When planning a trip, accommodation costs can quickly eat into your travel budget. The Red Roof Inn brand has long been synonymous with value, but does the St Clairsville location live up to the hype? For many travelers, the answer is a resounding yes.

    The primary appeal of this specific location is its strategic positioning. It sits just off Exit 219 on I-70, making it incredibly easy to access without navigating complex city streets. This is particularly beneficial for truck drivers, late-night arrivals, or anyone who prefers a hassle-free check-in process after a long day of driving.

    Affordability Meets Comfort

    One of the standout features of this hotel is its pricing structure. Compared to full-service hotels in downtown Wheeling or larger chains in Columbus, the Red Roof Inn offers a significantly lower nightly rate. However, “budget” does not necessarily mean “compromised.”

    Recent guest reviews highlight that while the rooms are simple, they are clean and functional. The beds are often cited as comfortable, providing the essential rest needed for the next day’s journey. For travelers who prioritize sleep quality and basic hygiene over luxury spas and room service, this hotel hits the sweet spot.

    The Pet-Friendly Advantage

    If you are traveling with furry friends, finding affordable lodging can be a challenge. Many hotels charge exorbitant pet fees or restrict certain breeds. The Red Roof Inn St Clairsville is known for its pet-friendly policy, allowing one well-behaved pet per room at no extra charge. This is a massive benefit for families who consider their pets part of the crew.

    • No Pet Fees: Save money by avoiding additional charges.
    • Easy Access: Ground-floor rooms are often available, making bathroom breaks for dogs easier.
    • Welcoming Atmosphere: Staff are generally accustomed to handling guests with animals, reducing stress during check-in.

    Location and Accessibility: The Tri-State Hub

    Understanding the geography of this area is key to appreciating the hotel’s value. St. Clairsville, Ohio, is located directly across the river from Wheeling, West Virginia. This proximity allows guests to enjoy attractions in both states without paying premium prices for a central city hotel.

    Proximity to Major Attractions

    Staying here puts you within a short driving distance of several key landmarks:

    1. Wheeling Island Casino Resort: Just a 10-15 minute drive across the bridge.
    2. Ohio Valley Mall: Located nearby for shopping and dining needs.
    3. Historic Downtown Wheeling: Accessible via the Fort Henry Bridge, offering cultural sites and restaurants.
    4. Bellefonte Center: Ideal for business travelers attending conferences or meetings in the industrial sector.

    For those interested in the historical significance of the region, Wheeling is known as the “Birthplace of West Virginia.” You can explore the History of Wheeling, West Virginia to understand the rich cultural backdrop of your stay. This context adds depth to your visit, turning a simple overnight stop into a mini-cultural excursion.

    Ease of Navigation

    The hotel’s location off I-70 means you are never far from major routes. If you are heading east toward Pennsylvania or west toward Columbus, you can merge back onto the highway within minutes. This reduces fuel consumption and time spent in local traffic, which is a significant advantage for logistics managers and road warriors.

    Red Roof Inn St Clairsville Wheeling West St Clairsville Oh

    Amenities and Room Features: What to Expect

    To help you decide if this hotel meets your specific needs, let’s break down the typical amenities offered at the Red Roof Inn St Clairsville. Note that amenities can vary by season and management updates, so it is always wise to confirm specific details during booking.

    Core Amenities Table

    AmenityAvailabilityNotes
    Free Wi-FiYesStandard speed; suitable for browsing and email.
    ParkingYesFree surface parking; ample space for trucks/RVs.
    BreakfastNoNot included; nearby diners and fast food available.
    PoolNoFocus is on budget lodging, not recreation.
    Pet PolicyYesOne pet free; must be leashed in public areas.
    AccessibilityYesADA-compliant rooms available upon request.

    Room Configurations

    The hotel typically offers two main types of rooms:

    1. Standard Queen/Double Beds: Ideal for solo travelers or couples. These rooms are compact but efficiently designed to maximize space.
    2. Family Suites: Some locations offer suites with a microwave and mini-fridge. This is perfect for families who want to store snacks or leftovers, further reducing dining costs.

    Pro Tip: If you require a microwave or fridge, explicitly request this when booking. Not all standard rooms include these appliances, and availability is first-come, first-served.

    Cleanliness and Maintenance

    In the budget hotel sector, cleanliness is the most critical factor. Recent trends in the hospitality industry show a heightened focus on sanitation post-pandemic. The Red Roof Inn St Clairsville has implemented enhanced cleaning protocols, focusing on high-touch surfaces like door handles, remote controls, and bathroom fixtures.

    Guests often report that while the furnishings may show signs of wear due to high turnover, the overall hygiene standards are maintained rigorously. This commitment to cleanliness builds trust and ensures a safe environment for all guests.

    Step-by-Step Guide to Booking Your Stay

    To ensure you get the best rate and the right room, follow these simple steps when booking your stay at Red Roof Inn St Clairsville.

    1. Check Dates and Availability: Visit the official website or a trusted third-party booking engine. Enter your dates for “St Clairsville, OH.”
    2. Select Room Type: Choose between standard rooms or suites based on your needs. If traveling with a pet, ensure the “Pet-Friendly” filter is active.
    3. Review Cancellation Policy: Most Red Roof Inn locations offer flexible cancellation up to 24 hours before check-in. Verify this to avoid penalties if your plans change.
    4. Add Special Requests: Use the “Special Requests” box to ask for ground-floor rooms (for pet ease) or quiet rooms away from the ice machine.
    5. Confirm and Pay: Complete the booking. You will receive a confirmation email with your reservation number. Keep this handy for check-in.

    Note: If you are a member of the Red Roof Rewards program, log in before booking to earn points toward future free stays.

    Comparing Red Roof Inn to Local Competitors

    How does this hotel stack up against other options in the Wheeling/St. Clairsville area? Let’s look at a quick comparison.

    • Vs. Downtown Wheeling Hotels: Downtown hotels offer more dining and nightlife options but come with higher prices and limited parking. Red Roof Inn offers free parking and lower rates but requires a short drive to entertainment.
    • Vs. Other Budget Chains (e.g., Motel 6): While similar in price, Red Roof Inn often has newer renovations in specific locations and a stronger loyalty program. The pet policy is also generally more straightforward without hidden fees.
    • Vs. Mid-Range Chains (e.g., Holiday Inn Express): Mid-range hotels include breakfast and pools. If these amenities are essential to you, you might prefer a mid-range option. However, if you plan to eat out and don’t need a pool, the savings at Red Roof Inn are substantial.

    FAQ Section

    Here are answers to the most common questions travelers ask about this location.

    1. Is the Red Roof Inn St Clairsville truly pet-friendly?

    Yes, the hotel welcomes one well-behaved pet per room at no additional charge. Pets must be kept on a leash or in a carrier when in public areas, and owners are responsible for any damage caused by their animals.

    2. Does the hotel provide complimentary breakfast?

    No, the Red Roof Inn St Clairsville does not offer a complimentary breakfast. However, there are numerous dining options within a 5-minute drive, including fast-food chains and local diners, allowing you to choose what and where you eat.

    3. Is Wi-Fi free for all guests?

    Yes, high-speed Wi-Fi is provided free of charge to all registered guests. While it is suitable for streaming videos and working online, heavy bandwidth users may experience slower speeds during peak hours.

    4. How far is the hotel from downtown Wheeling?

    The hotel is approximately 3 to 5 miles from downtown Wheeling, depending on the specific destination. The drive typically takes 10–15 minutes via the Fort Henry Bridge or the Veterans Memorial Bridge.

    5. Are there accessible rooms available?

    Yes, the hotel offers ADA-compliant rooms featuring wider doorways, roll-in showers, and lowered fixtures. It is recommended to request these rooms specifically during the booking process to ensure availability.

    6. What is the check-in and check-out time?

    Standard check-in time is usually 3:00 PM, and check-out is at 11:00 AM. Early check-in or late check-out may be available upon request, subject to room availability and possibly an additional fee.

    Conclusion

    Choosing the right accommodation can make or break your travel experience. The Red Roof Inn St Clairsville Wheeling West St Clairsville Oh stands out as a pragmatic, budget-conscious choice for travelers who value convenience, affordability, and pet-friendly policies. While it may not offer the luxuries of a five-star resort, it delivers on the essentials: a clean bed, a safe environment, and easy access to major highways and local attractions.

    Whether you are passing through on a cross-country road trip or visiting the Ohio Valley for business, this hotel provides a reliable base for your journey. By understanding what to expect and planning ahead, you can enjoy a stress-free stay that leaves more money in your pocket for the experiences that matter most.

    If you found this guide helpful, please share it with your fellow travelers on social media. Happy travels!

  • Best Paint Colors for a House With a Green Roof

    Best Paint Colors for a House With a Green Roof

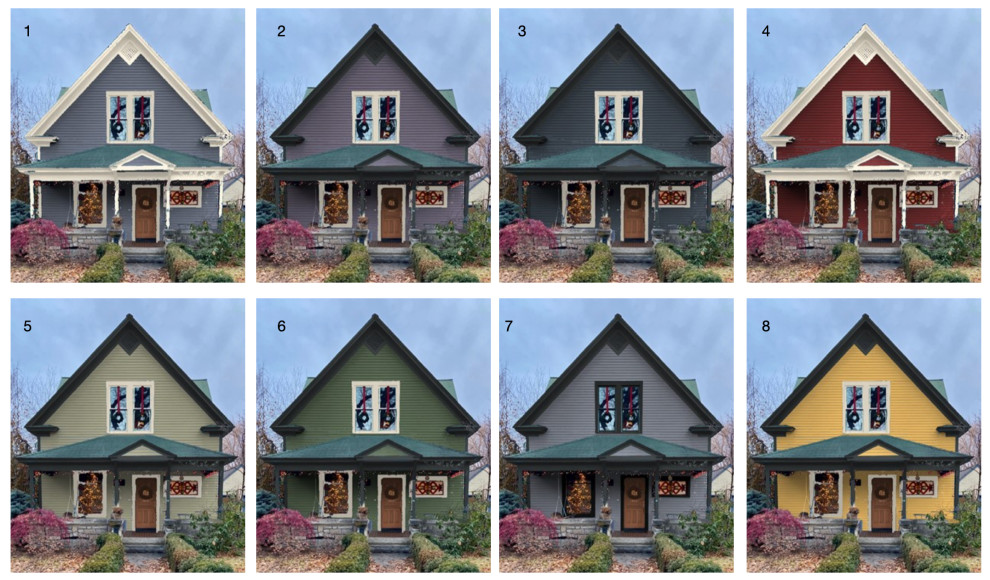
    Choosing the right exterior paint when you have a distinctive roofing material can feel overwhelming. A green roof is a bold architectural statement, and pairing it with the wrong siding color can clash rather than complement. If you are asking what color to paint a house with a green roof, you are looking for harmony, balance, and timeless curb appeal.

    In this guide, we will break down the science of color theory, explore trending palettes, and provide actionable advice to help your home look its absolute best. Whether your roof is a deep forest green, a muted sage, or a vibrant emerald, there is a perfect paint match waiting for you.

    Why Is Choosing the Right Paint Color Crucial for Green Roofs?

    A green roof is not just a covering; it is a dominant visual element. Unlike standard black, gray, or brown shingles, green introduces a strong hue that interacts dynamically with sunlight and surrounding landscaping.

    According to color psychology, green represents nature, tranquility, and renewal. However, in exterior design, it can easily overpower other elements if not balanced correctly. The goal is to create a cohesive look where the roof and siding work together, not against each other.

    • Resale Value: Homes with coordinated exterior colors often sell faster. A clashing color scheme can deter potential buyers who perceive the home as needing immediate updates.
    • Architectural Integrity: The right color highlights your home’s architectural details, such as trim, columns, and porches.
    • Environmental Harmony: A well-chosen palette helps your home blend seamlessly with its natural surroundings, especially if you live in a wooded or rural area.

    What Are the Best Neutral Colors for a Green Roof?

    When in doubt, neutrals are your safest and most sophisticated bet. They allow the green roof to shine without creating visual chaos. Here are the top neutral contenders:

    1. Crisp White and Off-White

    White is the classic partner for green. It creates a fresh, clean, and airy aesthetic that works particularly well with cottage, farmhouse, and colonial styles.

    • Pure White: Offers high contrast and a modern look. Best for dark green roofs.
    • Cream or Ivory: Softens the contrast and adds warmth. Ideal for lighter sage or olive green roofs.

    Pro Tip: Avoid stark, blue-toned whites if your green roof has yellow undertones, as this can create a jarring visual vibration. Stick to warm whites.

    2. Warm Beige and Taupe

    Beige tones bridge the gap between the natural world and your home’s structure. They echo the earthiness of the green roof while providing a subtle backdrop.

    • Greige (Gray-Beige): A modern favorite that works with both cool and warm green tones.
    • Sandstone: Adds texture and warmth, perfect for homes in arid or coastal regions.

    3. Light to Medium Gray

    Gray is versatile, but you must choose the right undertone. Since green is a cool color on the spectrum, cool grays often pair beautifully.

    • Light Gray: Creates a soft, contemporary look.
    • Charcoal: For a dramatic, high-contrast effect, pair a light green roof with dark charcoal siding. This is a bold choice that exudes modern elegance.

    Can You Use Earth Tones With a Green Roof?

    Absolutely. Earth tones are nature’s own palette, making them a logical and harmonious choice for homes with green roofs. This approach is often referred to as “biophilic design,” which seeks to connect building occupants more closely to nature.

    Brown and Tan Variations

    Brown siding can create a rustic, cabin-like feel. However, caution is required:

    • Avoid Matching Undertones: If your roof is an olive green (yellow undertone), avoid a reddish-brown siding, as they may clash. Instead, opt for a chocolate brown or a muted taupe.
    • Contrast is Key: Ensure there is enough difference in value (lightness/darkness) between the roof and the siding. A medium brown roof needs either a very light tan siding or a very dark chocolate siding to stand out.

    Stone and Brick Accents

    If you are not painting the entire house, consider using stone or brick veneer. Natural stone often contains flecks of green, gray, and beige, which naturally tie into a green roof.

    What Color To Paint A House With A Green Roof

    How Do Bold Colors Compare to Neutrals?

    While neutrals are safe, bold colors can make a stunning statement if executed correctly. This is where understanding color theory becomes essential.

    Color FamilyBest Green Roof ShadeEffectRisk Level
    Navy BlueForest GreenRich, traditional, nauticalLow
    Soft YellowSage GreenCheerful, cottage-core, brightMedium
    Slate BlueOlive GreenCool, calming, sophisticatedLow
    Red/BurgundyDark GreenTraditional, holiday-esqueHigh

    The Case for Navy and Slate Blue

    Blue and green are analogous colors on the color wheel, meaning they sit next to each other. This creates a harmonious, soothing effect. A deep navy blue house with a dark green roof is a popular choice in coastal and New England-style architecture.

    The Risk of Red and Orange

    Red and green are complementary colors (opposite on the color wheel). While this creates high contrast, it can easily look like a Christmas decoration if not carefully managed. If you love red, opt for a muted brick red or burgundy rather than a bright fire-engine red.

    What Role Does Trim and Accent Color Play?

    The trim is the frame of your home’s picture. It defines the edges and adds depth. When dealing with a green roof, your trim choice can make or break the overall look.

    1. White Trim: The universal solver. It crisps up the edge between the siding and the roof, regardless of the siding color. It is especially effective with beige, gray, or blue siding.
    2. Matching Trim: Painting the trim the same color as the siding (monochromatic look) is a modern trend. It makes the house appear larger and sleeker. However, ensure your roof color provides enough contrast so the house doesn’t look flat.
    3. Contrasting Trim: If your siding is dark, use a lighter trim. If your siding is light, you can experiment with a darker trim, but avoid using green trim unless it is an exact match to the roof, which is difficult to achieve.

    Step-by-Step Guide to Testing Your Color Choice

    Do not rely solely on digital renderings or paint chips. Real-world lighting changes everything. Follow these steps to ensure you make the right choice:

    1. Identify Your Roof’s Undertone: Look at your green roof in direct sunlight. Is it blue-based (cool) or yellow-based (warm)? This determines whether you should choose cool or warm siding colors.
    2. Buy Sample Pots: Purchase small sample sizes of your top 3 color choices.
    3. Paint Large Swatches: Paint at least a 2×2 foot section on different sides of your house (north, south, east, west).
    4. Observe at Different Times: Check the colors in the morning, noon, and evening. Note how the green roof looks against the siding in shadow versus direct sun.
    5. Check Against Landscaping: Ensure the new color doesn’t clash with your permanent landscaping features, such as large trees or stone pathways.

    For more information on color theory principles, you can refer to the comprehensive overview on Color Theory at Wikipedia.org.

    Frequently Asked Questions (FAQ)

    1. What is the best white paint for a house with a dark green roof?

    For a dark green roof, Sherwin-Williams Extra White or Benjamin Moore Chantilly Lace are excellent choices. These bright whites provide a crisp contrast that prevents the dark roof from making the house look too heavy or gloomy.

    2. Can I paint my house green if I have a green roof?

    Yes, but it is tricky. You must use a significantly different shade. For example, pair a dark forest green roof with a very pale sage or mint green siding. Using the same shade will make your home look monotonous and lack dimension.

    3. Does the style of my house affect the color choice?

    Absolutely. Victorian homes can handle bolder, multi-color palettes, while Ranch-style homes often look best with simple, two-tone schemes (siding and trim). Colonial homes traditionally pair well with white, gray, or beige siding.

    4. How do I maintain the appearance of my green roof and painted siding?

    Regular cleaning is key. Green roofs can show pollen and dirt more easily than darker roofs. Wash your siding annually with a mild detergent to keep the colors vibrant. Consider using UV-resistant paint to prevent fading, which can alter the color balance over time.

    5. What if my green roof is metal instead of shingles?

    Metal roofs often have a more reflective, industrial finish. They pair exceptionally well with modern, minimalist colors like charcoal, slate gray, and stark white. Avoid overly rustic textures like faux wood grain, as they may clash with the sleekness of metal.

    Conclusion

    Deciding what color to paint a house with a green roof is about balancing boldness with harmony. While the roof is a significant feature, it doesn’t have to dictate your entire design. By choosing neutrals like white, beige, or gray, you create a timeless backdrop. If you’re feeling adventurous, earthy tones or deep blues can offer a unique, sophisticated charm.

    Remember to test your colors in natural light and consider the architectural style of your home. The right combination will not only enhance your curb appeal but also bring you joy every time you pull into your driveway.

    Did you find this guide helpful? Share this article with friends who are planning their next exterior renovation, or pin it to your Pinterest board for future reference! Let’s make every home beautiful, one color at a time.

  • How Far Can You Span A 2X6 For A Roof?

    How Far Can You Span A 2X6 For A Roof?

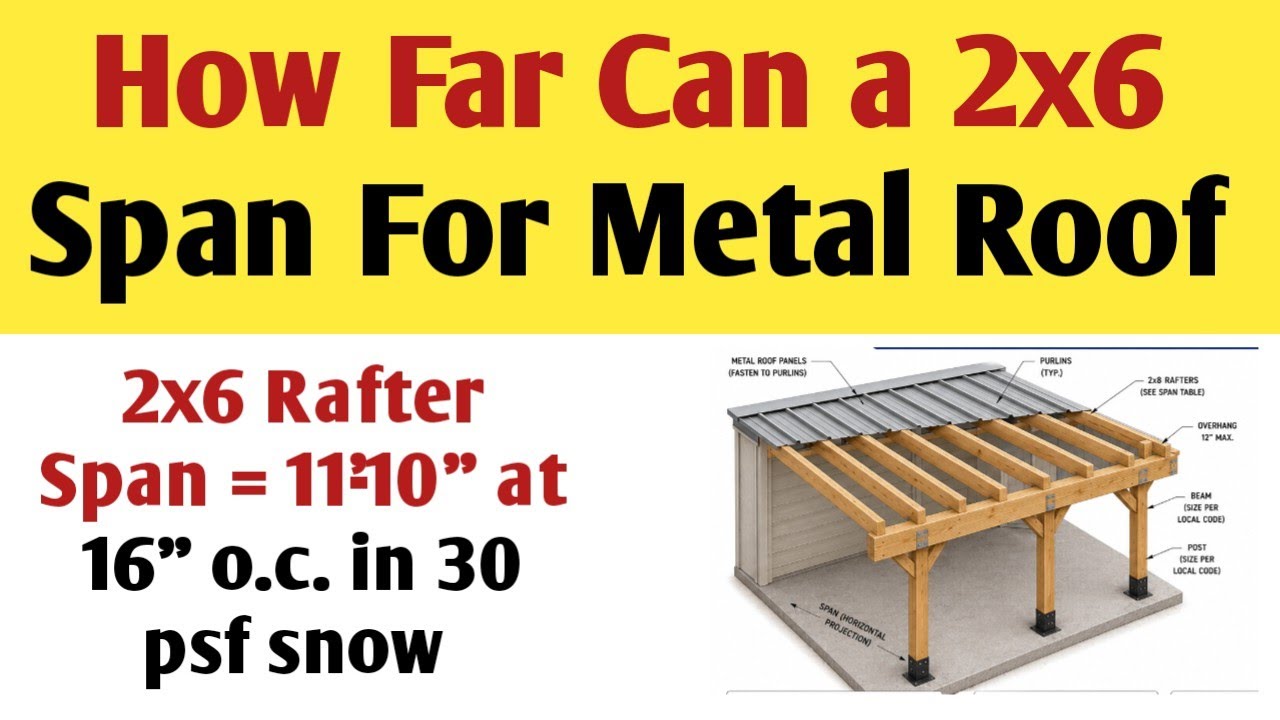
    Have you ever stared at a pile of lumber, wondering if that stack of 2x6s is strong enough to hold up your new shed or porch roof? It is a common dilemma for DIY enthusiasts and homeowners alike. Getting the span wrong isn’t just an aesthetic issue; it is a critical safety concern. Understanding exactly how far can you span a 2×6 for a roof is the first step toward building a structure that is both durable and compliant with local building codes.

    In this guide, we will break down the engineering basics, variable factors, and standard limits to help you make informed decisions for your next project.

    Understanding the Basics of Lumber Spans

    Before we dive into specific numbers, it is crucial to understand what “span” actually means in construction terms. The span refers to the horizontal distance between two supports, such as walls or beams. When we ask how far can you span a 2×6 for a roof, we are essentially asking how much weight that piece of wood can support over a specific distance without sagging excessively or failing structurally.

    A 2×6 nominal dimension is actually 1.5 inches by 5.5 inches after planing. While this seems small, engineered correctly, it is surprisingly robust for light-duty roofing applications. However, wood is not a uniform material. Its strength varies based on species, grade, and moisture content. Therefore, there is no single “magic number” that applies to every situation. Instead, we look at ranges based on standardized testing and building codes.

    Key Factors That Determine Your Maximum Span

    You cannot determine the span length in a vacuum. Several dynamic variables interact to dictate the safe limit of your rafters. Ignoring these can lead to catastrophic failure.

    1. Wood Species and Grade

    Not all 2x6s are created equal. Southern Pine, for example, is generally stronger than Spruce-Pine-Fir (SPF). Furthermore, the “grade” of the lumber matters.

    • #1 Grade: Has fewer knots and defects, offering higher structural integrity.
    • #2 Grade: The most common standard for residential framing, allowing for more natural defects.
    • Select Structural: The highest quality, used for heavy loads.

    For most DIY projects, you will likely be using #2 SPF or Hem-Fir. Always check the stamp on the wood for its specific grade and species.

    2. Rafter Spacing (On-Center)

    The distance between your rafters significantly impacts how far each individual 2×6 can reach. The closer the rafters are, the less load each one carries. Common spacing includes:

    • 12 inches on-center (OC): Strongest option, allows for the longest span.
    • 16 inches OC: The industry standard for most residential roofing.
    • 24 inches OC: Weaker configuration, drastically reduces the maximum span.

    3. Load Requirements

    Your roof must support two types of loads:

    • Dead Load: The weight of the roof itself (shingles, plywood, insulation).
    • Live Load: External forces like snow, wind, and maintenance workers.

    If you live in a region with heavy snowfall, your 2x6s will need to span a shorter distance compared to someone in a dry, mild climate.

    Standard Span Limits for 2×6 Roof Rafters

    While you should always consult a structural engineer for unique projects, we can look at general guidelines provided by the American Wood Council and typical building codes. These figures assume a standard live load of 20-30 pounds per square foot (psf) and a dead load of 10 psf.

    Rafter SpacingMax Span (No. 2 SPF)Max Span (Southern Pine No. 2)Best Use Case
    12″ OC~10 feet 9 inches~12 feet 6 inchesHeavy snow areas / High durability
    16″ OC~9 feet 11 inches~11 feet 6 inchesStandard residential sheds/patios
    24″ OC~8 feet 7 inches~10 feet 0 inchesLight duty / Covered porches

    Note: These are approximate values. Always verify with local codes.

    As you can see, switching from 16″ OC to 12″ OC can gain you nearly a foot of span capacity. Conversely, moving to 24″ OC sacrifices significant strength. If you are trying to maximize how far can you span a 2×6 for a roof, reducing the spacing is often more effective than upgrading the wood grade.

    How Far Can You Span A 2X6 For A Roof

    Calculating Deflection and Safety Margins

    Strength is not the only factor; stiffness matters too. Building codes typically limit deflection (sagging) to L/240 for live loads and L/180 for total loads. This means if your span is 10 feet (120 inches), the roof should not sag more than 0.5 inches under live load.

    Even if a 2×6 doesn’t break, excessive sagging can crack drywall, cause water pooling, and ruin the aesthetic of your project. This is why many professionals recommend staying under the maximum calculated span. A good rule of thumb is to aim for 80-90% of the maximum allowable span to ensure a rigid, long-lasting roof.

    For deeper technical definitions on structural load paths and engineering standards, you can refer to resources like Wikipedia’s article on Structural Load to understand the physics behind these requirements.

    Step-by-Step Guide to Determining Your Span

    If you are ready to start framing, follow these steps to ensure accuracy:

    1. Check Local Building Codes: Visit your municipal building department website. Snow load maps vary wildly between states. A 2×6 that works in Florida may fail in Colorado.
    2. Identify Your Lumber: Look at the stamp on your 2x6s. Note the species (e.g., SPF, Douglas Fir) and the grade (No. 2, No. 1).
    3. Determine Spacing: Decide if you will space rafters at 12″, 16″, or 24″ OC. Remember, 16″ is the default for compatibility with standard plywood sheets.
    4. Consult a Span Chart: Use a reputable span table specific to your lumber species. Do not guess.
    5. Add a Safety Buffer: If the chart says the max span is 10 feet, try to design your structure so the span is 9 feet. This accounts for any imperfections in the wood or unexpected heavy snow.

    Pros and Cons of Using 2×6 Rafters

    To help you decide if a 2×6 is the right choice, consider this comparison:

    Advantages:

    • Cost-Effective: 2x6s are cheaper than 2x8s or 2x10s.
    • Lightweight: Easier for one person to lift and install.
    • Sufficient for Small Structures: Ideal for sheds, gazebos, and carports.

    Disadvantages:

    • Limited Span: Not suitable for large open rooms without intermediate support.
    • Insulation Limits: A 2×6 cavity offers less room for thick insulation compared to larger dimensions, potentially affecting energy efficiency in conditioned spaces.

    FAQ Section

    1. Can I use a 2×6 for a flat roof?

    Flat roofs require careful consideration because they do not shed water as efficiently as pitched roofs. Water pooling adds significant weight. While a 2×6 can be used for small flat sections, it is generally recommended to use larger lumber (like 2×8 or 2×10) or reduce the span significantly to prevent sagging and water accumulation.

    2. Does the type of roofing material affect the span?

    Yes. Heavy materials like clay tiles or slate increase the “dead load,” requiring shorter spans or stronger lumber. Lightweight asphalt shingles or metal roofing place less stress on the rafters, allowing you to utilize the maximum span limits more safely.

    3. What is the maximum span for a 2×6 ceiling joist vs. a roof rafter?

    Ceiling joists often have different load requirements than roof rafters. Ceiling joists primarily support the ceiling material and attic storage (live load), while rafters support the roof covering and weather loads. Generally, ceiling joists can span slightly further than rafters if they are not tied into the roof load path, but this depends heavily on whether the attic is used for storage.

    4. Can I sister a 2×6 to increase the span?

    “Sistering” involves attaching another piece of lumber alongside the existing one. Yes, you can sister a 2×6 with another 2×6 to effectively create a 2×12 equivalent in strength, which significantly increases the span capability. Ensure they are glued and nailed/screwed together properly according to code.

    5. Is pressure-treated 2×6 weaker than untreated?

    Pressure-treated lumber can sometimes have a slightly lower bending strength rating due to the chemical treatment process and higher moisture content when installed. However, for outdoor structures where rot resistance is needed, it is essential. Always check the specific grade stamp on treated lumber, as manufacturers adjust ratings accordingly.

    Conclusion

    Determining how far can you span a 2×6 for a roof is not about finding a single universal number, but rather understanding the interplay between wood species, spacing, and environmental loads. For most standard DIY projects using #2 SPF lumber spaced 16 inches on center, you can safely expect a span of roughly 10 feet. However, always prioritize local building codes and add a safety margin to your calculations.

    By respecting the limitations of your materials and planning carefully, you can build a roof that is not only cost-effective but also safe and durable for years to come. If you found this guide helpful, please share it with your fellow DIY community on social media to help others build smarter and safer!

  • Cow Carcasses on Utah Roof: The Bizarre Truth

    Cow Carcasses on Utah Roof: The Bizarre Truth

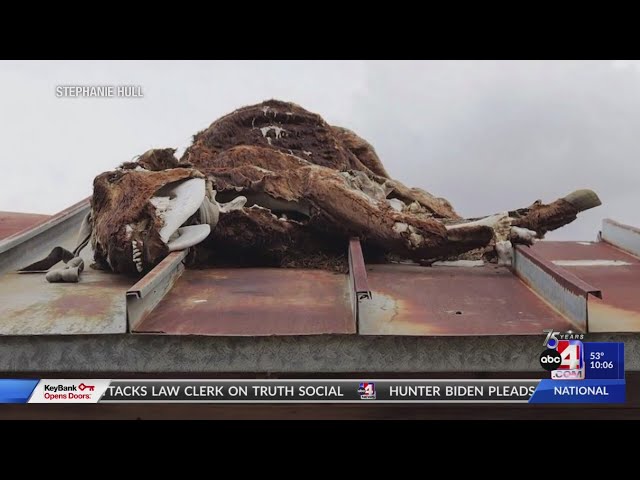
    Have you ever scrolled through social media and stopped dead in your tracks at an image that seemed too bizarre to be real? You are not alone. The internet has been buzzing with disbelief and curiosity regarding the viral reports of Carcasses Of Cows Found On Roofs Of Abandoned Utah Building, leaving many to wonder how such a logistical impossibility could occur.

    In this article, we will separate fact from fiction, explore the environmental factors that contribute to such strange occurrences, and provide you with a clear understanding of what likely happened. Whether you are a local resident concerned about safety or a curious observer of strange American oddities, this guide will provide the clarity you seek.

    What Is the Story Behind the Cow Carcasses?

    The phrase “Carcasses Of Cows Found On Roofs Of Abandoned Utah Building” sounds like the setup for a surreal horror movie or an elaborate prank. However, incidents involving livestock in unusual places are more common in rural and semi-rural areas than one might expect, though rarely on rooftops.

    To understand this specific viral topic, we must look at the context of abandoned structures in Utah. Utah’s landscape is a mix of rugged mountains, high deserts, and sprawling agricultural lands. As urbanization expands, old farmhouses, barns, and industrial buildings are often left to decay. These structures become hazards, not just for humans, but for wildlife and stray livestock.

    While there may not be one single, verified news report from a major outlet confirming a mass event of cows on a roof in 2026, the concept taps into real phenomena:

    1. Structural Collapse: Weak roofs can sometimes trap animals that climb up.
    2. Flood Events: In rare flash flood scenarios, debris and animals can be lifted to high points.
    3. Viral Misinformation: Often, images are misidentified or taken out of context.

    It is crucial to approach such headlines with a critical eye. The “cow on the roof” trope is a classic example of how local oddities can morph into internet legends.

    How Could Cows Possibly End Up on a Roof?

    If you are skeptical—and you should be—you are asking the right question. Cows are heavy animals, typically weighing between 1,000 and 1,800 pounds. They are not known for their climbing abilities. So, how does the narrative of Carcasses Of Cows Found On Roofs Of Abandoned Utah Building gain traction?

    Here are the most plausible scientific and logistical explanations:

    1. Structural Failure and Entrapment

    Abandoned buildings in Utah often suffer from neglected maintenance. If a building had a flat or low-slope roof with easy access (such as a collapsed wall or a ramp formed by debris), a cow could theoretically wander onto it. Once there, if the structure was unstable, the animal might become trapped or perish due to exposure, leading to the grim discovery.

    2. Extreme Weather Events

    Utah is prone to sudden weather changes. While rare, severe thunderstorms or flash floods can create powerful updrafts or water currents. However, lifting a full-grown cow onto a roof via wind is physically improbable. Floodwaters, on the other hand, can carry carcasses to elevated areas if the building is partially submerged and the roof is one of the few remaining dry surfaces.

    3. Human Intervention or Pranks

    Unfortunately, not all strange discoveries are natural. In some cases, abandoned buildings become sites for illegal dumping or cruel pranks. While disturbing, this is a reality law enforcement occasionally faces in remote areas.

    4. Misidentification

    Often, viral photos are mislabeled. What looks like a cow on a roof might be:

    • A large tarp or debris resembling an animal shape.
    • An animal from a different species (like a large dog or deer) viewed from a distance.
    • A staged photo using props.

    Are There Health Risks Associated with Animal Carcasses?

    Discovering animal remains, especially in populated or accessible areas, poses significant health risks. If you encounter something similar to the reported Carcasses Of Cows Found On Roofs Of Abandoned Utah Building, it is vital to understand the dangers.

    Decomposing organic matter releases bacteria and gases that can be harmful to humans. Here is a breakdown of the primary risks:

    Risk FactorDescriptionSeverity
    Bacterial ContaminationSalmonella, E. coli, and Clostridium botulinum can thrive in decaying tissue.High
    Airborne PathogensAs tissues decompose, spores and bacteria can become airborne, posing respiratory risks.Medium
    Attracting PestsCarcasses attract flies, rodents, and scavengers, which can spread disease further.High
    Groundwater ContaminationIf fluids leak from the roof into the soil or water systems, local water sources may be compromised.Medium

    According to the Centers for Disease Control and Prevention (CDC), proper disposal of animal carcasses is regulated to prevent public health outbreaks. Never attempt to move or touch a carcass yourself.

    Carcasses Of Cows Found On Roofs Of Abandoned Utah Building

    What Should You Do If You Find Animal Remains?

    If you come across an abandoned building in Utah and suspect there are animal remains on the roof or inside, follow these steps strictly. Your safety and the safety of your community depend on proper protocol.

    1. Do Not Approach: Keep a safe distance. Do not enter the abandoned structure. Unstable floors and roofs are a physical hazard, and biological hazards are present.
    2. Document from Afar: If it is safe to do so, take a photo from a distance. This helps authorities assess the situation without exposing you to risk. Note the exact location (GPS coordinates if possible).
    3. Contact Local Authorities: Call your local county sheriff’s office or animal control. In Utah, you can also contact the Utah Department of Agriculture and Food if it involves livestock.
    4. Warn Others: If the area is accessible to hikers or children, alert local community groups or place a visible warning sign from a safe distance if permitted.
    5. Avoid Social Media Speculation: While it is tempting to post online, wait for official confirmation. Spreading unverified images of Carcasses Of Cows Found On Roofs Of Abandoned Utah Building can cause unnecessary panic and hinder investigations.

    Why Do Abandoned Buildings Attract Such Oddities?

    Abandoned buildings serve as unintentional ecosystems. They offer shelter from Utah’s harsh sun and cold winters, making them attractive to various animals. However, they also lack the maintenance required to keep them safe.

    • Lack of Fencing: Old farms often have broken fences, allowing livestock to wander freely.
    • Curiosity: Animals are curious. A cow might investigate a strange structure and find itself trapped.
    • Neglect: Without regular human presence, issues like trapped animals go unnoticed until decomposition begins.

    This phenomenon highlights the importance of urban planning and the responsible decommissioning of agricultural properties. When buildings are abandoned, they should be secured to prevent entry by both humans and animals.

    FAQ Section

    1. Is it true that cows were found on a roof in Utah?

    While viral stories circulate frequently, specific verified reports of multiple cow carcasses on a single roof are rare. Most instances are either isolated incidents of single animals getting trapped, misidentified debris, or internet hoaxes. Always check local news sources for verification.

    2. Can cows climb roofs?

    Cows are not climbers. They lack the anatomical structure to scale steep surfaces. However, they can walk onto flat or low-slope roofs if there is easy access, such as a pile of debris, a collapsed wall, or a gentle incline. Once on top, they may struggle to get down.

    3. What causes animals to die on roofs?

    Common causes include entrapment (unable to get down), exposure to extreme weather (heatstroke or hypothermia), lack of food and water, or pre-existing injuries that worsened while trapped. In rare cases, structural collapse can injure or kill animals on the roof.

    4. Who is responsible for removing animal carcasses from private property?

    Generally, the property owner is responsible for the removal of animal carcasses on their land. However, if the building is abandoned and the owner is unknown, local county authorities or animal control services may intervene to protect public health.

    5. How long does it take for a cow carcass to decompose?

    Decomposition rates vary based on temperature, humidity, and exposure. In Utah’s dry climate, mummification can occur, slowing down the process. However, in warmer months, significant decomposition can happen within weeks. On a roof, exposure to sun and wind may accelerate drying but slow bacterial decay compared to ground burial.

    6. Are there laws against abandoning livestock in Utah?

    Yes. Utah has strict laws regarding animal neglect and abandonment. Livestock owners are required to provide adequate care, including food, water, and shelter. Abandoning animals is considered a criminal offense and can result in fines and imprisonment.

    Conclusion

    The story of Carcasses Of Cows Found On Roofs Of Abandoned Utah Building serves as a fascinating intersection of urban legend, animal behavior, and public health awareness. While the image is striking and unsettling, it reminds us of the responsibilities we hold toward our environment and the animals within it.

    Whether you are a local resident, a hiker, or just someone intrigued by the strange corners of the internet, understanding the reality behind these headlines is crucial. It helps us respond appropriately, stay safe, and avoid spreading misinformation.

    If you found this article informative, please share it with your friends and family on social media. Helping others distinguish fact from fiction is one of the best ways to keep our online communities informed and safe. Have you ever encountered a strange animal sighting? Let us know in the comments below!

  • Best Quiet & Powerful Roof Exhaust Fan Guide

    Best Quiet & Powerful Roof Exhaust Fan Guide

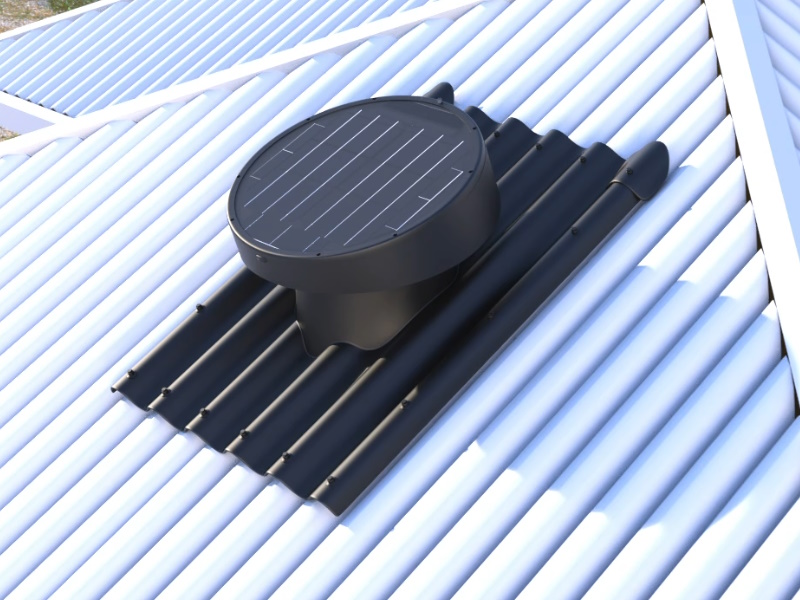
    Is your attic turning into a sauna during the summer, or are you struggling with stubborn moisture buildup in the winter? Poor ventilation doesn’t just make your home uncomfortable; it can lead to costly structural damage and skyrocketing energy bills. Finding a good roof fan to extract most air quietly while maintaining powerful performance is the ultimate solution for homeowners who value both efficiency and peace. In this guide, we will break down exactly what to look for, how to choose the right model, and why silence doesn’t mean sacrificing power.

    Why Your Home Needs a High-Performance Roof Fan

    Before diving into specific models, it is crucial to understand why extraction matters. Many US homeowners underestimate the role of attic ventilation. According to the U.S. Department of Energy, proper ventilation can significantly reduce cooling loads by removing superheated air that radiates down into living spaces.

    A high-quality roof exhaust fan serves three primary purposes:

    1. Heat Reduction: It pulls out hot air that accumulates under the roof deck.
    2. Moisture Control: It prevents condensation that leads to mold and rot.
    3. Air Quality: It removes stale air, pollutants, and odors from the home ecosystem.

    However, the common complaint with traditional fans is noise. A fan that sounds like a jet engine is rarely used consistently. This is where the balance of “quiet” and “powerful” becomes critical.

    What Makes a Roof Fan “Good” for Maximum Air Extraction?

    When searching for a good roof fan to extract most air quietly, you need to look beyond the price tag. The engineering behind the motor and the blade design dictates performance.

    Key Metrics to Watch

    • CFM (Cubic Feet per Minute): This measures volume. For an average 2,000 sq. ft. home, you generally need a fan capable of moving at least 1,000–1,500 CFM depending on the climate zone.
    • Sones (Noise Level): This is the standard unit for measuring sound. A quiet fan should operate below 1.5 sones. For context, a whisper is about 0.5 sones, while a normal conversation is around 4 sones.
    • Static Pressure: This determines how well the fan can push air through resistance (like ducts or screens). High static pressure capability ensures consistent airflow even in complex roofing structures.

    Pro Tip: Always check the AMCA (Air Movement and Control Association) certified ratings. These provide unbiased data on performance, ensuring the manufacturer’s claims are backed by testing.

    Quiet vs. Powerful: Can You Have Both?

    Historically, there was a trade-off: high power meant high noise. However, advancements in motor technology have changed the game. Modern fans use DC (Direct Current) motors or advanced AC induction motors with variable speed controls.

    Comparison: Traditional AC Fans vs. Modern DC Fans

    FeatureTraditional AC FanModern DC Fan
    Noise LevelModerate to High (2.5+ Sones)Very Low (<1.0 Sone)
    Energy EfficiencyStandardHigh (Up to 70% less energy)
    Speed ControlLimited (On/Off or 3-speed)Precise (Variable Speed)
    Lifespan10–15 Years15–20+ Years
    Initial CostLowerHigher

    For those seeking a good roof fan to extract most air quietly, investing in a DC motor model is often the best long-term strategy. The initial cost is higher, but the energy savings and noise reduction provide immediate comfort.

    Good Roof Fan To Extract Most Air Quiet Powerful Exhaust

    Top Features to Look for in a Silent Exhaust Fan

    To ensure you get the best performance, prioritize these features during your selection process:

    1. Aerodynamic Blade Design

    Look for fans with curved or angled blades rather than flat paddles. Curved blades cut through the air more smoothly, reducing turbulence—the primary cause of fan noise.

    2. Insulated Housing

    Some premium roof fans come with insulated housings or vibration-dampening mounts. These features absorb the mechanical hum of the motor, preventing it from resonating through the roof structure.

    3. Weather-Resistant Construction

    Since the fan is exposed to the elements, it must be built to last. Look for materials like powder-coated aluminum or high-grade UV-resistant plastics. Rust can unbalance the fan over time, leading to increased noise and decreased efficiency.

    4. Smart Thermostat Integration

    A powerful fan is useless if it runs when not needed. Models with built-in thermostats or humidity sensors automatically adjust speed based on real-time conditions. This ensures maximum extraction only when necessary, keeping noise levels low during mild weather.

    Installation Tips for Optimal Performance

    Even the best fan will underperform if installed incorrectly. Proper installation is key to achieving the “quiet powerful exhaust” goal.

    Step-by-Step Installation Overview

    1. Choose the Right Location: Place the fan near the peak of the roof but away from obstructions like chimneys or trees. Ensure it is centered over the attic space for balanced airflow.
    2. Cut the Opening Carefully: Measure twice, cut once. Use a reciprocating saw to cut the hole in the roof deck. Ensure the opening matches the fan’s flange size exactly to prevent leaks.
    3. Seal Thoroughly: Apply a high-quality roofing cement or butyl tape around the flange before securing the fan. This prevents water intrusion, which can cause electrical shorts and corrosion.
    4. Secure Electrical Connections: Follow local electrical codes. If you are not comfortable working with wiring, hire a licensed electrician. Improper wiring can lead to motor failure or fire hazards.
    5. Test for Vibration: Once installed, turn the fan on. If you hear excessive rattling, check the mounting screws. Tighten them evenly to ensure the fan sits flush against the roof.

    For more detailed information on building science and ventilation standards, you can refer to resources provided by Wikipedia regarding architectural ventilation principles.

    Common Mistakes to Avoid

    • Undersizing the Fan: Buying a fan with too low CFM for your attic size will result in inadequate ventilation. Always calculate your attic’s square footage first.
    • Ignoring Intake Vents: Exhaust fans need intake vents (soffits or gables) to work effectively. Without proper intake, the fan creates negative pressure, which can pull conditioned air from your living space, increasing energy costs.
    • Neglecting Maintenance: Dust and debris can accumulate on blades, causing imbalance and noise. Clean your fan blades annually to maintain optimal performance.

    FAQ Section

    Q1: How many sones is considered “quiet” for a roof fan?

    A fan rated at 1.0 sone or lower is considered very quiet. Anything above 2.5 sones will be noticeable inside the home, especially in quiet rooms like bedrooms or libraries.

    Q2: Can I install a roof fan myself?

    While DIY installation is possible for those with roofing and electrical experience, it is often recommended to hire a professional. Improper sealing can lead to roof leaks, which are far more expensive to fix than the cost of professional installation.

    Q3: Do solar-powered roof fans offer enough power?

    Solar fans have improved significantly, but they depend on sunlight. On cloudy days or at night, their performance drops. For consistent, powerful extraction regardless of weather, a hardwired electric fan with a thermostat is usually a better choice for maximizing air removal.

    Q4: How often should I replace my roof exhaust fan?

    Most high-quality roof fans last between 10 to 15 years. However, if you notice a significant increase in noise, a drop in airflow, or frequent motor failures, it may be time to replace it sooner.

    Q5: Will a powerful roof fan cool my house?

    A roof fan does not directly cool the air like an AC unit. Instead, it removes superheated air from the attic, reducing the heat load on your ceiling. This allows your air conditioner to work more efficiently, potentially lowering indoor temperatures by several degrees.

    Conclusion

    Finding a good roof fan to extract most air quietly is about balancing technical specifications with smart design choices. By prioritizing low sone ratings, high CFM output, and durable construction, you can transform your attic from a heat trap into a well-ventilated space. Remember, the right fan not only protects your home’s structure but also enhances your daily comfort.

    Don’t let noise and inefficiency dictate your home’s climate control. Evaluate your current setup, consider upgrading to a modern DC motor model, and enjoy the benefits of a cooler, quieter home.

    Did you find this guide helpful? Share it with your friends on social media who might be struggling with attic heat or moisture issues. Let’s help everyone breathe easier!

  • Gray Homes, Black Roofs: Top Design Pics & Tips

    Gray Homes, Black Roofs: Top Design Pics & Tips

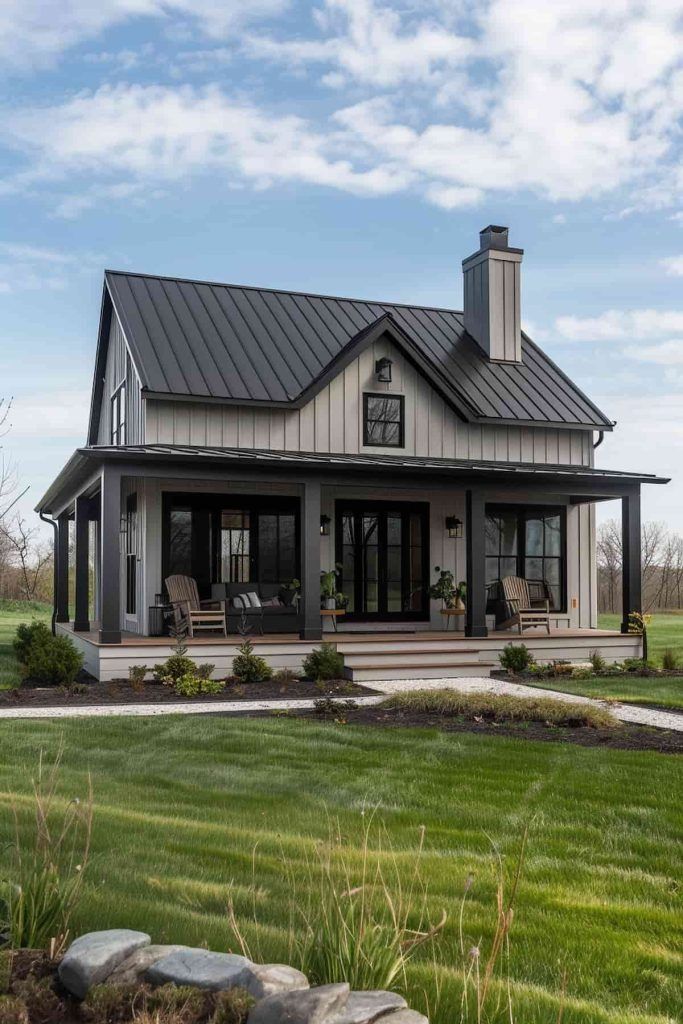
    Are you struggling to visualize how different shades of gray interact with the stark contrast of a black metal roof? You are not alone; many homeowners find it challenging to balance these bold elements without making their home look too dark or industrial. In this guide, we curate the best pics of gray houses with black metal roof and shutters to help you find the perfect aesthetic for your property.

    Why This Combination Is Trending in US Architecture

    The combination of gray siding and black roofing has moved from a niche trend to a mainstream favorite across the United States. According to recent housing market analyses, neutral exteriors with high-contrast accents tend to have higher curb appeal ratings. This specific palette offers a modern yet timeless look that fits various architectural styles, from Modern Farmhouse to Contemporary Industrial.

    The visual weight of a black metal roof grounds the structure, while gray siding provides a versatile canvas. When you add black shutters, you create a cohesive frame that draws the eye upward and defines the home’s character. But why does this work so well? It comes down to contrast and balance. The darkness of the roof and shutters anchors the lighter or mid-tone gray walls, preventing the house from looking “floating” or unfinished.

    Choosing the Right Shade of Gray

    Not all grays are created equal. When browsing through pics of gray houses with black metal roof and shutters, you will notice a wide spectrum of wall colors. Selecting the right undertone is crucial for achieving the desired mood.

    Cool vs. Warm Grays

    • Cool Grays: These have blue, green, or purple undertones. They pair exceptionally well with black metal roofs in coastal or modern urban settings. Cool grays can make a home feel crisp and clean. However, in areas with heavy overcast skies, they might appear slightly dull.
    • Warm Grays: Also known as “greige” (gray-beige), these have brown or yellow undertones. They offer a softer, more inviting appearance. Warm grays are ideal for Traditional or Farmhouse styles because they mitigate the harshness of the black roof, creating a welcoming vibe.

    Expert Tip: Always test paint samples on your actual siding material. Metal, vinyl, and wood absorb light differently. A gray that looks perfect on a digital screen may look drastically different under natural sunlight.

    The Impact of Black Shutters on Curb Appeal

    Black shutters are not just functional; they are a major design statement. In the context of gray houses with black metal roof and shutters, the shutters serve as a bridge between the roof and the walls.

    Visual Cohesion

    When your roof is black, adding black shutters creates a vertical line that connects the top of the home to the windows. This symmetry is pleasing to the human eye and adds a sense of order and elegance. Without black shutters, a gray house with a black roof might look top-heavy. The shutters distribute the visual weight evenly.

    Material Matters

    While vinyl shutters are common, consider upgrading to composite or wood for a higher-end look. Matte black finishes are currently preferred over glossy ones, as they reduce glare and hide dust better, maintaining a sleek appearance with less maintenance.

    Pics Of Gray Houses With/ Black Metal Roof And Shutters

    Architectural Styles That Shine With This Palette

    This color scheme is versatile, but it shines brightest in specific architectural styles. Here is a breakdown of where this combination works best:

    Architectural StyleRecommended Gray ToneShutter StyleRoof Profile
    Modern FarmhouseLight to Mid Warm GrayBoard-and-BattenStanding Seam
    ContemporaryDark Charcoal or SlateMinimalist/FlatCorrugated or Flat Lock
    CraftsmanMedium Cool GrayLouveredRibbed Panel
    Colonial RevivalLight Dove GrayRaised PanelStanding Seam

    Modern Farmhouse Appeal

    The Modern Farmhouse style is perhaps the most popular driver for this trend. The rustic charm of the farmhouse is updated with the industrial edge of a metal roof. In this style, you often see light gray siding paired with a black standing seam metal roof. The black shutters add a traditional touch that keeps the home from feeling too cold.

    Contemporary Edge

    For contemporary homes, darker grays are often used. A charcoal gray exterior with a black metal roof creates a monochromatic, sophisticated look. Here, the shutters might be omitted entirely or replaced with black window frames to maintain clean lines. If shutters are used, they are typically simple and unadorned.

    Maintenance and Durability Benefits

    One of the primary reasons homeowners choose metal roofs is durability. A black metal roof can last 40–70 years, significantly outlasting traditional asphalt shingles. This longevity makes the initial investment worthwhile.

    Heat Absorption Concerns

    A common question is whether black roofs make houses hotter. While black surfaces do absorb more heat, modern metal roofing systems often include reflective pigments or cool-roof coatings. These technologies help reflect solar energy, keeping your home cooler. Additionally, proper attic ventilation plays a critical role in managing heat transfer.

    According to Wikipedia, metal roofing is highly recyclable and energy-efficient, contributing to sustainable building practices. This eco-friendly aspect is a significant selling point for environmentally conscious buyers.

    Step-by-Step Guide to Visualizing Your Project

    If you are ready to transform your home, follow these steps to ensure you get the best results:

    1. Assess Your Current Siding: Determine if your current gray siding is cool or warm-toned. If you are repainting, choose a shade that complements your landscape.
    2. Select the Roof Profile: Decide between standing seam (smooth, modern) or corrugated (rustic, industrial). Standing seam is generally preferred for residential homes due to its sleek appearance.
    3. Choose Shutter Style: Match the shutter style to your home’s architecture. Louvered shutters suit traditional styles, while board-and-batten fits Farmhouse designs.
    4. Create a Digital Mockup: Use online tools or hire a designer to create a rendering. Look for pics of gray houses with black metal roof and shutters that match your home’s shape to get a realistic preview.
    5. Get Samples: Order physical samples of the roof color, siding paint, and shutter material. View them together at different times of the day.

    FAQ Section

    1. Does a black metal roof fade over time?

    High-quality metal roofs with Kynar 500 or Hylar 5000 finishes are designed to resist fading. While slight chalking may occur over decades, significant color change is rare. Black tends to show chalk residue less than lighter colors.

    2. Can I install black shutters on a dark gray house?

    Yes, but ensure there is enough contrast. If the gray is very dark (charcoal), black shutters might blend in too much. In such cases, consider using a slightly lighter gray for the shutters or adding white trim around the windows to create separation.

    3. Is a metal roof noisy during rain?

    No. When installed correctly with solid sheathing and proper insulation, a metal roof is no noisier than an asphalt shingle roof. The sound is dampened by the underlying structure.

    4. How do I clean a black metal roof?

    Black roofs show dust and pollen more easily. Clean them gently with a soft brush and mild soap solution twice a year. Avoid pressure washers, which can damage the protective coating.

    5. Will this color combination increase my home’s value?

    Yes. Neutral exteriors with high-contrast accents are broadly appealing to buyers. They suggest a well-maintained, modern home, which can positively influence appraisal and sale speed.

    6. What trim color works best with gray siding and a black roof?

    White trim is the classic choice, offering crisp contrast. However, cream or off-white can soften the look for Farmhouse styles. For a ultra-modern look, you can even use black trim to match the roof and shutters, creating a seamless monochromatic effect.

    Conclusion

    Choosing pics of gray houses with black metal roof and shutters as your inspiration is a smart move for any homeowner looking to boost curb appeal. This combination offers a perfect blend of modern sophistication and timeless elegance. By carefully selecting the right shade of gray, choosing durable materials, and ensuring visual balance with black shutters, you can create a home exterior that stands out for all the right reasons.

    Remember, the key is in the details. Take your time to sample colors and consult with professionals to ensure your vision becomes a reality. If you found this guide helpful, please share it on social media to help others discover the beauty of this striking architectural trend!

  • How Many Shingles for 1884 Sq Ft Roof?

    How Many Shingles for 1884 Sq Ft Roof?

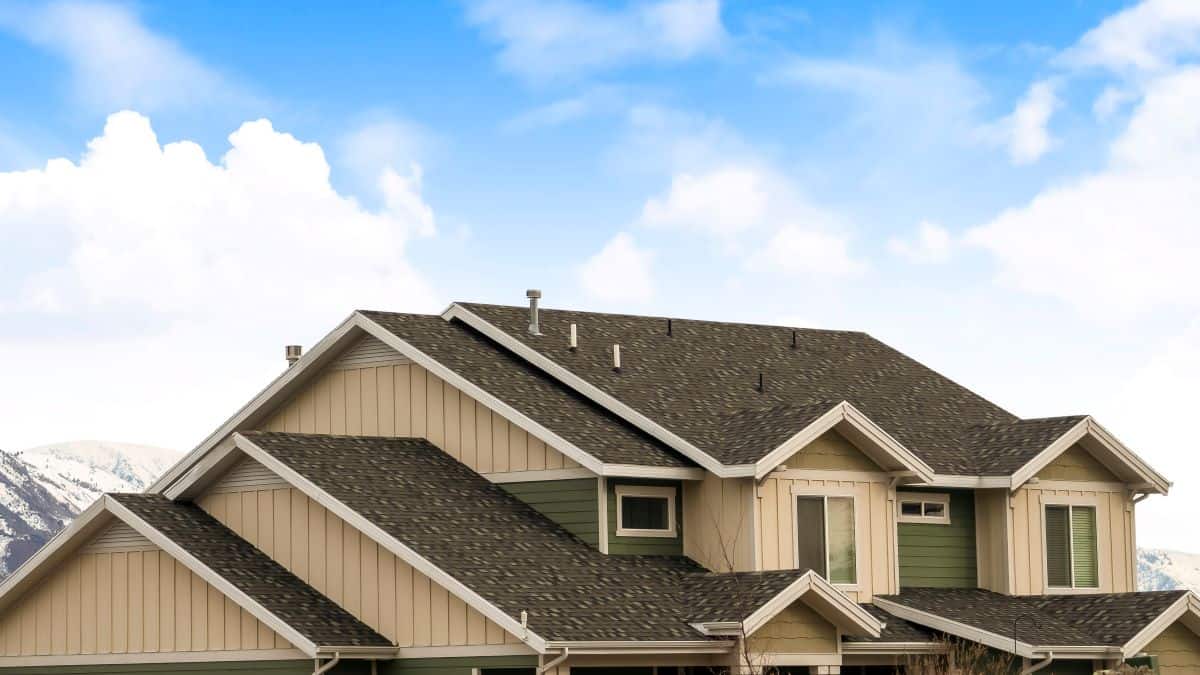
    Have you ever stared at a quote from a contractor and wondered if the numbers actually add up? Or perhaps you are planning a DIY roof replacement and need to order materials without ending up with too much leftover waste or, worse, running short mid-project. Knowing exactly how many shingles is needed for 1884 sq ft roof is the first step toward a budget-friendly and stress-free renovation.

    In this guide, we will break down the math, explain the concept of “roofing squares,” and provide a clear checklist to ensure you buy the right amount of material for your 1,884 square foot home.

    Understanding the Basics: Square Feet vs. Roofing Squares

    Before we dive into the specific calculation for your 1,884 square foot area, it is crucial to understand how roofing materials are sold. This is where most homeowners get confused.

    When you measure your home’s footprint, you get the floor area. However, roofing contractors and suppliers do not sell shingles by the individual piece or even by the standard square foot. They sell them by the “Roofing Square.”

    What is a Roofing Square?

    One roofing square equals 100 square feet of roof area.

    This distinction is vital because your roof is rarely flat. It has slopes, peaks, valleys, and overhangs. Therefore, the surface area of your roof is almost always larger than the floor area of your house.

    For a house with a floor area of 1,884 sq ft, your actual roof surface area will likely be higher. However, for the sake of this specific query, we will assume that 1,884 sq ft refers to the actual measured surface area of the roof itself (not the footprint). If 1,884 sq ft is your footprint, please note that you will need significantly more shingles due to the pitch factor, which we will discuss later.

    The Core Calculation: How Many Bundles Do You Need?

    Now, let’s answer the main question: How many shingles is needed for 1884 sq ft roof?

    Most standard asphalt shingles (3-tab or architectural) come packaged in bundles. Typically, three bundles equal one roofing square (100 sq ft).

    Here is the step-by-step breakdown:

    1. Convert Square Feet to Squares: 1,884 sq ft/100=18.84 Squares1,884 sq ft/100=18.84 Squares
    2. Calculate Base Bundles: Since 1 Square = 3 Bundles: 18.84 Squares×3 Bundles/Square=56.52 Bundles18.84 Squares×3 Bundles/Square=56.52 Bundles

    So, theoretically, you need roughly 57 bundles to cover the exact area. But wait! You cannot buy 0.52 of a bundle, and you should never buy the exact amount.

    The Critical Factor: Waste Percentage

    You must account for waste. Waste occurs due to:

    • Cutting shingles to fit hips and ridges.
    • Starter strips along the eaves.
    • Mistakes during installation.
    • Pattern matching (if using architectural shingles).

    Industry standards recommend adding a waste factor:

    • Simple Gable Roof: Add 10% waste.
    • Complex Roof (Hips, Valleys, Dormers): Add 15–20% waste.

    Let’s calculate for a moderately complex roof with a 15% waste factor:

    1. Total Squares with Waste: 18.84 Squares×1.15=21.66 Squares18.84 Squares×1.15=21.66 Squares
    2. Total Bundles Needed: 21.66 Squares×3 Bundles/Square=64.98 Bundles21.66 Squares×3 Bundles/Square=64.98 Bundles

    Final Recommendation: You should purchase 65 bundles of shingles.

    Pro Tip: Always round up. It is much easier to return unopened bundles to a local supplier than to pay for a second delivery fee because you ran short.

    Does Roof Pitch Change the Number of Shingles?

    Yes, significantly. If your 1,884 sq ft figure is based on your home’s floor plan rather than a direct measurement of the roof surface, you must apply a Pitch Multiplier.

    Roof pitch is the steepness of the roof. The steeper the roof, the more surface area exists compared to the flat footprint.

    Roof PitchMultiplier FactorExample Calculation (1,884 sq ft footprint)
    Low (4/12)1.054~1,985 sq ft actual roof area
    Medium (6/12)1.118~2,106 sq ft actual roof area
    Steep (9/12)1.250~2,355 sq ft actual roof area

    If you have a medium-pitch roof (6/12) and your house is 1,884 sq ft, your actual roof area is roughly 2,106 sq ft. Using the previous logic:

    • 2,106 sq ft = 21.06 Squares.
    • With 15% waste: 24.2 Squares.
    • Bundles needed: ~73 Bundles.

    Always verify whether your 1,884 number is footprint or surface area. When in doubt, consult a professional roofer or use an aerial measurement tool. For more detailed information on roof geometry, you can refer to Wikipedia’s article on Roof Pitch.

    How Many Shingles Is Needed For 1884 Sq Ft Roof

    Additional Materials: Don’t Forget the Underlayment and Nails

    Shingles are only part of the equation. A proper roofing system requires several other components. Ignoring these can lead to leaks and voided warranties.

    1. Underlayment

    This is the water-resistant barrier installed directly onto the roof deck.

    • Coverage: One roll of synthetic underlayment typically covers 10 squares (1,000 sq ft).
    • For 18.84 Squares: You will need 2 rolls of synthetic underlayment.

    2. Starter Strips

    These are specialized shingles used at the eaves and rakes to prevent wind uplift and water infiltration.

    • Rule of Thumb: 1 bundle of starter strip per 100 linear feet of edge.
    • Estimate: For an average home, plan for 3–5 bundles of starter strips.

    3. Roofing Nails

    • Standard: Use galvanized roofing nails with a minimum 12-gauge shank and 3/8-inch head.
    • Quantity: Approximately 4 nails per shingle for standard installation, 6 nails for high-wind areas.
    • Estimate: For 65 bundles, you will need roughly 40–50 lbs of nails.

    4. Ridge Cap Shingles

    These cover the peak of the roof.

    • Estimate: Measure the total length of your ridges. One bundle of ridge cap usually covers about 33–35 linear feet.

    Step-by-Step Guide to Ordering Your Materials

    To ensure you get the right materials for your 1,884 sq ft roof, follow this checklist:

    1. Verify Measurements: Double-check if 1,884 sq ft is the footprint or the actual roof surface. If it’s the footprint, apply the pitch multiplier.
    2. Choose Your Shingle Type: Architectural shingles are heavier and may require different bundling counts (sometimes 4 bundles per square for premium brands). Check the manufacturer’s spec sheet.
    3. Calculate Squares: Divide total surface area by 100.
    4. Add Waste: Multiply by 1.10 (simple) or 1.15 (complex).
    5. Convert to Bundles: Multiply final squares by 3 (or 4, depending on brand).
    6. Round Up: Always round up to the nearest whole bundle.
    7. Order Accessories: Include underlayment, starter strips, nails, and ridge caps.

    FAQ Section

    Q1: Can I use leftover shingles from a previous project?

    A: It is generally not recommended. Shingles from different batches may have slight color variations due to manufacturing differences. Additionally, old shingles may have become brittle or damaged during storage. For a seamless look and optimal performance, use new shingles from the same batch.

    Q2: How much does it cost to shingle a 1,884 sq ft roof?

    A: Costs vary by region and material quality. On average, asphalt shingles cost between $3.50 and $5.50 per square foot installed. For 1,884 sq ft, expect to pay between $6,500 and $10,500 for materials and labor. DIY costs will be lower, primarily covering materials ($2,500–$4,000).

    Q3: Do I need a permit to replace my roof?

    A: In most US jurisdictions, yes. Roof replacement involves structural and safety considerations. Check with your local building department. Failure to obtain a permit can result in fines and issues when selling your home.

    Q4: What is the lifespan of asphalt shingles?

    A: Standard 3-tab shingles last 15–20 years. Architectural (dimensional) shingles typically last 25–30 years. Premium luxury shingles can last 50 years or more. Proper ventilation and installation are key to reaching these lifespans.

    Q5: Should I remove the old shingles before installing new ones?

    A: While it is possible to layer new shingles over old ones (if local codes allow and there is only one existing layer), removal is preferred. Removing old shingles allows you to inspect the roof deck for rot or damage, ensuring a solid foundation for the new roof.

    Conclusion

    Determining how many shingles is needed for 1884 sq ft roof comes down to precise math and accounting for waste. For a direct surface area of 1,884 sq ft, you will need approximately 65 bundles of standard asphalt shingles, assuming a 15% waste factor.

    Remember, accurate measurements are the backbone of a successful roofing project. Whether you are hiring a pro or tackling this as a DIY weekend warrior, buying slightly more than you think you need is the safest bet.

    Did you find this guide helpful? Share it with your friends on Facebook or Pinterest who might be planning their own home improvements! If you have more questions about roofing materials, leave a comment below.

  • Stop Insurance Cancellation: Fix Your CA Roof Deck

    Stop Insurance Cancellation: Fix Your CA Roof Deck

    Receiving a notice that your provider is dropping you is one of the most stressful experiences a homeowner can face. It feels personal, but it is often a calculated risk assessment by the insurer. If you are dealing with Insurance Company Threats To Cancel Due To Roof Deck California, you are not alone in this struggle. This guide will walk you through exactly why this is happening, how to respond effectively, and what steps you can take to keep your home protected.

    Why Are Insurers Targeting Roof Decks in California?

    To solve the problem, we must first understand the root cause. The insurance landscape in California has shifted dramatically in recent years. Major carriers like State Farm, Allstate, and Farmers have restricted new policies or canceled existing ones due to rising reinsurance costs and increased wildfire risks. However, the “roof deck” issue is specific and technical.

    The roof deck is the structural layer (usually plywood or OSB boards) that sits beneath your shingles or tiles. It is the foundation of your roofing system. In California, insurers are increasingly using aerial imagery and drone technology to inspect homes without visiting them. If their algorithms detect sagging, water stains, or aged materials on the roof deck, they flag it as a high-risk liability.

    According to industry data, wind-driven rain and wildfire embers can easily penetrate compromised roof decks. For an insurer, a weak roof deck means a higher probability of a total loss claim. Therefore, when they issue a threat to cancel, they are essentially saying your home no longer meets their underwriting standards for structural integrity.

    What Does a “4-Point Inspection” Reveal About Your Roof?

    When an insurer threatens cancellation, they often require a 4-Point Inspection. This is not a full home inspection; it focuses strictly on four critical areas: Roof, Electrical, Plumbing, and HVAC. For the roof portion, the inspector is looking for specific red flags related to the deck.

    Key Red Flags Inspectors Look For

    • Sagging Lines: Visible dips in the roofline indicate the deck may be rotting or structurally weak.
    • Water Stains: From the attic side, dark spots on the deck suggest active leaks.
    • Delamination: Plywood layers separating due to moisture exposure.
    • Age: Most insurers have a hard cap on roof age (often 15–20 years). If the deck is original to an older home, it is likely deemed “end of life.”

    If the inspection report notes “deferred maintenance” or “immediate repair needed” for the roof deck, the insurer will likely proceed with cancellation unless proof of repair is provided.

    How to Respond to a Notice of Non-Renewal

    Time is your most valuable asset here. In California, insurers are generally required to give you at least 45 days’ notice before non-renewal takes effect. Do not ignore this letter. Here is a step-by-step plan to handle the threat.

    Step 1: Verify the Reason

    Read the notice carefully. Does it explicitly mention the “roof deck” or general “roof condition”? Sometimes, generic reasons are used. Call your agent and ask for the specific underwriting guideline that triggered the flag. Ask if they have photos from their aerial inspection.

    Step 2: Get a Professional Roof Certification

    Do not rely on a general handyman. Hire a licensed C-39 roofing contractor in California. Ask for a Roof Certification Letter. This document states that the roof, including the deck, has a remaining useful life of at least 3–5 years.

    • Note: If the deck is damaged, the contractor must repair or replace the affected sections before issuing this letter.

    Step 3: Submit Proof of Repair

    If repairs were made, submit the following to your insurer’s underwriting department:

    1. The contractor’s invoice showing scope of work (specifically mentioning deck repair/replacement).
    2. Before-and-after photos.
    3. The final Roof Certification Letter.

    Step 4: Request a Re-inspection

    Once you submit the documents, formally request a re-evaluation. Many cancellations are automated. A human underwriter reviewing fresh evidence may reverse the decision.

    Insurance Company Threats To Cancel Due To Roof Deck Califiornia

    Comparing Your Options: Repair vs. Replace vs. Switch

    When facing Insurance Company Threats To Cancel Due To Roof Deck California, you have three main paths. Each has pros and cons regarding cost and speed.

    OptionEstimated Cost (CA Avg)TimeframeInsurance Impact
    Partial Deck Repair$1,500 – $4,0001–3 DaysMay satisfy current insurer if damage is localized.
    Full Roof Replacement$15,000 – $30,000+1–2 WeeksBest long-term solution; resets roof age clock.
    Switch to FAIR PlanVaries (Often Higher)ImmediateLast resort; provides basic fire coverage only.

    Data Note: Costs vary significantly by county and material type. Always get three quotes.

    If your roof deck is largely intact but has minor issues, partial repair is cost-effective. However, if the deck is over 20 years old, most insurers will not accept a patch job. They want a new system.

    Understanding the California FAIR Plan

    If your private insurer cancels your policy and you cannot find another private carrier, you may need to turn to the California FAIR Plan. This is a state-mandated pool of last resort for homeowners who cannot obtain coverage in the standard market.

    While the FAIR Plan provides essential fire and lightning coverage, it is not a complete homeowners policy. It does not cover liability, theft, or water damage. Most homeowners must purchase a separate “Difference in Conditions” (DIC) policy to fill these gaps. This route is more expensive and offers less protection, so it should only be used if all other options fail.

    Preventing Future Issues: Maintenance Tips

    Once you have secured your insurance, maintain your roof deck to prevent future threats.

    1. Clean Gutters Regularly: Clogged gutters cause water to back up under shingles, rotting the deck edge.
    2. Trim Overhanging Branches: Trees rubbing against the roof can wear down materials and drop debris that traps moisture.
    3. Attic Ventilation: Ensure your attic is properly ventilated. Excessive heat and humidity can warp the roof deck from the inside out.
    4. Annual Inspections: Have a professional inspect your roof every two years, especially after heavy rain seasons.

    FAQ: Common Questions About Roof Deck Insurance Issues

    1. Can my insurer cancel my policy mid-term?

    Generally, no. In California, insurers cannot cancel a policy mid-term unless there is fraud, non-payment, or a significant increase in hazard (like storing explosives). They usually must wait until the renewal date to non-renew.

    2. Does homeowners insurance cover roof deck replacement?

    Only if the damage was caused by a covered peril, such as a storm, falling tree, or fire. Wear and tear, age, and lack of maintenance are never covered. You pay out-of-pocket for maintenance-related deck repairs.

    3. What if I disagree with the insurer’s inspection?

    You have the right to appeal. Provide a counter-inspection report from a licensed contractor. If the insurer still refuses, you can file a complaint with the California Department of Insurance.

    4. Will a new roof lower my premiums?

    It might not lower the base rate, but it will make you eligible for coverage again. Some insurers offer discounts for new roofs or impact-resistant materials, which can offset the cost over time.

    5. How long does a roof deck last in California?

    A well-maintained plywood or OSB deck can last 20–30 years. However, in coastal areas with salt air or inland areas with extreme heat, the lifespan may be shorter. Regular inspections are key to maximizing longevity.

    Conclusion

    Dealing with Insurance Company Threats To Cancel Due To Roof Deck California is daunting, but it is manageable with the right approach. The key is to act quickly, gather professional documentation, and communicate clearly with your insurer. Remember, insurers are looking for risk mitigation. By proving your roof deck is sound through certified inspections and repairs, you can often reverse their decision or find a new carrier willing to protect your home.

    Don’t let bureaucracy leave your home vulnerable. Take control of your property’s health today. If you found this guide helpful, please share it with your neighbors on social media—many Californians are facing similar challenges, and knowledge is our best defense.

  • Spot Roof Hail Damage Fast: A Homeowner’s Guide

    Spot Roof Hail Damage Fast: A Homeowner’s Guide

    Storm season can be stressful for any homeowner. One minute the sky is clear, and the next, ice pellets are battering your home, leaving you wondering about the structural integrity of your most important asset. If you are asking yourself, “How Can You Tell If Your Roof Has Hail Damage,” you are not alone. Many homeowners miss subtle signs until a leak appears, leading to costly repairs that could have been prevented with early detection. This guide will walk you through exactly what to look for, helping you protect your investment and peace of mind.


    Why Early Detection of Hail Damage Matters

    Hail damage is often deceptive. Unlike wind damage, which might tear off shingles immediately, hail damage can compromise the protective granule layer of your roof without causing an immediate leak. Over time, UV rays penetrate these weakened spots, causing the asphalt to dry out, crack, and eventually fail.

    According to the Insurance Information Institute, weather-related incidents account for a significant portion of property insurance claims in the United States. Identifying damage early ensures you can file a claim within the statute of limitations and prevent minor issues from becoming major structural failures.


    What Does Hail Damage Look Like on Different Roof Types?

    Not all roofs react to hail the same way. The material of your roof dictates the type of evidence you should look for. Here is a breakdown of common roofing materials and their specific vulnerability signs.

    1. Asphalt Shingles (Most Common in the US)

    Asphalt shingles are susceptible to bruising and granule loss. When hail hits, it knocks off the ceramic granules that protect the shingle from the sun.

    • Black Spots: Look for dark, circular marks where the granules have been knocked away, exposing the black asphalt underneath.
    • Soft Spots: If you gently press on a suspect area (safely from a ladder), it may feel soft or spongy compared to surrounding shingles. This indicates the matting beneath has been fractured.
    • Shiny Edges: Fresh impacts often leave a shiny appearance on the exposed asphalt before it oxidizes and turns dull gray.

    2. Metal Roofs

    Metal roofs are durable but not immune. Hail can cause cosmetic dents that may affect the coating over time.

    • Dents: Look for round depressions that match the size of the hailstones.
    • Paint Chipping: Check for areas where the protective paint or coating has chipped off around the dent, which can lead to rust.

    3. Wood Shakes and Shingles

    Wood is brittle and can split upon impact.

    • Fresh Splits: Look for orange or light-colored wood fibers inside cracks. Old splits will be gray and weathered.
    • Impact Marks: Circular bruises or indentations where the hail struck the wood surface.

    Key Signs: How Can You Tell If Your Roof Has Hail Damage?

    To accurately assess your roof, you need to know the specific indicators. Here are the primary red flags that suggest hail has compromised your roofing system.

    Random Pattern of Impact

    Unlike wear and tear, which follows a pattern (such as near valleys or ridges), hail damage is random. You will see marks scattered across the roof slope without a logical geometric arrangement. If you see damage only on one side of the house, it likely corresponds to the direction the storm was blowing.

    Granule Loss in Gutters

    One of the easiest ways to check for damage without climbing onto the roof is to inspect your gutters and downspouts.

    • Accumulation: After a storm, if you find an unusual amount of sand-like granules in your gutters, it is a strong indicator that your shingles have taken a beating.
    • Clogging: Excessive granules can clog drainage systems, leading to water backup and potential interior damage.

    Dented Flashing and Vents

    Your roof accessories are often more vulnerable than the shingles themselves. Check the metal flashing around chimneys, vents, and skylights.

    • Dents: Soft metals like aluminum or copper will show clear dents.
    • Loose Seals: Impact can loosen the sealant around these fixtures, creating entry points for water.

    Comparison Table: Hail Damage vs. Normal Wear

    FeatureHail DamageNormal Aging/Wear
    PatternRandom, scatteredUniform, consistent
    Granule LossSharp, circular bare spotsGradual thinning over time
    Shingle ConditionBruised, soft spotsCurling, cracking at edges
    TimingOccurs suddenly after a stormDevelops over years
    Color of ExposureShiny/black initiallyDull/gray throughout
    How Can You Tell If Your Roof Has Hail Damage
    Roof shingles with large hailstones after hail storm

    Step-by-Step: How to Inspect Your Roof Safely

    Safety is paramount. Never climb onto a wet or steep roof. Follow these steps to conduct a preliminary inspection from the ground and a safe vantage point.

    1. Wait for Clear Weather: Ensure the storm has completely passed and the roof is dry. Wet roofs are slippery and dangerous.
    2. Use Binoculars: Stand at a distance where you can see the entire roof slope. High-quality binoculars allow you to spot missing granules or dents without risking a fall.
    3. Check Ground Level Evidence: Look for dings on your siding, window screens, air conditioning units, and mailbox. If these items are damaged, your roof likely is too. For more context on how hail forms and its physical properties, you can refer to Wikipedia’s article on Hail.
    4. Inspect the Gutters: Use a sturdy ladder to look inside your gutters. Wear gloves to protect your hands from sharp metal edges. Look for the “sand” of lost granules.
    5. Look for Interior Signs: Check your attic for water stains, daylight coming through the roof deck, or damp insulation. These are late-stage signs of damage.

    When to Call a Professional Roofer

    While DIY inspections are useful, they have limitations. You should contact a licensed roofing contractor if:

    • You see visible cracks or missing shingles.
    • You notice water stains on your ceiling or walls.
    • The storm involved hail larger than 1 inch in diameter (quarter-sized).
    • You are unsure about the extent of the damage.

    Professional roofers have the training to distinguish between hail damage and manufacturer defects or installation errors. This distinction is crucial for insurance claims, as insurers may deny coverage for pre-existing conditions.


    FAQ Section

    1. Will my insurance cover hail damage to my roof?

    Most standard homeowners’ insurance policies cover hail damage. However, coverage depends on your deductible and the age of your roof. Some policies have separate wind/hail deductibles, which may be higher than your standard deductible. Always review your policy details or speak with your agent.

    2. Can hail damage cause leaks immediately?

    Not always. Hail often causes “bruising” that weakens the shingle. It may take months or even years of UV exposure and thermal cycling for the damaged area to crack and leak. This is why immediate inspection is vital, even if you don’t see water inside.

    3. How big does hail need to be to damage a roof?

    Hail as small as 1 inch (the size of a quarter) can cause damage to asphalt shingles, especially if they are older or brittle. Larger hail (1.5 inches or more) can cause significant structural damage to almost any roofing material.

    4. Should I repair or replace my roof after hail damage?

    This depends on the severity. If less than 30% of the roof is damaged, repairs might suffice. However, if the damage is widespread, or if the shingles are old, a full replacement is often more cost-effective and ensures uniform protection. A professional assessment is necessary to make this call.

    5. How long do I have to file a hail damage claim?

    Time limits vary by state and insurance provider, but generally, you should file a claim as soon as possible. Most insurers require notification within one year of the event, but waiting too long can complicate the proof of causation.


    Conclusion

    Knowing how can you tell if your roof has hail damage empowers you to act quickly and protect your home. By looking for random patterns of granule loss, checking your gutters, and inspecting metal fixtures, you can identify potential issues before they become expensive leaks. Remember, early detection is key to maximizing your insurance claim and extending the life of your roof.

    If you suspect damage, don’t wait for the next rainstorm to reveal the problem. Schedule a professional inspection today. Found this guide helpful? Share it with your neighbors on social media to help them protect their homes too!