Tag: Roofing Measurements

  • How Many Square Feet In A Bundle Of Roof Shingles?

    How Many Square Feet In A Bundle Of Roof Shingles?

    Planning a roofing project can feel overwhelming, especially when you are standing in the aisle of a home improvement store trying to decipher cryptic packaging labels. You might be staring at a stack of asphalt shingles, wondering exactly how many square feet in a bundle of roof shingles you are actually buying. Getting this number wrong can lead to costly delays if you run short, or wasted money if you overbuy significantly.

    In this guide, we will break down the math simply and clearly. Whether you are a seasoned DIYer or a first-time homeowner looking to understand contractor quotes, knowing the precise coverage of a shingle bundle is the foundation of a successful roofing job. Let’s dive into the numbers so you can buy with confidence.

    The Standard Answer: 33.3 Square Feet Per Bundle

    If you are purchasing standard three-tab or architectural asphalt shingles in the United States, there is a golden rule you need to memorize: One bundle covers approximately 33.3 square feet.

    However, it is crucial to understand that shingles are not sold by the square foot directly; they are sold by the “bundle,” and bundled into a larger unit called a “square.”

    Understanding the “Roofing Square”

    In the roofing industry, terminology differs from general construction. A “square” does not mean a 10×10 foot area in casual conversation; it is a specific unit of measurement equal to 100 square feet.

    Because one roofing square equals 100 square feet, and one bundle covers roughly 33.3 square feet, it takes three bundles to make one roofing square.

    • 1 Bundle ≈ 33.3 sq. ft.
    • 3 Bundles = 1 Roofing Square (100 sq. ft.)

    This 3-to-1 ratio is the industry standard for most asphalt shingles. However, relying solely on averages can be risky. Let’s look at why variations exist.

    Why Do Some Bundles Cover Different Amounts?

    While 33.3 square feet is the norm, it is not universal. Several factors can change the coverage per bundle, and ignoring them is a common mistake for beginners.

    1. Shingle Type and Weight

    Heavier, premium architectural shingles often have different dimensions than basic three-tab shingles. Some high-end laminated shingles may require four or five bundles to cover a single roofing square (100 sq. ft.). This means each bundle would only cover 20 to 25 square feet. Always check the specific product data sheet before calculating.

    2. Manufacturer Specifications

    Different manufacturers (such as GAF, Owens Corning, or CertainTeed) may have slight variations in shingle cut and overlap requirements. While the total coverage per square remains 100 sq. ft., the number of shingles per bundle might vary, affecting the square footage per individual bundle.

    3. Exposure Rate

    The “exposure” is the part of the shingle that is visible after installation. Most shingles are designed with a standard 5-inch exposure. If a contractor installs shingles with a different exposure rate (which is rare but possible for aesthetic reasons), the coverage per bundle changes drastically.

    Pro Tip: Never assume. Always look for the “Coverage per Bundle” label on the wrapper or the manufacturer’s website. If it says “3 bundles per square,” you are safe with the 33.3 sq. ft. rule. If it says “4 bundles per square,” each bundle covers only 25 sq. ft.
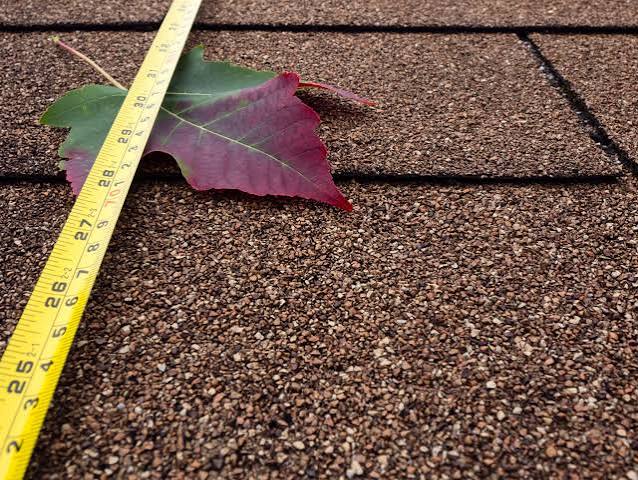
    How Many Square Feet In A Bundle Of Roof Shingles

    How to Calculate the Exact Number of Bundles You Need

    Knowing how many square feet in a bundle of roof shingles is only half the battle. The next step is applying that knowledge to your specific roof. Here is a step-by-step guide to ensuring you order the right amount.

    Step 1: Measure Your Roof’s Footprint

    Measure the length and width of each section of your house from the ground. Multiply these numbers to get the square footage of each plane.

    • Example: A section that is 20 feet wide and 40 feet long = 800 square feet.

    Step 2: Account for Roof Pitch

    A flat measurement is not enough because roofs are sloped. A steeper roof has more surface area than its footprint suggests. You must apply a pitch multiplier.

    • Low Pitch (4/12): Multiply footprint by 1.05
    • Medium Pitch (6/12): Multiply footprint by 1.15
    • Steep Pitch (9/12+): Multiply footprint by 1.25 or higher

    For accurate pitch multipliers, you can refer to standard construction geometry resources, such as the detailed explanations found on Wikipedia’s Roof page, which outlines various structural designs and their implications.

    Step 3: Calculate Total Square Footage

    Add up the adjusted square footage of all roof planes. Let’s say your total adjusted area is 2,400 square feet.

    Step 4: Convert to Squares and Bundles

    Divide your total square footage by 100 to get the number of “squares.”

    • 2,400 sq. ft. / 100 = 24 Squares

    Multiply the number of squares by 3 (assuming standard shingles).

    • 24 Squares x 3 Bundles = 72 Bundles

    Step 5: Add Waste Factor

    You cannot use every scrap of shingle. Cutting around vents, chimneys, and valleys creates waste.

    • Simple Roof (Gable): Add 10% waste.
    • Complex Roof (Hips, Valleys, Dormers): Add 15–20% waste.

    Using a 10% waste factor for our example:

    • 72 Bundles x 1.10 = 79.2 Bundles

    Always round up. You should order 80 bundles.

    Comparison: Standard vs. Premium Shingles

    To help you visualize the differences, here is a quick comparison table. Note how the “Square Feet per Bundle” changes based on the product tier.

    FeatureStandard 3-Tab ShinglesArchitectural/LaminatedPremium Designer
    Bundles per Square33 to 44 to 5
    Sq. Ft. per Bundle~33.3 sq. ft.~25–33.3 sq. ft.~20–25 sq. ft.
    Weight per Bundle~50–60 lbs~65–80 lbs~80+ lbs
    Best ForBudget projects, rentalsMost residential homesLuxury aesthetics

    Common Mistakes to Avoid

    Even with the right math, errors happen. Here are the most frequent pitfalls:

    1. Ignoring Starter Strips: You need special starter shingles for the eaves and rakes. These are often sold separately or in specific bundles. Do not count these as part of your field shingle coverage.
    2. Forgetting Ridge Caps: The peak of your roof requires ridge cap shingles. These are usually calculated differently (by linear foot) and do not follow the standard bundle coverage rule.
    3. Underestimating Complexity: If your roof has many valleys, dormers, or skylights, your waste factor will be higher. A 10% waste factor is insufficient for a complex Victorian-style roof; aim for 15–20%.

    FAQ Section

    Q1: Can I return unused bundles of shingles?

    Most major home improvement stores in the US allow returns of unopened, undamaged bundles within a specific timeframe (usually 90 days). However, policies vary by location. Keep your receipt and try to buy slightly more than you think you need, as returning extras is easier than running out mid-project.

    Q2: Does the color of the shingle affect how many square feet are in a bundle?

    No, the color does not change the physical dimensions or coverage. However, darker shingles may absorb more heat, which can impact longevity, but the how many square feet in a bundle of roof shingles remains consistent regardless of color within the same product line.

    Q3: How much does a bundle of shingles weigh?

    A standard bundle of asphalt shingles typically weighs between 50 and 80 pounds. Heavier architectural shingles are on the higher end of this spectrum. This is important to consider if you are carrying them up a ladder yourself.

    Q4: What is the difference between a “square” and a “bundle”?

    A “square” is a unit of measurement equal to 100 square feet of roof area. A “bundle” is the physical package the shingles come in. For standard shingles, it takes three bundles to equal one square.

    Q5: Do metal roofs use bundles?

    No, metal roofing is typically sold by the panel or by the square foot, not in bundles like asphalt shingles. The calculation method for metal roofing is entirely different and involves linear feet and panel width.

    Q6: How do I measure my roof if I can’t climb on it?

    You can use satellite imagery tools like Google Earth to measure the footprint of your home. Alternatively, many roofing supply companies offer free drone measurements or online calculators where you input your address, and they provide an estimate based on local tax records and satellite data.

    Conclusion

    Understanding how many square feet in a bundle of roof shingles is the first step toward a stress-free roofing project. Remember the magic number: 33.3 square feet for standard bundles, which means three bundles per roofing square.

    By accurately measuring your roof, accounting for pitch, and adding a proper waste factor, you can avoid the headache of mid-project supply runs. Always double-check the manufacturer’s specifications for the specific product you choose, as premium shingles may have different coverage rates.

    Did you find this guide helpful? Share it with your fellow DIYers on social media to help them tackle their roofing projects with confidence!

  • How to Calculate Roof Pitch in Degrees

    How to Calculate Roof Pitch in Degrees

    Have you ever stood in your attic or looked up at your home’s exterior, wondering exactly how steep your roof is? Whether you are planning a renovation, installing solar panels, or simply curious about your home’s architecture, knowing the angle is crucial. Understanding how to calculate the pitch of a roof in degrees is the first step toward ensuring safety, accuracy, and cost-efficiency in any roofing project.

    Many homeowners find themselves confused by the difference between “pitch” (often expressed as a ratio like 4:12) and “degrees” (the actual angle). While contractors often speak in ratios, degrees are essential for specific calculations involving trigonometry, such as determining snow load capacity or fitting skylights. In this guide, we will break down the process into simple, manageable steps so you can measure your roof with confidence.

    Why Convert Roof Pitch to Degrees?

    Before we dive into the math, it is important to understand why you might need this specific measurement. In the United States, the construction industry predominantly uses the “rise over run” ratio. For example, a “6/12 pitch” means the roof rises 6 inches for every 12 inches of horizontal distance.

    However, degrees provide a universal standard for angle measurement. Here is why converting to degrees matters:

    • Solar Panel Installation: Solar installers require precise angles to maximize energy efficiency.
    • Safety Assessments: Steeper roofs (higher degrees) require different safety equipment and harnesses.
    • Material Compatibility: Certain roofing materials, such as clay tiles or slate, have minimum degree requirements to prevent water infiltration.
    • Architectural Design: If you are adding a dormer or an extension, matching the existing angle in degrees ensures structural harmony.

    According to building science principles, the angle of incidence affects how water sheds and how wind interacts with the structure. Getting this number right is not just about aesthetics; it is about performance.

    Tools You Will Need for Accurate Measurement

    You do not need expensive laser equipment to get a reliable reading. For most DIY purposes, basic tools found in a standard toolbox will suffice. However, precision is key.

    • A Level: A 2-foot or 4-foot carpenter’s level is ideal. Ensure it is calibrated correctly before starting.
    • A Tape Measure: A standard retractable tape measure with clear markings.
    • A Calculator: One with trigonometric functions (specifically arctangent or tan⁻¹). Your smartphone’s calculator app works perfectly for this.
    • Safety Gear: If measuring from the outside, always use a sturdy ladder, non-slip shoes, and consider having a spotter.

    Safety Note: Never attempt to walk on a roof that is wet, icy, or excessively steep (over 30 degrees) without professional fall protection gear.

    How To Calculate The Pitch Of A Roof In Degrees

    Step-by-Step: How to Calculate the Pitch of a Roof in Degrees

    Calculating the angle requires a bit of high school geometry, but don’t worry—we will walk through it together. The core concept relies on the tangent function in trigonometry.

    Step 1: Measure the Rise and Run

    The most accurate way to measure is from inside the attic, where you can access the underside of the roof rafters.

    1. Place one end of your level against the bottom edge of a rafter.
    2. Adjust the level until the bubble is perfectly centered, indicating it is horizontal. This horizontal distance is your Run. For simplicity, let’s assume a standard run of 12 inches.
    3. From the 12-inch mark on the level, measure vertically straight up to the bottom of the rafter. This vertical distance is your Rise.

    Example: If you measure 6 inches from the level to the rafter, your rise is 6 inches.

    Step 2: Determine the Ratio

    Now you have your ratio. In our example, the rise is 6 and the run is 12. This gives us a ratio of 6/12.

    If you measured a different run (e.g., 24 inches), ensure you normalize it to a 12-inch base for standard comparison, or simply use the actual numbers in the formula below.

    Step 3: Apply the Trigonometric Formula

    To convert this ratio into degrees, we use the inverse tangent function (arctan). The formula is:

    Angle in Degrees=arctan⁡(RiseRun)Angle in Degrees=arctan(RunRise​)

    Using our example:

    1. Divide the Rise by the Run: 6÷12=0.56÷12=0.5
    2. Calculate the arctangent of 0.5.
    3. On your calculator, press shift or 2nd followed by tan (or look for tan⁻¹).
    4. Enter 0.5.

    The result is approximately 26.57 degrees.

    Step 4: Verify with External Measurement (Optional)

    If you cannot access the attic, you can measure from the outside using the gable end of the house. Measure the total width of the house (Run x 2) and the height from the top of the wall plate to the peak (Rise). Divide the total rise by half the width to get the same ratio, then apply the formula above.

    For more detailed information on roof framing standards, you can refer to general construction guidelines on Wikipedia.

    Common Roof Pitches and Their Degree Equivalents

    To help you visualize where your roof falls on the spectrum, here is a quick reference table. This eliminates the need for constant calculation if you know your standard ratio.

    Pitch Ratio (Rise/Run)Angle in DegreesClassification
    2/129.46°Low Slope
    4/1218.43°Conventional Low
    6/1226.57°Conventional
    8/1233.69°Steep
    10/1239.81°Very Steep
    12/1245.00°Extreme

    Key Insight: A 12/12 pitch is exactly 45 degrees because the rise equals the run. Any pitch higher than 12/12 will exceed 45 degrees, which significantly increases installation difficulty and cost.

    Factors That Influence Roof Pitch Choice

    Why do some houses have flat roofs while others are steep? Several factors dictate the optimal pitch for a structure.

    Climate and Weather Patterns

    In regions with heavy snowfall, such as the Northeastern US, steeper pitches (above 30 degrees) are preferred. Gravity helps shed snow before it accumulates enough weight to cause structural damage. Conversely, in hurricane-prone areas, lower pitches may be used to reduce wind uplift forces, though this must be balanced with drainage needs.

    Architectural Style

    Your home’s design plays a massive role. Colonial and Cape Cod styles typically feature steeper pitches (8/12 to 12/12), while Ranch-style homes often utilize low slopes (2/12 to 4/12). Modern architecture may even employ flat roofs (less than 2/12), which technically still require a slight pitch for water drainage.

    Material Constraints

    Not all roofing materials work on all angles.

    • Asphalt Shingles: Can be installed on pitches as low as 2/12 with special underlayment.
    • Clay Tiles: Generally require a minimum of 4/12 to prevent water backing up under the tiles.
    • Slate: Often requires 4/12 or steeper for proper longevity.

    Frequently Asked Questions (FAQ)

    What is the difference between roof slope and roof pitch?

    While often used interchangeably in casual conversation, there is a technical difference. Slope is the ratio of vertical rise to horizontal run (e.g., 6:12). Pitch is technically the ratio of the rise to the total span (width) of the house. However, in modern US construction, “pitch” is commonly accepted to mean the slope ratio. When calculating degrees, we use the slope (rise/run).

    Can I use a smartphone app to measure roof pitch?

    Yes, there are many inclinometer apps available for iOS and Android that use your phone’s gyroscope. While convenient, they can be less accurate than manual measurements due to calibration issues or uneven surfaces. Use them for a quick estimate, but rely on manual math for critical projects like structural modifications.

    What is the minimum roof pitch for shingles?

    Most asphalt shingle manufacturers require a minimum slope of 2:12 (approximately 9.5 degrees). Below this threshold, the roof is considered “flat,” and specialized membrane roofing systems (like EPDM or TPO) are required to ensure waterproofing. Always check the specific warranty requirements of your chosen material.

    How does roof pitch affect cooling costs?

    A steeper roof pitch can contribute to better attic ventilation. Hot air rises, and a higher peak allows for larger ridge vents, facilitating natural airflow. This can reduce the heat load on your HVAC system during summer months, potentially lowering energy bills. However, the impact is secondary to proper insulation and radiant barriers.

    Is a 45-degree roof too steep?

    A 45-degree roof (12/12 pitch) is quite steep but not uncommon in traditional American architecture. It is challenging to walk on and requires strict safety protocols for maintenance. While it offers excellent water and snow shedding, it also increases the surface area of the roof, leading to higher material costs compared to a lower-pitched roof of the same footprint.

    Conclusion

    Learning how to calculate the pitch of a roof in degrees empowers you to make informed decisions about your home. Whether you are hiring a contractor, buying materials, or assessing safety risks, knowing the exact angle removes guesswork from the equation. By using a simple level, tape measure, and the arctangent formula, you can achieve professional-grade accuracy without professional-grade costs.

    Remember, accuracy is vital. A small error in measurement can lead to significant issues in material ordering or structural fit. Take your time, double-check your numbers, and prioritize safety above all else.

    Did you find this guide helpful? Share it with your fellow DIY enthusiasts on social media to help them tackle their next roofing project with confidence!