Discovering a leak in your roof during a storm is every homeowner’s nightmare. The stress of water damaging your ceilings and belongings can be overwhelming, especially when you don’t have immediate access to professional roofing services or the right tools. You need a solution that is fast, effective, and won’t cause further damage to your shingles. This guide will show you exactly how to put a tarp on a roof without nails, ensuring your home stays dry while you wait for permanent repairs.
We understand the urgency. Water intrusion can lead to mold growth within 24–48 hours, according to the EPA. Therefore, acting quickly with the right technique is crucial. By avoiding nails, you prevent creating new holes in your roof, which could complicate future repairs. Let’s dive into the safest, most reliable methods to secure your roof temporarily.
Why Avoid Nails When Tarping a Roof?
Before we get into the “how,” it is essential to understand the “why.” Many homeowners instinctively reach for a hammer and nails because it seems like the most secure option. However, this approach carries significant risks.
The Risk of Additional Damage
Every nail you drive into your roof creates a new potential entry point for water. If the tarp shifts due to wind, these nail holes can widen, leading to more severe leaks than the original problem. Furthermore, removing nails later often leaves behind gaps that require immediate sealing with roofing cement.
Insurance and Warranty Concerns
Some homeowner insurance policies and roofing manufacturer warranties may be voided if improper temporary repairs cause additional damage. Using non-penetrating methods is generally viewed as a responsible, low-risk mitigation strategy by adjusters.
Essential Tools and Materials
To successfully learn how to put a tarp on a roof without nails, you need the right gear. Do not attempt this with flimsy materials. Here is what you need:
- Heavy-Duty Polyethylene Tarp: Look for a tarp with a thickness of at least 6 mils. It should be large enough to cover the damaged area plus an extra 3–4 feet on all sides.
- Rope or Bungee Cords: Use UV-resistant polypropylene rope (at least ½ inch thick) or heavy-duty bungee cords with hooks.
- Sandbags or Weight Bags: These are crucial for holding the tarp down without penetration. You can buy pre-filled sandbags or fill durable bags with sand or gravel.
- Ladder: A sturdy, extension ladder with slip-resistant feet.
- Safety Gear: Non-slip rubber-soled shoes, gloves, and a safety harness if the roof pitch is steep.
- Roofing Cement (Optional): For sealing the edges of the tarp if you choose a hybrid method, though we will focus on non-penetrating methods here.
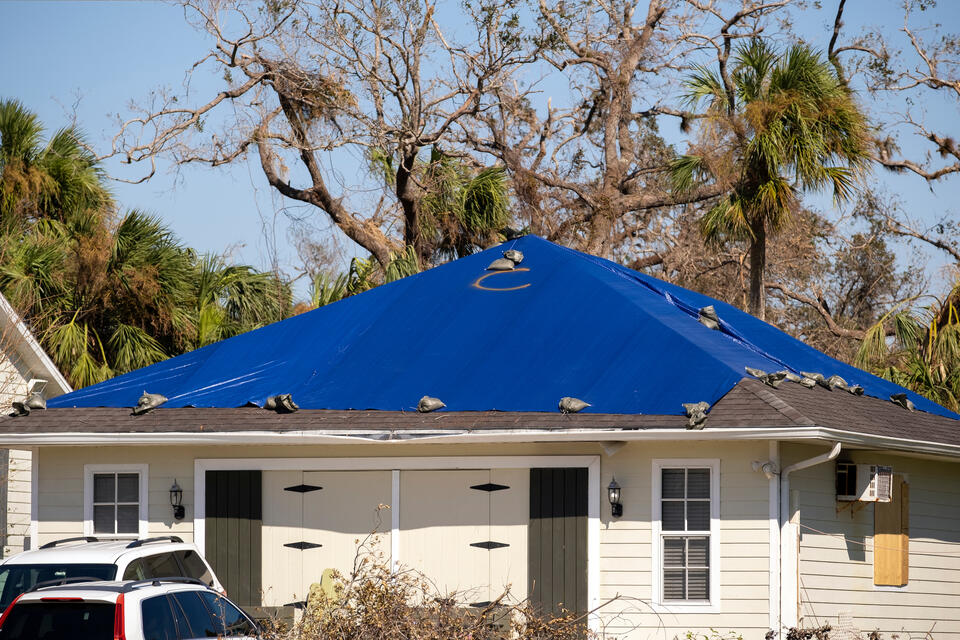
Step-by-Step Guide: How To Put A Tarp On A Roof Without Nails
Follow these steps carefully. Safety is your top priority. If the roof is wet, icy, or the wind is exceeding 20 mph, wait for conditions to improve or call a professional.
Step 1: Assess the Damage and Measure
From the ground or a safe position on the ladder, identify the source of the leak. Measure the area to determine the size of the tarp needed. Remember, the tarp must extend well beyond the damaged spot. For example, if the hole is 2×2 feet, use a tarp that covers at least 6×6 feet around that point.
Step 2: Prepare the Surface
Clear any debris, such as branches or loose shingles, from the area where the tarp will sit. A clean surface ensures the tarp lies flat and reduces the risk of punctures from underneath. Note: Do not walk directly on damaged areas.
Step 3: Position the Tarp
Unfold the tarp on the ground first to remove wrinkles. Then, carefully pull it up onto the roof. Start from the ridge (top) and work your way down. This orientation helps water shed off the tarp rather than pooling under it. Ensure the tarp extends over the ridge if the damage is near the top, or at least 4 feet up-slope from the leak.
Step 4: Secure with Sandbags (The Key Step)
This is the core of learning how to put a tarp on a roof without nails. Place sandbags along the edges of the tarp.
- Top Edge: Place sandbags every 2–3 feet along the top edge.
- Side Edges: Place sandbags along the sides, ensuring they are heavy enough to withstand wind uplift.
- Bottom Edge: Leave the bottom edge slightly loose or lightly weighted to allow water to flow out, preventing pooling.
According to structural engineering principles, distributed weight is more effective than single-point anchoring for flexible membranes like tarps. The friction between the sandbags, the tarp, and the roof shingles holds the system in place.
Step 5: Use Ropes for Extra Security
If wind is a concern, tie ropes around the sandbags and anchor them to sturdy parts of the house, such as chimney bases (if safe) or heavy vent pipes. Do not tie ropes to gutters, as they can easily rip off under tension. Create a “cross-hatch” pattern over the tarp with ropes if the area is large, placing additional sandbags at the intersections.
Comparing Securing Methods
To help you decide the best approach, here is a comparison of common temporary securing methods.
| Method | Damage Risk | Wind Resistance | Ease of Installation | Cost |
|---|---|---|---|---|
| Nails/Straps | High (New holes) | High | Moderate | Low |
| Sandbags Only | None | Moderate | Easy | Low |
| Rope + Sandbags | None | High | Moderate | Low |
| Adhesive Tape | Low (Residue) | Low | Very Easy | Moderate |
Table 1: Comparison of Temporary Roof Tarping Methods
As shown, combining ropes with sandbags offers the best balance of safety and effectiveness without causing damage. For more information on roofing materials and their properties, you can refer to Wikipedia’s page on Roofing.
Common Mistakes to Avoid
Even with the right tools, errors can compromise the repair.
- Using a Tarp That Is Too Small: A small tarp may stop the direct leak but allows water to seep under the edges via capillary action. Always go bigger.
- Ignoring Wind Direction: Install the tarp so that the prevailing wind blows over the tarp, not under it. If the wind gets under the edge, it will act like a sail and tear the tarp away.
- Walking on Wet Roofs: Asphalt shingles become extremely slippery when wet. Use a ladder to position the tarp from the edge whenever possible.
- Leaving Pools of Water: Ensure the tarp has a slight slope. Standing water adds weight and can eventually breach the tarp material.
FAQ Section
Q1: How long can a tarp stay on a roof without nails?
A tarp secured with sandbags and ropes is a temporary solution. It should ideally remain in place for no more than 30–90 days. Prolonged exposure to UV rays can degrade the tarp, and weather conditions may shift the weights. Schedule permanent repairs as soon as possible.
Q2: Can I use bricks instead of sandbags?
While bricks are heavy, they are not recommended. Bricks have hard, sharp edges that can crack shingles or puncture the tarp. Sandbags conform to the roof’s shape and distribute weight evenly, making them a safer choice.
Q3: What if my roof is too steep to walk on?
If your roof pitch is greater than 6:12 (steep), do not attempt to walk on it. Instead, use a long pole to push the tarp into position from a ladder. Anchor the ropes from the ground or eaves if possible. If this is not feasible, hire a professional roofer immediately.
Q4: Will this method work in heavy snow?
Snow adds significant weight. While sandbags provide good friction, heavy snow accumulation can slide the tarp. In snowy climates, it is better to clear snow from the affected area first (safely) before applying the tarp. Monitor the tarp regularly during snowfall.
Q5: Can I use duct tape to seal the edges?
Duct tape is not designed for long-term outdoor exposure on roofs. It loses adhesion in cold weather and leaves a messy residue. If you need to seal edges, use specialized roofing tape or flashing cement, but remember that the primary security should come from weights and ropes, not adhesives.
Conclusion
Learning how to put a tarp on a roof without nails is a valuable skill for any homeowner. It allows you to protect your property from water damage without risking further harm to your roof structure. By using heavy-duty tarps, sandbags, and ropes, you create a secure, non-penetrating barrier that withstands moderate weather conditions.
Remember, this is a temporary fix. Prioritize your safety, assess the situation calmly, and act quickly. Once the immediate threat is managed, contact a licensed roofing professional to assess the damage and perform permanent repairs.
Did you find this guide helpful? Share it with your friends and family on social media to help them prepare for unexpected home emergencies. Stay safe and keep your home dry!