Tag: Roof Repair Tips

  • How Long Does Roofing Tar Take to Dry?

    How Long Does Roofing Tar Take to Dry?

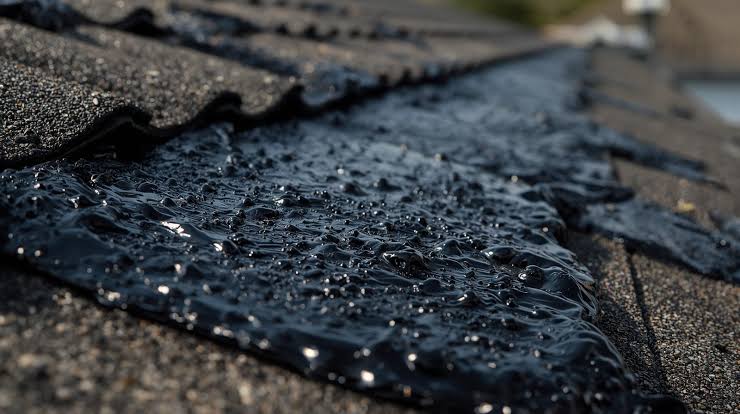
    Have you ever stared at a patch of fresh black goo on your roof, wondering if it’s safe to walk on or if rain is about to ruin your hard work? You are not alone; timing is the most critical factor in ensuring a lasting seal. Understanding exactly how long does it take for roofing tar to dry can save you from costly repairs and ensure your home stays watertight.

    Roofing tar, also known as asphalt cement or bitumen, is a staple in DIY roof repairs. It is affordable, effective, and widely available. However, unlike paint that dries in hours, roofing tar behaves differently based on environmental conditions. In this guide, we will break down the science behind the drying process, provide realistic timelines, and offer expert advice to help you get the job done right the first time.

    The Short Answer: General Drying Timelines

    If you are looking for a quick estimate, here is the general rule of thumb for standard asphalt-based roofing tar:

    • Touch Dry: 24 to 48 hours.
    • Fully Cured: 7 to 14 days.

    However, “dry” and “cured” are two different concepts. Touch dry means the surface is no longer sticky to a light finger touch. Fully cured means the solvents have completely evaporated, and the material has hardened into its final, durable state. Walking on it or exposing it to heavy rain before it is fully cured can compromise the seal.

    It is crucial to note that these timelines assume ideal conditions: temperatures between 50°F (10°C) and 80°F (27°C), low humidity, and good airflow. If you are working in extreme heat, cold, or high humidity, these numbers will change significantly.

    What Factors Influence Roofing Tar Drying Time?

    Many homeowners make the mistake of applying tar without checking the weather forecast. To understand why your tar might still be sticky after three days, we need to look at the variables at play.

    1. Temperature and Sunlight

    Heat is the primary accelerator for the evaporation of solvents in roofing tar.

    • Ideal Range: 70°F–80°F (21°C–27°C).
    • Cold Weather: Below 50°F (10°C), the chemical reaction slows down drastically. The tar may remain tacky for weeks.
    • Extreme Heat: Above 90°F (32°C), the tar might skin over too quickly on top while remaining liquid underneath, leading to cracking later.

    2. Humidity Levels

    High humidity is the enemy of drying tar. When the air is saturated with moisture, the solvents in the tar cannot evaporate efficiently.

    • Low Humidity (<40%): Fast drying.
    • High Humidity (>70%): Significantly slower drying. If it rains within the first 24 hours, you may need to reapply the product entirely.

    3. Thickness of Application

    This is the most common DIY error. Applying a thick glob of tar does not create a stronger seal; it creates a longer drying time.

    • Thin Layer (1/16 inch): Dries in 24–48 hours.
    • Thick Layer (1/4 inch or more): Can take up to 2 weeks to cure through the center.

    For more detailed information on the chemical composition of bitumen and its properties, you can refer to Wikipedia’s entry on Bitumen.

    Surface Type Matters: Where Are You Applying It?

    The porosity of the surface you are sealing affects absorption and drying speed.

    Surface TypePorosityEstimated Drying TimeNotes
    Asphalt ShinglesMedium24–48 HoursStandard application. Ensure shingles are clean.
    Metal RoofingLow (Non-porous)48–72 HoursTar sits on top rather than soaking in. Requires primer for best adhesion.
    Concrete/TileHigh12–24 HoursAbsorbs some solvents, speeding up surface drying.
    Wood DeckingVery High12–24 HoursAbsorbs quickly, but ensure wood is dry before application.
    How Long Does It Take For Roofing Tar To Dry

    Step-by-Step Guide to Applying Roofing Tar Correctly

    To ensure the fastest and most effective drying time, follow this professional workflow. Rushing the preparation phase is the leading cause of premature failure.

    Step 1: Clean the Area Thoroughly

    Tar will not stick to dirt, moss, or loose granules. Use a stiff brush to sweep away debris. If there is old, cracked tar, scrape it off with a putty knife.

    • Pro Tip: Use a rag soaked in mineral spirits to wipe away oily residues. Let this evaporate completely before proceeding.

    Step 2: Check the Weather Window

    Do not apply tar if rain is forecasted within the next 48 hours. Ideally, choose a day with low humidity and moderate temperatures. Avoid applying late in the afternoon, as dew formation overnight can hinder the curing process.

    Step 3: Apply in Thin Layers

    Use a trowel or a specialized roofing brush. Spread the tar evenly.

    • Amount: Aim for a layer no thicker than a credit card.
    • Technique: Work from the center outward to push out air bubbles. Air pockets trap moisture and prevent proper curing.

    Step 4: Allow Proper Curing Time

    Resist the urge to test the stickiness with your fingers repeatedly. Every time you touch it, you introduce oils and potentially disrupt the forming skin. Mark your calendar and wait at least 48 hours before walking on the area.

    Common Mistakes That Delay Drying

    Even with the best intentions, several errors can prolong the drying process or ruin the repair entirely.

    • Applying Over Wet Surfaces: Never apply tar to a damp roof. The water trapped underneath will turn to steam when the sun hits it, causing the tar to bubble and peel.
    • Using Old or Expired Product: Roofing tar has a shelf life. If it has separated excessively or smells unusually sharp, it may not cure properly.
    • Ignoring Primer: On non-porous surfaces like metal or PVC, using a compatible primer helps the tar bond and can slightly improve drying consistency by creating a uniform base.

    Safety Precautions When Working with Roofing Tar

    Roofing tar contains volatile organic compounds (VOCs) and can be hazardous if not handled correctly.

    1. Ventilation: Always work in a well-ventilated area. The fumes can be strong and dizzying.
    2. Protective Gear: Wear nitrile gloves and safety glasses. Tar is incredibly difficult to remove from skin and can cause burns if hot-applied.
    3. Clothing: Wear old clothes. Once tar gets on fabric, it is nearly impossible to wash out.
    4. Fire Safety: Some roofing tars are flammable during application. Keep away from open flames or sparks.

    FAQ Section

    1. Can I speed up the drying process of roofing tar?

    You cannot safely “force” tar to dry faster using heat guns or hair dryers, as this can cause uneven curing and cracking. The best way to speed it up is to apply thinner layers and ensure maximum airflow and sunlight exposure. Choosing a day with low humidity is the most effective natural accelerator.

    2. What happens if it rains before the tar is dry?

    If light mist occurs after the tar has skinned over (usually after 12–24 hours), it may survive. However, heavy rain within the first 24 hours will likely wash away the uncured tar or cause it to emulsify (turn milky and weak). If this happens, you must let the area dry completely and reapply the tar.

    3. Is roofing tar waterproof immediately after application?

    No. While it begins to repel water once a skin forms, it is not fully waterproof until it is cured. Walking on it or exposing it to standing water before 48 hours can create pinholes or weak spots that lead to leaks later.

    4. Can I paint over roofing tar?

    Standard latex or oil-based paints will not adhere to roofing tar because the tar remains slightly flexible and oily. You must use a specialized elastomeric roof coating or an aluminum-based roof paint designed to bond with asphalt products. Always check the manufacturer’s label for compatibility.

    5. How do I know if the tar is fully cured?

    A fully cured patch will be hard to the touch, similar to the surrounding shingles. It should not leave any residue on your finger when pressed firmly. If it feels soft, gummy, or leaves a black mark, it is not yet cured.

    6. Does cold weather ruin roofing tar?

    Cold weather doesn’t necessarily ruin it, but it prevents it from curing properly. If you apply tar in temperatures below 40°F (4°C), it may remain tacky indefinitely until the weather warms up. For winter repairs, consider using cold-process asphalt cements specifically formulated for lower temperatures.

    Conclusion

    Knowing how long does it take for roofing tar to dry is essential for a successful DIY roof repair. While the surface may feel dry in 24 to 48 hours, full curing takes up to two weeks. By applying thin layers, choosing the right weather conditions, and exercising patience, you can ensure a durable, leak-proof seal that protects your home for years to come.

    Remember, patience is your best tool. Rushing the process often leads to having to redo the job twice. If you found this guide helpful, please share it with your friends or on social media to help other homeowners tackle their roof repairs with confidence!
  • Spot Roof Hail Damage Fast: A Homeowner’s Guide

    Spot Roof Hail Damage Fast: A Homeowner’s Guide

    Storm season can be stressful for any homeowner. One minute the sky is clear, and the next, ice pellets are battering your home, leaving you wondering about the structural integrity of your most important asset. If you are asking yourself, “How Can You Tell If Your Roof Has Hail Damage,” you are not alone. Many homeowners miss subtle signs until a leak appears, leading to costly repairs that could have been prevented with early detection. This guide will walk you through exactly what to look for, helping you protect your investment and peace of mind.


    Why Early Detection of Hail Damage Matters

    Hail damage is often deceptive. Unlike wind damage, which might tear off shingles immediately, hail damage can compromise the protective granule layer of your roof without causing an immediate leak. Over time, UV rays penetrate these weakened spots, causing the asphalt to dry out, crack, and eventually fail.

    According to the Insurance Information Institute, weather-related incidents account for a significant portion of property insurance claims in the United States. Identifying damage early ensures you can file a claim within the statute of limitations and prevent minor issues from becoming major structural failures.


    What Does Hail Damage Look Like on Different Roof Types?

    Not all roofs react to hail the same way. The material of your roof dictates the type of evidence you should look for. Here is a breakdown of common roofing materials and their specific vulnerability signs.

    1. Asphalt Shingles (Most Common in the US)

    Asphalt shingles are susceptible to bruising and granule loss. When hail hits, it knocks off the ceramic granules that protect the shingle from the sun.

    • Black Spots: Look for dark, circular marks where the granules have been knocked away, exposing the black asphalt underneath.
    • Soft Spots: If you gently press on a suspect area (safely from a ladder), it may feel soft or spongy compared to surrounding shingles. This indicates the matting beneath has been fractured.
    • Shiny Edges: Fresh impacts often leave a shiny appearance on the exposed asphalt before it oxidizes and turns dull gray.

    2. Metal Roofs

    Metal roofs are durable but not immune. Hail can cause cosmetic dents that may affect the coating over time.

    • Dents: Look for round depressions that match the size of the hailstones.
    • Paint Chipping: Check for areas where the protective paint or coating has chipped off around the dent, which can lead to rust.

    3. Wood Shakes and Shingles

    Wood is brittle and can split upon impact.

    • Fresh Splits: Look for orange or light-colored wood fibers inside cracks. Old splits will be gray and weathered.
    • Impact Marks: Circular bruises or indentations where the hail struck the wood surface.

    Key Signs: How Can You Tell If Your Roof Has Hail Damage?

    To accurately assess your roof, you need to know the specific indicators. Here are the primary red flags that suggest hail has compromised your roofing system.

    Random Pattern of Impact

    Unlike wear and tear, which follows a pattern (such as near valleys or ridges), hail damage is random. You will see marks scattered across the roof slope without a logical geometric arrangement. If you see damage only on one side of the house, it likely corresponds to the direction the storm was blowing.

    Granule Loss in Gutters

    One of the easiest ways to check for damage without climbing onto the roof is to inspect your gutters and downspouts.

    • Accumulation: After a storm, if you find an unusual amount of sand-like granules in your gutters, it is a strong indicator that your shingles have taken a beating.
    • Clogging: Excessive granules can clog drainage systems, leading to water backup and potential interior damage.

    Dented Flashing and Vents

    Your roof accessories are often more vulnerable than the shingles themselves. Check the metal flashing around chimneys, vents, and skylights.

    • Dents: Soft metals like aluminum or copper will show clear dents.
    • Loose Seals: Impact can loosen the sealant around these fixtures, creating entry points for water.

    Comparison Table: Hail Damage vs. Normal Wear

    FeatureHail DamageNormal Aging/Wear
    PatternRandom, scatteredUniform, consistent
    Granule LossSharp, circular bare spotsGradual thinning over time
    Shingle ConditionBruised, soft spotsCurling, cracking at edges
    TimingOccurs suddenly after a stormDevelops over years
    Color of ExposureShiny/black initiallyDull/gray throughout
    How Can You Tell If Your Roof Has Hail Damage
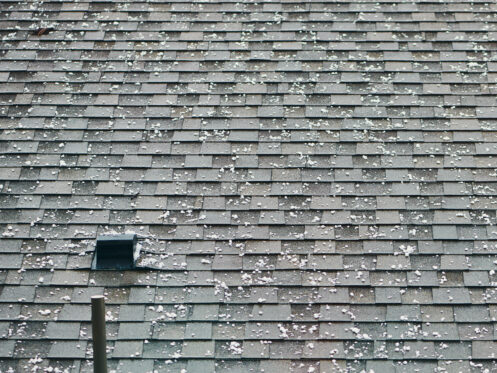
    Roof shingles with large hailstones after hail storm

    Step-by-Step: How to Inspect Your Roof Safely

    Safety is paramount. Never climb onto a wet or steep roof. Follow these steps to conduct a preliminary inspection from the ground and a safe vantage point.

    1. Wait for Clear Weather: Ensure the storm has completely passed and the roof is dry. Wet roofs are slippery and dangerous.
    2. Use Binoculars: Stand at a distance where you can see the entire roof slope. High-quality binoculars allow you to spot missing granules or dents without risking a fall.
    3. Check Ground Level Evidence: Look for dings on your siding, window screens, air conditioning units, and mailbox. If these items are damaged, your roof likely is too. For more context on how hail forms and its physical properties, you can refer to Wikipedia’s article on Hail.
    4. Inspect the Gutters: Use a sturdy ladder to look inside your gutters. Wear gloves to protect your hands from sharp metal edges. Look for the “sand” of lost granules.
    5. Look for Interior Signs: Check your attic for water stains, daylight coming through the roof deck, or damp insulation. These are late-stage signs of damage.

    When to Call a Professional Roofer

    While DIY inspections are useful, they have limitations. You should contact a licensed roofing contractor if:

    • You see visible cracks or missing shingles.
    • You notice water stains on your ceiling or walls.
    • The storm involved hail larger than 1 inch in diameter (quarter-sized).
    • You are unsure about the extent of the damage.

    Professional roofers have the training to distinguish between hail damage and manufacturer defects or installation errors. This distinction is crucial for insurance claims, as insurers may deny coverage for pre-existing conditions.


    FAQ Section

    1. Will my insurance cover hail damage to my roof?

    Most standard homeowners’ insurance policies cover hail damage. However, coverage depends on your deductible and the age of your roof. Some policies have separate wind/hail deductibles, which may be higher than your standard deductible. Always review your policy details or speak with your agent.

    2. Can hail damage cause leaks immediately?

    Not always. Hail often causes “bruising” that weakens the shingle. It may take months or even years of UV exposure and thermal cycling for the damaged area to crack and leak. This is why immediate inspection is vital, even if you don’t see water inside.

    3. How big does hail need to be to damage a roof?

    Hail as small as 1 inch (the size of a quarter) can cause damage to asphalt shingles, especially if they are older or brittle. Larger hail (1.5 inches or more) can cause significant structural damage to almost any roofing material.

    4. Should I repair or replace my roof after hail damage?

    This depends on the severity. If less than 30% of the roof is damaged, repairs might suffice. However, if the damage is widespread, or if the shingles are old, a full replacement is often more cost-effective and ensures uniform protection. A professional assessment is necessary to make this call.

    5. How long do I have to file a hail damage claim?

    Time limits vary by state and insurance provider, but generally, you should file a claim as soon as possible. Most insurers require notification within one year of the event, but waiting too long can complicate the proof of causation.


    Conclusion

    Knowing how can you tell if your roof has hail damage empowers you to act quickly and protect your home. By looking for random patterns of granule loss, checking your gutters, and inspecting metal fixtures, you can identify potential issues before they become expensive leaks. Remember, early detection is key to maximizing your insurance claim and extending the life of your roof.

    If you suspect damage, don’t wait for the next rainstorm to reveal the problem. Schedule a professional inspection today. Found this guide helpful? Share it with your neighbors on social media to help them protect their homes too!

  • Spot Roof Hail Damage Fast: A Homeowner’s Guide

    Spot Roof Hail Damage Fast: A Homeowner’s Guide

    Have you just weathered a nasty storm, and now you’re staring up at your shingles with a knot in your stomach? It is completely normal to feel anxious about potential structural issues after severe weather, but panic won’t help your home. Understanding how do you know if your roof has hail damage is the first step toward protecting your investment and ensuring your family stays safe and dry.

    In this guide, we will walk you through exactly what to look for, how to inspect your property safely, and when it is time to bring in the professionals. Let’s turn that uncertainty into actionable knowledge.

    Why Early Detection of Hail Damage Matters

    Hailstorms are becoming increasingly frequent and severe across many parts of the United States. According to recent climate data, billion-dollar hail events are no longer rare occurrences. When ice chunks strike your roof, they don’t just make noise; they compromise the integrity of your roofing materials.

    Ignoring these signs can lead to:

    • Water Intrusion: Even small cracks can allow moisture to seep into your attic, leading to mold and rot.
    • Reduced Lifespan: A roof that should last 20 years might fail in 10 if hail damage is left untreated.
    • Insurance Complications: Most insurance policies require timely reporting of storm damage. Waiting too long can result in denied claims.

    Knowing the specific indicators of hail impact allows you to act quickly, preserving both your home’s value and your peace of mind.

    What Does Hail Damage Look Like on Different Roof Types?

    Not all roofs react to hail the same way. The material you have plays a significant role in how damage manifests. Here is a breakdown of what to expect based on common roofing materials.

    Asphalt Shingles

    Asphalt shingles are the most common roofing material in the US, and they are quite vulnerable to hail. Look for:

    • Black Bruises: These are dark spots where the granules have been knocked off, exposing the asphalt underneath.
    • Shiny Spots: If you see areas that look unusually shiny or smooth, the protective granule layer has likely been stripped away.
    • Cracked Shingles: Hail can cause fractures that run along the shingle, which may not be visible from the ground.

    Metal Roofs

    Metal roofs are durable, but they are not invincible. Hail damage on metal usually appears as:

    • Dents: Circular depressions that match the size of the hailstones.
    • Paint Chipping: Impact points may chip away the protective coating, leading to rust over time.

    Wood Shakes and Tiles

    • Wood: Look for splits, orange-brown discoloration (fresh wood exposure), or impact marks with sharp edges.
    • Clay/Concrete Tiles: These may crack or shatter entirely. Listen for loose pieces rattling in the gutters after a storm.

    Pro Tip: Always compare the damage on your roof to other objects around your property. If your air conditioner unit, window screens, or mailbox show dents, your roof likely sustained impact as well.

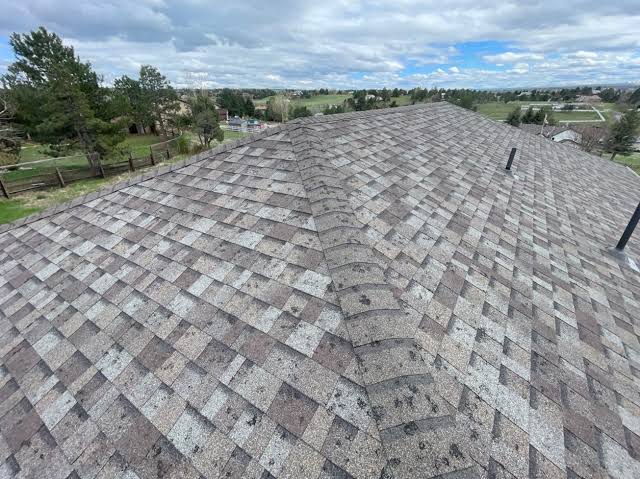
    How Do You Know If Your Roof Has Hail Damage

    Step-by-Step: How to Inspect Your Roof Safely

    You do not need to climb onto your roof to identify most hail damage. In fact, walking on a damaged roof can cause further harm and void warranties. Follow this safe, ground-level inspection routine.

    1. Check Your Gutters and Downspouts

    Start by looking at your gutter system. Hail knocks granules off asphalt shingles, and these granules wash into the gutters.

    • What to look for: An accumulation of sand-like granules. While some granule loss is normal over time, a sudden surge after a storm is a red flag.
    • Action: Clean out a section of the gutter. If you find a thick layer of granules mixed with debris, note it as evidence.

    2. Inspect Ground-Level Fixtures

    Look at items that sit at the same elevation as your roof or slightly lower.

    • Vents and Pipes: Check plastic vent caps or pipe flashings for cracks or dents.
    • Soft Metal: Aluminum flashing around chimneys or valleys is soft and easily dented. Dents here suggest significant hail impact.

    3. Use Binoculars for a Closer Look

    Stand at various corners of your house and use binoculars to scan the roof surface.

    • Pattern Recognition: Hail damage is often random but widespread. Look for clusters of dark spots or missing granules.
    • Lighting: Inspect during the early morning or late afternoon when the sun is low. This creates shadows that highlight dents and irregularities.

    4. Document Everything

    Take clear, high-resolution photos of any suspected damage. Include close-ups and wide shots that show the location on the roof. Date-stamp these images for your insurance records.

    Hail Damage vs. Normal Wear and Tear

    One of the biggest challenges homeowners face is distinguishing between age-related wear and storm damage. Here is a quick comparison to help you tell the difference.

    FeatureHail DamageNormal Wear & Tear
    PatternRandom, scattered impactsUniform, consistent aging
    Granule LossSharp, distinct bare spotsGradual thinning over large areas
    Shingle ConditionCracks with sharp edgesCurling, blistering, or softening
    Surrounding ItemsDents on AC units, cars, etc.No corresponding damage elsewhere
    TimingAppears immediately after a stormDevelops slowly over years

    If you are unsure, remember that hail damage is typically accompanied by collateral damage to other property features. If your car is fine and the trees are untouched, it might just be an old roof.

    When to Call a Professional Roofer

    While DIY inspections are great for initial assessments, they have limits. You should contact a licensed roofing contractor if:

    • You see visible cracks or missing shingles.
    • You notice water stains on your ceiling or walls inside the home.
    • The storm involved hail larger than 1 inch in diameter (quarter-sized or bigger).
    • You are planning to file an insurance claim.

    A professional roofer can perform a thorough inspection using safety harnesses and provide a detailed report. This documentation is crucial for insurance adjusters. For more information on how roofing materials are tested for durability, you can refer to general standards on Wikipedia.

    Navigating the Insurance Claim Process

    If you confirm damage, the next step is dealing with insurance. Here is how to streamline the process:

    1. Review Your Policy: Check your deductible and coverage limits. Understand if you have “Actual Cash Value” or “Replacement Cost” coverage.
    2. File Promptly: Most insurers have a deadline for filing storm claims, often within one year of the event.
    3. Get Multiple Estimates: Obtain at least two quotes from reputable local roofers. Do not automatically accept the insurance adjuster’s first offer if it seems low.
    4. Keep Records: Save all receipts, photos, and correspondence.

    Note: Be wary of “storm chasers”—contractors who descend on a neighborhood after a storm offering cheap repairs. Always verify licenses and check reviews before signing a contract.

    FAQ: Common Questions About Roof Hail Damage

    1. Can hail damage cause leaks immediately?

    Not always. Sometimes the damage is cosmetic initially, but the compromised shingles degrade faster under UV exposure, leading to leaks months or even years later. However, severe hail can puncture shingles, causing immediate leaks.

    2. How big does hail need to be to damage a roof?

    Generally, hail needs to be at least 1 inch in diameter (the size of a quarter) to cause significant functional damage to standard asphalt shingles. Smaller hail can cause cosmetic bruising, but larger stones are required to crack or break shingles.

    3. Will my insurance cover hail damage?

    Most standard homeowners insurance policies cover hail damage. However, coverage depends on your specific policy terms, deductible, and whether the damage is deemed “cosmetic” or “functional.” Some policies exclude cosmetic damage entirely.

    4. How long do I have to file a claim for hail damage?

    This varies by insurer and state, but typically you have one to two years from the date of the storm. It is best to file as soon as possible while evidence is fresh and contractors are available.

    5. Can I repair hail damage myself?

    Minor cosmetic issues might seem fixable, but roof repair is dangerous and complex. Improper repairs can void warranties and lead to leaks. It is highly recommended to hire a professional for any structural or waterproofing repairs.

    Conclusion

    Knowing how do you know if your roof has hail damage empowers you to take control of your home maintenance. By recognizing the signs—such as black bruises, granule loss, and dented fixtures—you can prevent minor issues from becoming major headaches. Remember, early detection saves money, extends your roof’s life, and simplifies the insurance process.

    Don’t wait for a leak to appear. If you suspect your roof took a hit during the last storm, perform a safe ground-level inspection today. If you found this guide helpful, please share it with your neighbors on social media. Staying informed together helps our entire community stay safe and secure.