Leaking roofs are the nightmare of every RV owner. One small crack can lead to massive water damage, ruining insulation, wood framing, and your peace of mind. If you are staring at a worn-out roof and wondering how much does it cost to recoat an RV roof, you are not alone. This guide breaks down the real costs, helping you decide whether to grab a brush or call a pro.
Understanding the Average Cost Breakdown
The short answer? Recoating an RV roof typically costs between $300 and $1,500. However, this range is broad because it depends heavily on the size of your rig, the type of coating used, and who does the work.
For a standard Class C motorhome or a large travel trailer (25–30 feet), most owners spend around $600 to $900 for materials if they choose the DIY route. If you hire a professional mobile RV technician, expect to pay between $1,200 and $2,500, including labor and premium materials.
Why the discrepancy? Labor is the biggest variable. Professional technicians charge for their expertise, insurance, and the convenience of not having to climb onto your roof yourself. However, the material cost remains relatively stable across the board.
| RV Size | DIY Material Cost | Professional Service Cost |
|---|---|---|
| Small (Under 20 ft) | $250 – $400 | $800 – $1,200 |
| Medium (20-30 ft) | $400 – $700 | $1,200 – $1,800 |
| Large (30+ ft) | $700 – $1,000+ | $1,800 – $2,500+ |
What Factors Influence the Price of Recoating?
Before you budget, you need to understand what drives the price up or down. It is not just about the square footage.
1. Type of Coating Material
Not all coatings are created equal. The three most common types are:
- Acrylic Coatings: These are water-based, eco-friendly, and reflect UV rays well. They are generally the cheapest option but may require reapplication every 3–5 years.
- Silicone Coatings: Highly durable and waterproof, silicone forms a seamless barrier. It is more expensive than acrylic but lasts longer.
- Liquid Rubber (EPDM): This is the gold standard for many RVers. It bonds directly to EPDM rubber roofs and is incredibly flexible. It sits in the mid-to-high price range but offers superior longevity.
2. Roof Condition and Prep Work
If your roof has minor cracks, a simple cleaning and coat will suffice. However, if there is delamination, significant tears, or old adhesive residue, the prep work increases. You might need to purchase patch kits, primers, or sealants before applying the main coat. Ignoring prep work is the number one reason coatings fail.
3. Geographic Location
Labor costs vary by state. A technician in California or New York will charge significantly more than one in the Midwest. Additionally, shipping heavy gallons of coating material can add to your DIY costs if you cannot find them locally.
DIY vs. Hiring a Pro: Which Is Right for You?
This is the most critical decision you will make. Let’s look at the pros and cons to help you choose.
The DIY Approach
Pros:
- Cost Savings: You save 50–60% by eliminating labor costs.
- Control: You choose exactly which products to use.
- Satisfaction: There is pride in maintaining your own rig.
Cons:
- Physical Risk: Climbing on an RV roof can be dangerous, especially if it is slippery or steep.
- Time-Consuming: Proper cleaning, drying, and application can take a full weekend.
- Warranty Issues: Some manufacturers void warranties if non-approved products are used.
The Professional Approach
Pros:
- Expertise: Pros know how to handle tricky areas like vents, AC units, and seams.
- Speed: They can often complete the job in one day.
- Warranty: Many pros offer a labor warranty on their work.
Cons:
- Higher Cost: You pay for convenience and skill.
- Scheduling: You may have to wait weeks for an appointment during peak season.
Expert Insight: According to industry standards, proper surface preparation accounts for 80% of the success of any roofing project. Whether you DIY or hire out, never skip the cleaning phase. For more details on roofing materials, you can refer to general construction standards on Wikipedia.
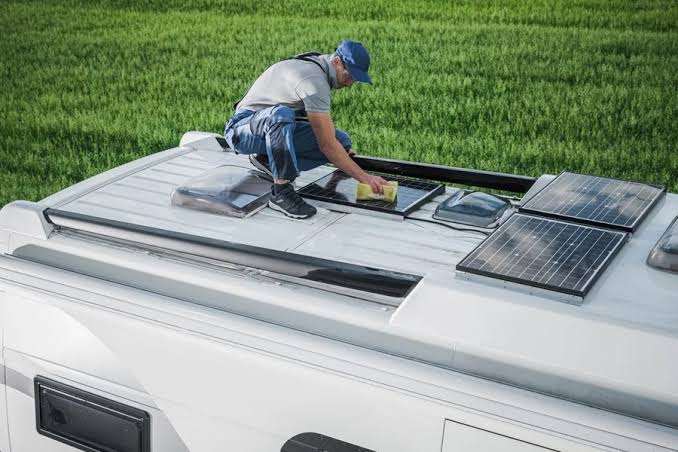
Step-by-Step Guide to Recoating Your RV Roof
If you decide to tackle this project yourself, follow these steps to ensure a long-lasting finish.
Step 1: Safety First
Ensure your RV is parked on level ground. Use a sturdy ladder with stabilizers. Wear non-slip shoes and consider using a safety harness if your roof is high or slippery.
Step 2: Thorough Cleaning
You cannot coat over dirt. Use a dedicated RV roof cleaner or a mixture of mild dish soap and water. Scrub the entire surface with a soft-bristle brush. Pay special attention to seams and around fixtures.
- Tip: Avoid pressure washers on high settings, as they can force water under existing seals.
Step 3: Inspect and Repair
Walk the roof (carefully) and look for cracks, bubbles, or loose seams. Use a compatible sealant or patch kit to fix any damage. Allow repairs to cure completely according to the product instructions.
Step 4: Masking and Priming
Use painter’s tape to mask off areas you do not want coated, such as solar panels or AC units. If your chosen coating requires a primer (common for metal or fiberglass roofs), apply it now and let it dry.
Step 5: Apply the Coating
Stir the coating thoroughly. Using a high-quality roller with an extension pole, apply the first coat evenly. Work in small sections to maintain a “wet edge.”
- Quantity: Most roofs require two coats. Wait for the first coat to dry (usually 4–6 hours, depending on humidity) before applying the second.
Step 6: Clean Up and Cure
Remove the tape while the final coat is still slightly tacky to avoid peeling. Allow the roof to cure for at least 24–48 hours before exposing it to rain or heavy dew.
Frequently Asked Questions (FAQ)
How often should I recoat my RV roof?
Most experts recommend recoating every 3 to 5 years. However, this depends on the climate. If you live in an area with intense sun exposure or harsh winters, you may need to do it more frequently. Annual inspections are crucial to catch wear early.
Can I recoat over an existing coating?
Yes, in most cases. However, the existing coating must be firmly adhered, clean, and free of mold or mildew. If the old coating is peeling or flaking, it must be removed entirely before applying a new layer. Check with the manufacturer of your new coating for compatibility.
What is the best time of year to recoat an RV roof?
The ideal time is during spring or early fall. You need temperatures between 50°F and 90°F (10°C–32°C) for proper curing. Avoid rainy seasons or extreme heat, as these can affect the bonding and drying process.
Does recoating void my RV warranty?
It depends. Some RV manufacturers require specific types of coatings or professional application to maintain the roof warranty. Always check your owner’s manual or contact the manufacturer before starting. Using third-party coatings without approval may void coverage for roof-related leaks.
How long does the recoating process take?
For a DIYer, plan for two days. Day one is for cleaning, repairing, and applying the first coat. Day two is for applying the second coat. Professionals can often complete the job in one long day, but curing time remains the same.
Conclusion
Knowing how much does it cost to recoat an RV roof empowers you to make the right financial decision for your rig. Whether you spend $400 doing it yourself or $1,500 hiring a pro, the investment is far cheaper than replacing a water-damaged interior.
Remember, the key to longevity is not just the product you buy, but the preparation you put in. A clean, well-prepped roof ensures your coating bonds correctly and protects your home on wheels for years to come.
Did you find this guide helpful? Share it with your fellow RVers on Facebook or Pinterest to help them protect their investments too! Safe travels and dry roofs!