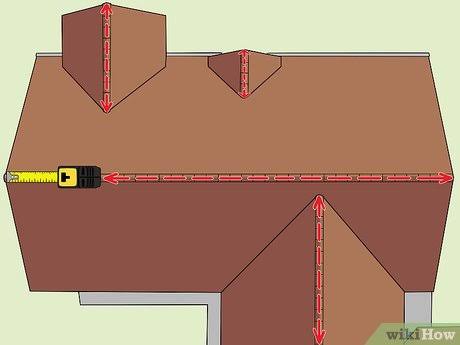
Tag: DIY Roofing Tips

  • How to Install a Ridge Vent on a Shingle Roof

    How to Install a Ridge Vent on a Shingle Roof

    Is your attic trapping heat like an oven, causing your AC to work overtime? Poor ventilation can lead to premature shingle failure and costly moisture damage. Learning how to install a ridge vent on a shingle roof is one of the most effective DIY upgrades you can make to protect your home’s structural integrity and improve energy efficiency.

    In this comprehensive guide, we will walk you through the entire process, from safety preparations to the final shingle placement. Whether you are a seasoned DIYer or a cautious homeowner, this tutorial provides the clarity and confidence you need to get the job done right.

    Why Ridge Vents Are Superior for Attic Ventilation

    Before we pick up a hammer, it is crucial to understand why you are doing this. Ridge vents are widely considered the gold standard in residential roofing ventilation. Unlike box vents or turbine vents that puncture the roof field, ridge vents run continuously along the peak of your roof.

    This continuous design allows hot air and moisture to escape uniformly across the entire length of the attic. According to building science principles, proper ventilation requires a balance of intake (usually at the soffits) and exhaust (at the ridge). A ridge vent creates a natural convection current, often referred to as the “stack effect,” which pulls cool air in from the bottom and pushes hot air out the top.

    The Benefits at a Glance

    FeatureRidge VentBox/Turbine Vents
    AestheticsLow profile, nearly invisibleBulky, visible protrusions
    CoverageContinuous exhaust along the peakSpot ventilation only
    Leak RiskLow (if installed correctly)Higher (multiple penetration points)
    MaintenanceMinimal to noneMoving parts may jam or wear out

    By choosing a ridge vent, you are opting for a solution that is both aesthetically pleasing and functionally superior. For more detailed information on building standards regarding ventilation, you can refer to general construction guidelines on Wikipedia.

    Essential Tools and Materials Checklist

    Preparation is half the battle in any roofing project. Having the right tools on hand prevents unnecessary trips up and down the ladder, keeping you safe and efficient.

    Tools Required:

    • Circular saw with a depth-adjustable blade
    • Reciprocating saw (for cutting near obstacles)
    • Hammer or pneumatic nail gun
    • Chalk line
    • Tape measure
    • Utility knife
    • Safety harness and non-slip shoes
    • Ladder stabilizer

    Materials Needed:

    • Ridge vent rolls (plastic or aluminum)
    • Roofing nails (galvanized, 1-3/4 inch)
    • Cap shingles (matching your existing roof color)
    • Roofing cement (optional, for extra sealing)
    • Drip edge flashing (if replacing old ridge caps)
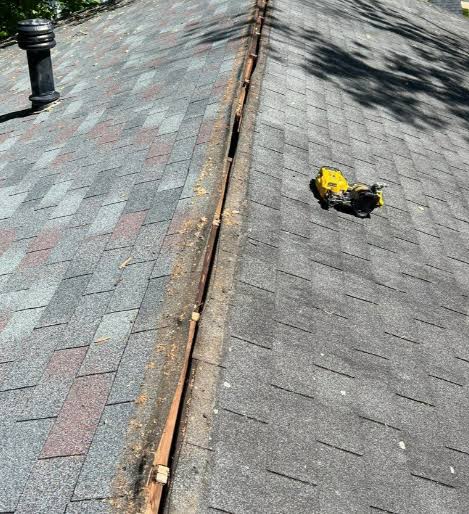
    How To Install A Ridge Vent On A Shingle Roof

    Step-by-Step Guide: How to Install a Ridge Vent on a Shingle Roof

    Follow these steps carefully. Remember, working on a roof involves height risks. If you feel uncomfortable at any point, please consult a professional roofer.

    Step 1: Safety First and Site Preparation

    Never underestimate the danger of a sloped surface. Ensure your ladder is secure and use a roof anchor system if the pitch is steep. Check the weather forecast; you need a dry, calm day. Wet shingles are slippery, and wind can make handling large rolls of ridge vent difficult.

    Clear the work area of debris. If there are old box vents near the ridge, plan to remove them later, as the ridge vent will replace their function.

    Step 2: Remove Existing Ridge Cap Shingles

    Start by removing the existing cap shingles along the ridge line. Use a flat bar or pry bar to gently lift the nails. Be careful not to damage the underlying field shingles too much, although some wear is expected.

    Remove all nails and debris. You should expose the original ridge board or the top layer of sheathing. Measure the length of the ridge where you intend to install the vent.

    Step 3: Mark and Cut the Ventilation Slot

    This is the most critical technical step. You need to cut a slot along the peak of the roof to allow air to flow from the attic into the vent.

    1. Measure: Determine the width of the slot based on the manufacturer’s instructions for your specific ridge vent product. Typically, this is between 2 to 3 inches wide.
    2. Mark: Snap a chalk line on both sides of the ridge centerline to ensure a straight cut.
    3. Set Depth: Adjust your circular saw blade depth to exactly 1 inch. This is vital. You want to cut through the roof sheathing (plywood or OSB) but not through the rafters or trusses below. Cutting into structural members compromises the roof’s integrity.
    4. Cut: Carefully cut along the chalk lines. Use a reciprocating saw for the ends or around any obstructions like plumbing stacks.

    Remove the cut strip of wood. You should now see the open attic space below. Check for any protruding nails from the underside and hammer them flat.

    Step 4: Install the Ridge Vent Roll

    Unroll the ridge vent material along the peak. Most modern ridge vents come in flexible rolls that conform to the roof’s shape.

    1. Positioning: Center the vent over the slot you just cut. The mesh or baffles inside the vent should face downward into the attic.
    2. Securing: Start at one end of the ridge. Nail the vent down using galvanized roofing nails. Place nails every 6 to 8 inches along the flange of the vent.
    3. Overlap: If you need multiple rolls, overlap the ends by at least 2 inches to ensure continuous airflow and prevent water intrusion.

    Ensure the vent lies flat against the roof deck. Any gaps can allow rain-driven snow or insects to enter.

    Step 5: Install the Cap Shingles

    Now that the vent is secure, you need to cover it with shingles to protect it from the elements and blend it with your roof.

    1. Prepare Cap Shingles: If you don’t have pre-cut cap shingles, you can cut standard three-tab shingles into thirds.
    2. Nailing Pattern: Place the first cap shingle at the end of the ridge. Nail it down with two nails per side, ensuring the nails penetrate the vent’s nailing flange but do not pierce the ventilation channel itself.
    3. Overlapping: Each subsequent shingle should overlap the previous one by about 5 to 6 inches, following the exposure line recommended by the shingle manufacturer. This ensures water sheds correctly down the roof.
    4. Sealing: In high-wind areas, apply a dab of roofing cement under the leading edge of each cap shingle for added security.

    Continue this process until you reach the other end of the ridge. Trim the final shingle to fit flush with the edge of the roof.

    Common Mistakes to Avoid

    Even experienced DIYers can stumble. Here are the most frequent errors when learning how to install a ridge vent on a shingle roof:

    • Cutting Too Deep: As mentioned, cutting into rafters is a structural hazard. Always double-check your saw depth.
    • Blocking Airflow: Ensure that insulation in the attic does not block the soffit vents. If air cannot get in, it cannot get out through the ridge vent.
    • Using Wrong Nails: Standard steel nails will rust quickly. Always use galvanized or stainless steel roofing nails to prevent staining and failure.
    • Ignoring Local Codes: Some municipalities have specific requirements for net free vent area (NFVA). Check your local building codes before starting.

    FAQ Section

    1. Can I install a ridge vent on an existing roof without replacing all shingles?

    Yes, you can. The process involves removing only the ridge cap shingles and cutting the slot. The field shingles remain intact. However, if your existing shingles are very old or brittle, they may crack during the process, so proceed with caution.

    2. How long does it take to install a ridge vent?

    For an average-sized home (approx. 2,000 sq. ft.), a two-person team can typically complete the installation in 4 to 6 hours. A solo DIYer might take a full day, especially if it is their first time.

    3. Do ridge vents leak?

    When installed correctly, ridge vents are highly resistant to leaks. The key is proper nailing and overlapping of cap shingles. The design allows water to shed over the top while air escapes from the sides. Using roofing cement on nail heads can provide extra peace of mind.

    4. What if my roof has no soffit vents?

    Ridge vents require intake ventilation to work effectively. If you do not have soffit vents, you may need to install them or use drip-edge vents. Without adequate intake, the ridge vent will not create the necessary airflow, and you might even pull conditioned air from your living space into the attic.

    5. Is plastic or aluminum ridge vent better?

    Both materials are effective. Plastic vents are flexible and easier to install on complex roof lines. Aluminum vents are more rigid and durable but can be harder to bend around curves. Choose the material that best fits your roof’s geometry and your comfort level with installation.

    Conclusion

    Learning how to install a ridge vent on a shingle roof is a rewarding project that pays dividends in comfort and cost savings. By improving your attic’s airflow, you reduce the strain on your HVAC system, prevent moisture buildup, and extend the lifespan of your roofing materials.

    Remember, safety is paramount. Take your time, measure twice, and cut once. If you follow the steps outlined above, you will achieve a professional-looking result that enhances your home’s value.

    Did you find this guide helpful? Share it with your friends on social media who might be considering similar home improvements! Let’s help more homeowners breathe new life into their roofs.
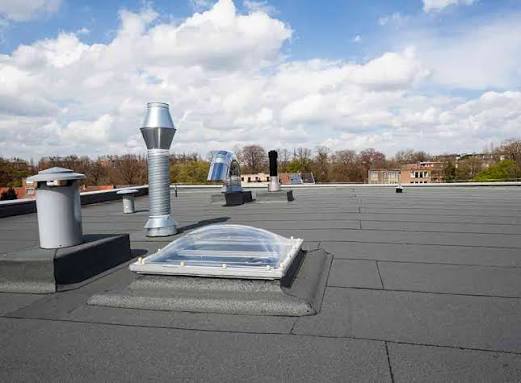
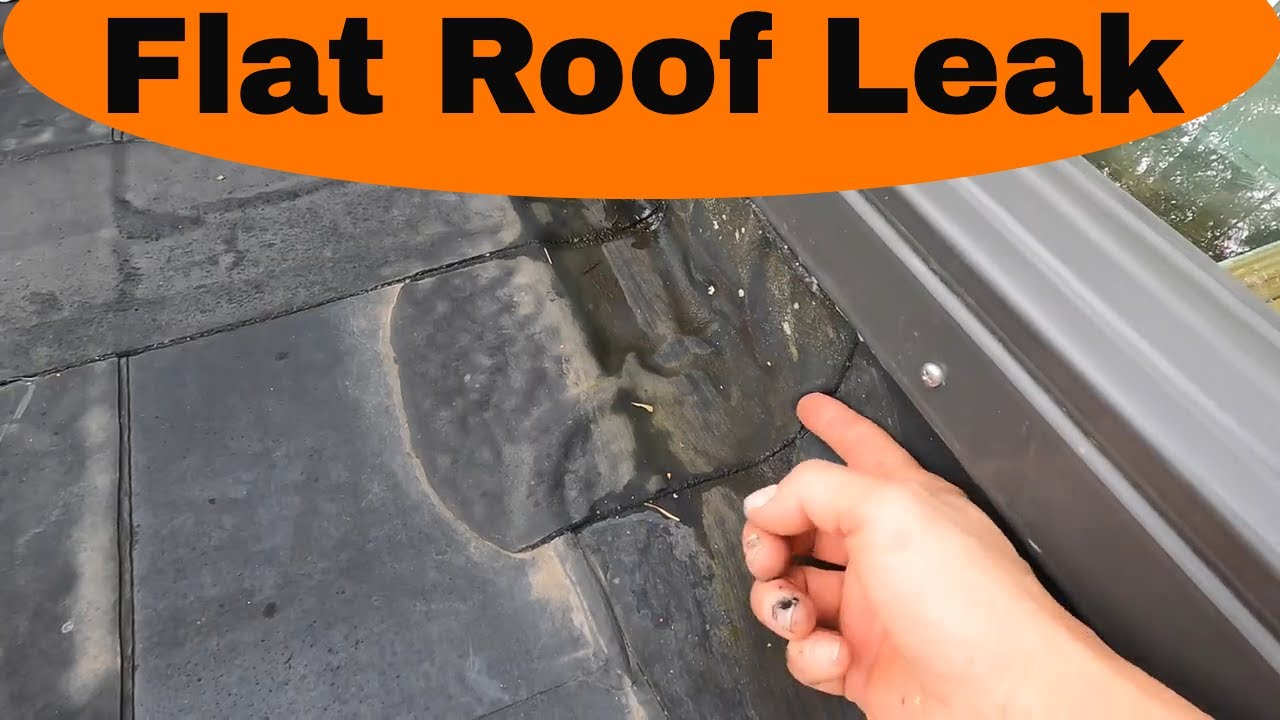
  • How To Find A Roof Leak On A Flat Roof

    How To Find A Roof Leak On A Flat Roof

    Water dripping from your ceiling is one of the most stressful sights for any homeowner or property manager. It signals immediate damage, potential mold growth, and costly repairs if left unchecked. If you are staring at a wet spot and wondering how to find a roof leak on a flat roof, you are not alone; flat roofs are notorious for hiding the source of water intrusion due to their unique drainage dynamics.

    Unlike sloped roofs where gravity quickly directs water away, flat roofs allow water to pool, making the entry point difficult to trace. However, with a systematic approach and the right tools, you can identify the culprit before it causes structural harm. This guide will walk you through professional inspection techniques, safety protocols, and common failure points specific to flat roofing systems.

    Why Is Finding Leaks on Flat Roofs So Difficult?

    Before diving into the detection process, it is crucial to understand why flat roofs behave differently than pitched roofs. In the roofing industry, we often say that “water finds its own level,” but on a flat roof, water also finds every tiny imperfection in the membrane.

    According to data from the National Roofing Contractors Association (NRCA), improper installation and lack of maintenance account for over 60% of premature roof failures. On a flat roof, a leak occurring at point A might manifest as a stain at point B, several feet away. This phenomenon, known as “water migration,” happens because water travels along insulation boards, decking, or vapor barriers before dripping through the ceiling drywall.

    Understanding this migration is key. You are not just looking for a hole; you are looking for the path the water took. For more detailed information on roofing materials and their properties, you can refer to the comprehensive overview on Wikipedia’s Roofing page.

    How To Find A Roof Leak On A Flat Roof

    Step 1: Prioritize Safety and Preparation

    Never compromise safety for the sake of curiosity. Flat roofs can be slippery, especially when wet or covered in debris. Before you climb up, ensure you have the proper gear:

    • Non-slip footwear: Rubber-soled shoes with good traction.
    • Safety harness: If the roof is more than one story high, a fall protection system is mandatory.
    • Clear weather: Never inspect a roof during rain, high winds, or immediately after a storm when surfaces are slick.
    • Helper: Always have someone on the ground who knows you are on the roof.

    Once safe, clear the roof of any loose debris like leaves, branches, or trash. Debris can hold moisture against the membrane, accelerating wear and masking the actual leak source.

    Step 2: Visual Inspection of Common Failure Points

    Most leaks originate from specific weak points rather than the middle of an open field. Start your inspection by examining these high-risk areas:

    1. Flashing and Penetrations

    Flashing is the metal or rubber material used to seal joints around protrusions. Check around:

    • HVAC units
    • Vent pipes
    • Skylights
    • Chimneys

    Look for cracks, rust, or separated seams in the flashing. If the sealant looks brittle or cracked, water is likely entering there.

    2. Roof Drains and Scuppers

    Clogged drains cause water to pool, increasing the hydrostatic pressure on the membrane. Ensure all drains are free of debris. Look for signs of standing water (ponding) that remains more than 48 hours after rainfall. Ponding water accelerates membrane degradation and is a primary cause of leaks.

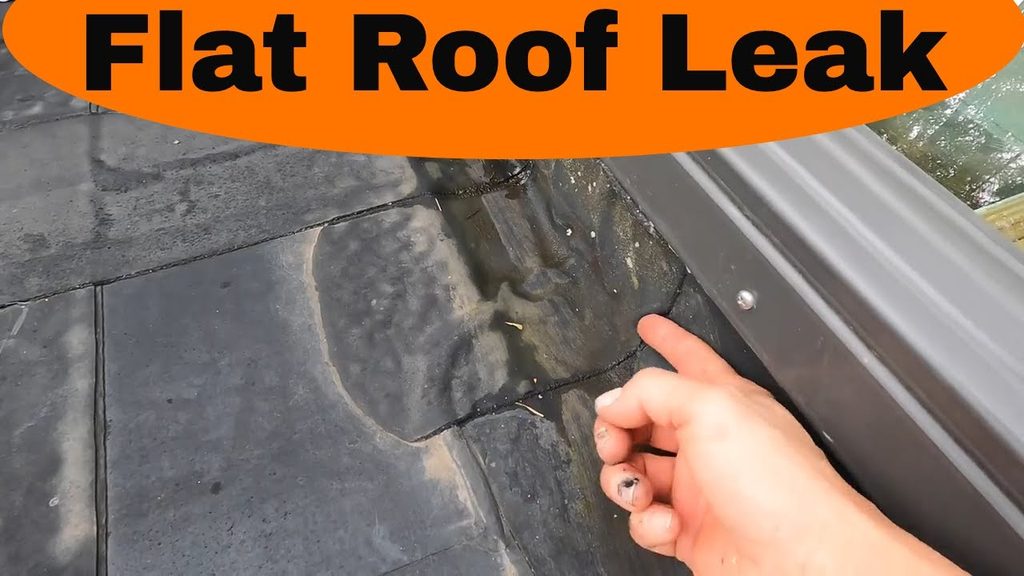
    3. Membrane Seams and Blisters

    Walk the perimeter and the field of the roof. Look for:

    • Blisters: Bubble-like formations indicating trapped air or moisture beneath the membrane.
    • Alligatoring: A pattern of cracks resembling alligator skin, common in older asphalt-based roofs.
    • Open Seams: Areas where the roofing plies have separated.

    Step 3: The Water Hose Test (Controlled Testing)

    If visual inspection doesn’t reveal the source, you may need to perform a controlled water test. This method requires two people: one on the roof with a hose and one inside the building watching the ceiling.

    Procedure:

    1. Isolate Sections: Divide the roof into manageable sections (e.g., 10×10 feet).
    2. Start Low: Begin testing the area closest to the interior leak, not the highest point. Water flows down, so the source is often lower than you think.
    3. Apply Water Slowly: Use a garden hose to gently soak the section for 5–10 minutes. Do not use high pressure, which can force water into intact seams and create false positives.
    4. Wait and Observe: The person inside should watch for drips. If no leak appears, move to the next section uphill.
    5. Mark the Spot: Once the leak reproduces, mark the exact area on the roof with chalk or tape.

    Note: This process can take several hours. Patience is essential.

    Step 4: Advanced Detection Methods

    For complex leaks or large commercial buildings, professional tools may be necessary. While DIYers can rent some of these, others require certified technicians.

    MethodHow It WorksBest For
    Infrared ThermographyDetects temperature differences; wet insulation retains heat differently than dry insulation.Locating hidden moisture under the membrane.
    Electronic Leak DetectionUses electrical current to find breaches in the membrane.Single-ply membranes (EPDM, TPO).
    Dye TestingFluorescent dye is added to water; UV light reveals the path.Tracing complex water migration paths.

    Infrared cameras are particularly effective because they can “see” wet insulation that is not yet visible on the surface. Wet spots appear as dark or light anomalies depending on the time of day and ambient temperature.

    Common Causes of Flat Roof Leaks

    Understanding why leaks happen helps prevent future issues. Here are the top offenders:

    • Poor Installation: Improperly adhered seams or insufficient flashing height.
    • Material Aging: UV exposure breaks down chemical bonds in roofing materials over time.
    • Foot Traffic: Excessive walking on the roof can puncture membranes or dislodge gravel.
    • Vegetation: Roots from weeds or trees can penetrate the roofing layers.

    FAQ Section

    Q1: Can I patch a flat roof leak myself?

    A: Small punctures or minor seam separations can often be patched with roofing cement or a patch kit designed for your specific membrane type (EPDM, TPO, etc.). However, if the leak is near flashing or involves large areas of blistering, professional repair is recommended to ensure a watertight seal.

    Q2: How long does it take to find a leak on a flat roof?

    A: A simple visual inspection might take 30–60 minutes. If a water hose test is required, it can take several hours or even a full day, depending on the roof’s size and the complexity of the water migration.

    Q3: Why is my ceiling leaking when it hasn’t rained recently?

    A: This could be due to condensation from poor attic ventilation, a burst pipe, or residual water from a previous storm that was trapped in the insulation and is slowly releasing. It is crucial to rule out plumbing issues before assuming it is a roof leak.

    Q4: What is the lifespan of a typical flat roof?

    A: Most modern flat roofs last between 15 to 30 years, depending on the material. EPDM and TPO roofs tend to last longer (20–30 years), while built-up roofing (BUR) may require more frequent maintenance. Regular inspections can extend this lifespan significantly.

    Q5: Should I walk on my flat roof?

    A: Only when necessary and with proper safety precautions. Frequent foot traffic can damage the membrane. If you must access the roof, wear soft-soled shoes and avoid dragging equipment across the surface.

    Q6: How much does professional leak detection cost?

    A: Costs vary by region and roof size, but professional leak detection typically ranges from $300 to $1,000. This fee often includes a detailed report and thermal imaging, which can save thousands in unnecessary tear-off costs.

    Conclusion

    Learning how to find a roof leak on a flat roof is a valuable skill that can save you significant money and stress. By prioritizing safety, conducting thorough visual inspections, and using systematic testing methods like the hose test, you can pinpoint the source of water intrusion with confidence. Remember, early detection is key to preventing extensive structural damage and mold growth.

    If the leak proves elusive or the repair seems beyond your comfort level, do not hesitate to call a licensed roofing professional. Their expertise and specialized tools can provide a definitive solution.

    Did you find this guide helpful? Share it with your friends on social media to help them protect their homes too!

  • Best Way to Repair a Flat Roof: Expert Guide

    Best Way to Repair a Flat Roof: Expert Guide

    Leaking roofs are every homeowner’s nightmare, but flat roofs present unique challenges that sloped roofs simply don’t have. If you are staring at a puddle on your ceiling or noticing bubbling material on your rooftop, you are likely wondering what is the best way to repair a flat roof without breaking the bank or causing further damage. This guide provides clear, actionable steps to help you tackle common issues safely and effectively.

    Understanding Your Flat Roof Material

    Before you pick up a trowel or a roll of tape, you must identify what your roof is made of. Using the wrong repair method can void warranties or cause immediate failure. Most residential and commercial flat roofs in the US fall into three categories:

    1. EPDM (Rubber): A black, synthetic rubber membrane. It is durable and flexible.
    2. TPO (Thermoplastic Polyolefin): Usually white or light gray, known for reflecting heat.
    3. Built-Up Roofing (BUR) or Modified Bitumen: Layers of asphalt and fabric, often covered with gravel or a mineral surface.

    According to industry standards, the longevity of these materials varies significantly. For detailed technical specifications on roofing membranes, you can refer to general construction resources like Wikipedia’s entry on Roofing. However, for practical repairs, knowing the material dictates the adhesive or patch kit you must buy.

    What Is the Best Way to Repair a Flat Roof?

    The “best” way depends entirely on the severity of the damage. However, for 80% of minor issues, the most effective method is cleaning the area thoroughly and applying a compatible self-adhering patch or liquid coating.

    Quick fixes like silicone caulk often fail because they do not bond well with UV-exposed roofing materials over time. A proper repair requires mechanical adhesion or chemical welding, depending on the membrane type.

    Step-by-Step: Repairing Small Punctures and Cracks

    If you have a small hole (less than 6 inches) or a hairline crack, follow this precise protocol. This method works best for EPDM and TPO roofs.

    1. Clean the Area: Use a specialized roof cleaner or a mixture of mild dish soap and water. Scrub the area within a 6-inch radius of the damage. Crucial: The surface must be 100% dry. Moisture prevents adhesion.
    2. Round the Corners: If cutting a patch, round the corners. Sharp corners are prone to peeling under thermal expansion and contraction.
    3. Apply Primer (If Required): Some patches require a primer pen. Apply it evenly and let it tack up for 5–10 minutes.
    4. Install the Patch: Peel the backing off the self-adhering patch. Center it over the damage.
    5. Roll It Out: Use a J-roller or a heavy hand roller. Apply firm pressure from the center outward to remove air bubbles. Ensure there are no wrinkles.

    Pro Tip: Always repair on a day when the temperature is between 50°F and 90°F (10°C–32°C). Extreme cold makes membranes brittle; extreme heat makes them too soft to handle properly.

    How Do You Fix a Blister on a Flat Roof?

    Blisters are bubbles trapped under the roofing membrane, caused by moisture turning into steam or poor initial installation. Ignoring them can lead to ruptures.

    The Repair Process:

    • Cut an X: Use a sharp utility knife to cut an “X” shape into the blister. Do not cut through the underlying deck.
    • Dry It Out: Lift the flaps and allow the area to dry completely. You may use a heat gun on a low setting to accelerate drying, but be careful not to burn the membrane.
    • Apply Adhesive: Inject roofing cement or compatible adhesive under the flaps.
    • Press Down: Firmly press the flaps back into place.
    • Patch Over: For added security, place a small patch over the “X” cut using the method described above.
    What Is The Best Way To Repair A Flat Roof

    Dealing with Ponding Water Issues

    Ponding water is water that remains on the roof for more than 48 hours after rainfall. This is not just a cosmetic issue; the weight can stress the structure, and standing water accelerates membrane degradation.

    Why It Happens:

    • Structural sagging.
    • Clogged drains or scuppers.
    • Improper slope during installation.

    The Fix: While re-sloping a roof is a major construction project, you can mitigate minor ponding by:

    1. Clearing Drains: Ensure all drains are free of leaves and debris.
    2. Installing Drainage Mats: These are porous layers placed under the membrane to channel water to drains.
    3. Using Tapered Insulation: In severe cases, adding tapered foam insulation boards can create a slight slope toward drains. This is usually a job for professionals.

    Comparison: DIY Patch Kits vs. Professional Replacement

    When deciding how to proceed, consider the scope of the damage. Here is a quick comparison to help you decide.

    FeatureDIY Patch/CoatingProfessional Replacement
    Cost$50 – $300$5,000 – $15,000+
    Time2 – 4 hours3 – 7 days
    Longevity2 – 5 years (if done correctly)15 – 30 years
    Best ForSmall holes, minor cracks, blistersLarge tears, widespread aging, structural issues
    Skill LevelBeginner to IntermediateExpert Required

    Note: If more than 25% of your roof is damaged, replacement is often more cost-effective than repeated repairs.

    When Should You Call a Professional?

    While DIY repairs are satisfying and economical, some situations demand expert intervention. You should call a licensed roofer if:

    • The Leak Source is Unknown: Water travels. The drip inside your house may be 10 feet away from the actual roof breach. Professionals use moisture meters and infrared cameras to locate hidden leaks.
    • Structural Damage: If the roof deck feels soft or spongy when you walk on it, the wood beneath is rotting. This requires deck replacement, not just membrane repair.
    • Warranty Concerns: Many flat roof manufacturers void warranties if unauthorized repairs are performed. Check your warranty terms before applying any aftermarket products.
    • Large Scale Damage: If you have multiple large blisters or tears spanning several feet, a patch job will likely fail quickly.

    Frequently Asked Questions (FAQ)

    1. Can I use regular tar to repair my flat roof?

    No. Regular asphalt tar is not compatible with modern single-ply membranes like EPDM or TPO. It can cause chemical reactions that degrade the membrane further. Always use manufacturer-approved adhesives or coatings.

    2. How long does a flat roof repair last?

    A properly executed DIY patch can last 3 to 5 years. Professional repairs using heat-welded seams or high-grade coatings can last 10 years or more, depending on weather conditions and maintenance.

    3. What is the best sealant for a flat roof?

    For EPDM roofs, use EPDM-specific splice adhesive or seam tape. For TPO, use TPO-compatible weldable patches. For general maintenance, acrylic or silicone-based roof coatings are popular, but ensure they are compatible with your specific membrane type.

    4. Why is my flat roof leaking after rain?

    Flat roofs leak due to punctures, failed seams, blistering, or clogged drains. Because water does not run off quickly, even a tiny pinhole can allow significant water ingress over time. Regular inspection of seams and drains is critical.

    5. Is it safe to walk on a flat roof?

    Generally, yes, but with caution. Avoid walking on the roof in extreme heat (it can become slippery) or when wet. Always wear soft-soled shoes to avoid puncturing the membrane. If the roof is old or shows signs of sagging, do not walk on it.

    Conclusion

    Knowing what is the best way to repair a flat roof empowers you to maintain your home’s integrity and avoid costly emergency replacements. For minor issues, a clean, dry surface and a compatible patch kit are your best friends. For structural issues or widespread damage, professional assessment is non-negotiable.

    Regular maintenance—clearing drains, inspecting seams, and addressing small punctures immediately—can extend the life of your flat roof by decades. Don’t wait for a major leak to take action.

    Found this guide helpful? Share it with your neighbors or on social media to help others protect their homes from water damage!

  • How to Calculate Roof Square Footage Accurately

    How to Calculate Roof Square Footage Accurately

    Calculating the exact area of your roof is one of the most critical steps in any home renovation or repair project. Getting this number wrong can lead to ordering too much material, wasting money, or worse, running short mid-project and facing price hikes for small batches. If you are wondering how do you get the square footage of a roof, you are not alone; many homeowners find the geometry intimidating, but it is simpler than it looks.

    In this guide, we will break down the process into manageable steps, ensuring you have the confidence to measure your roof accurately without needing a degree in mathematics.

    Why Accurate Roof Measurements Matter

    Before we dive into the tape measure, it is essential to understand why precision is non-negotiable. Roofing materials are sold by the “square,” which equals 100 square feet. A miscalculation of even 10% can result in significant financial loss or project delays.

    According to industry standards, contractors typically add a waste factor of 10–15% for simple gable roofs and up to 20% for complex roofs with multiple valleys and hips. However, this waste factor applies to an accurate base measurement. If your base number is wrong, the waste factor cannot save you.

    How Do You Get The Square Footage Of A Roof

    Step 1: Gather the Right Tools

    You do not need expensive laser equipment to get a reliable estimate. Here is what you need:

    • A sturdy ladder: Ensure it is on stable ground.
    • A long tape measure: At least 25–50 feet.
    • Graph paper and a pencil: For sketching the roof layout.
    • A calculator: Or a smartphone app.
    • Safety gear: Non-slip shoes and a spotter if you plan to climb onto the roof.

    Pro Tip: If you are uncomfortable climbing onto the roof, you can perform these measurements from the ground using basic geometry, though it may be slightly less precise.

    Step 2: Understand Roof Complexity

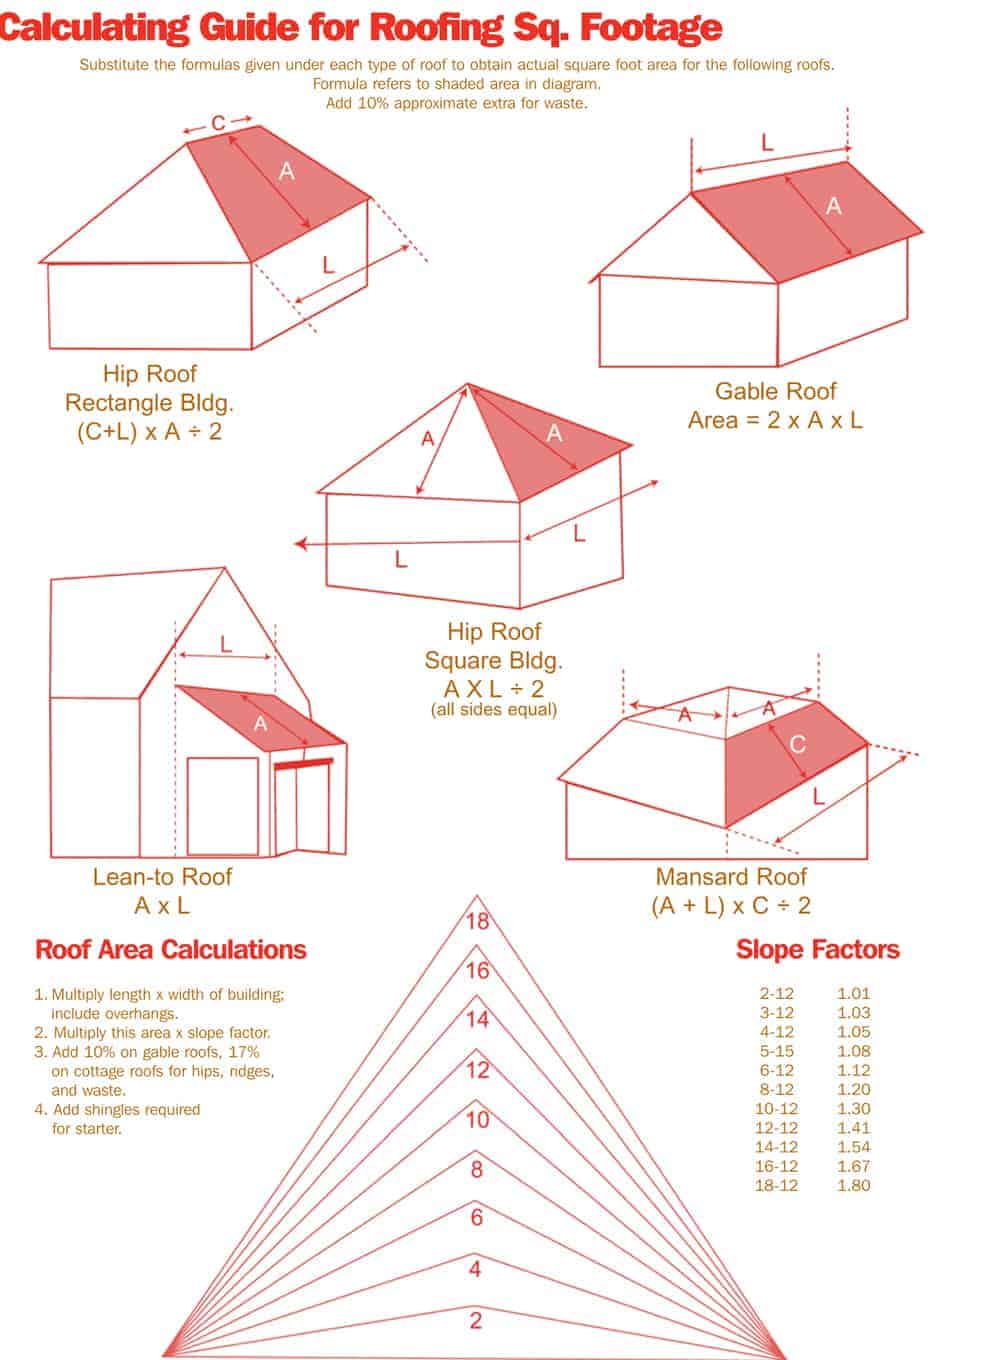
    Not all roofs are created equal. The method you use depends on the shape:

    1. Simple Gable Roof: Two sloping sides that meet at a ridge. This is the easiest to measure.
    2. Hip Roof: Slopes on all four sides. Requires more calculations.
    3. Complex Roof: Multiple gables, valleys, dormers, and chimneys.

    For complex roofs, the best strategy is to break the roof down into smaller, manageable geometric shapes (rectangles and triangles).

    Step 3: Measuring from the Ground (The Safe Method)

    If you prefer not to climb, you can estimate the footprint of your house and adjust for the pitch.

    Measure the Length and Width

    Walk around your house and measure the length and width of the exterior walls. Include any overhangs (eaves) if possible. If you cannot see the eaves clearly, add approximately 1–2 feet to each side to account for them.

    Example: If your house is 40 feet long and 30 feet wide, your footprint is 1,200 square feet.

    Account for Roof Pitch

    A flat roof has the same square footage as the footprint. However, most roofs are sloped. The steeper the pitch, the larger the surface area.

    To get the actual roof area from the ground, you need the Pitch Multiplier. You can find this by measuring the rise over a 12-inch run.

    Roof PitchMultiplier
    4/121.054
    6/121.118
    8/121.202
    10/121.302
    12/121.414

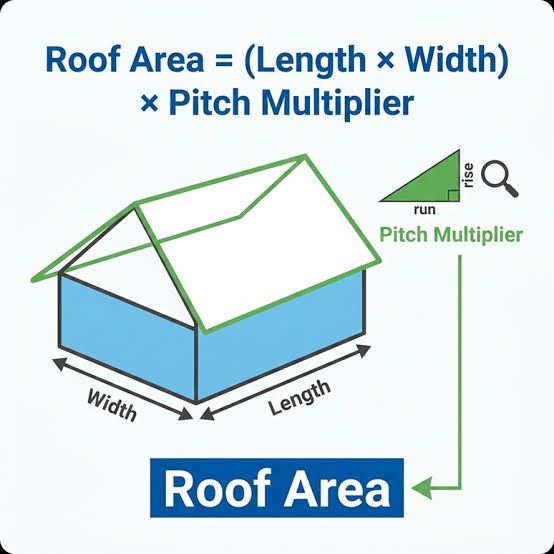
    Calculation: Roof Area=Footprint Area×Pitch MultiplierRoof Area=Footprint Area×Pitch Multiplier

    Using our example above with a 6/12 pitch: 1,200 sq ft×1.118=1,341.6 sq ft1,200 sq ft×1.118=1,341.6 sq ft

    Step 4: Measuring from the Roof (The Precise Method)

    For the highest accuracy, especially for complex roofs, measuring directly from the surface is best. Please prioritize safety. Use a harness if the pitch is steep.

    Break It Down into Sections

    Look at your roof from above (or sketch it from the ground first). Divide it into distinct sections.

    1. Rectangular Sections: Measure the length and width of each rectangular plane. Multiply them to get the area.
    2. Triangular Sections (Gables): Measure the base and the height (from the base to the peak). The formula is: Area=Base×Height2Area=2Base×Height​

    Don’t Forget the Details

    • Valleys: These are internal angles where two roof slopes meet. Measure their length and width carefully.
    • Dormers: Treat dormers as separate small roofs. Measure their faces and add them to the total.
    • Chimneys and Vents: Generally, you do not subtract these unless they are massive. It is better to have a little extra material for flashing and cuts.

    Summing It Up

    Add the square footage of all sections together. This gives you the total surface area.

    Understanding “Squares” in Roofing

    In the roofing industry, professionals do not usually talk in square feet. They talk in “Squares.”

    • 1 Square = 100 Square Feet

    If your total calculation is 2,450 square feet, you divide by 100: 2,450/100=24.5 Squares2,450/100=24.5 Squares

    When ordering materials, you would round up to 25 Squares. Always round up to ensure you have enough coverage.

    Adding the Waste Factor

    No installation is perfect. Shingles need to be cut to fit edges, valleys, and around obstacles.

    • Simple Roof (Gable): Add 10% waste.
    • Complex Roof (Hips/Valleys): Add 15–20% waste.

    Final Calculation Example:

    • Total Area: 2,450 sq ft
    • Waste (15%): 2,450×0.15=367.5 sq ft2,450×0.15=367.5 sq ft
    • Total Needed: 2,450+367.5=2,817.5 sq ft2,450+367.5=2,817.5 sq ft
    • In Squares: ~28.2 Squares -> Order 29 Squares

    For more detailed information on roofing structures and terminology, you can refer to Wikipedia’s article on Roofing.

    Common Mistakes to Avoid

    1. Ignoring Overhangs: Failing to include the eaves can leave you short by hundreds of square feet.
    2. Wrong Pitch Multiplier: Guessing the pitch instead of measuring it leads to significant errors.
    3. Not Accounting for Waste: Buying exactly the net amount ensures you will run out.
    4. Measuring Only One Side: On asymmetrical roofs, both sides may have different dimensions. Measure each plane individually.

    FAQ Section

    Q1: Can I use Google Earth to measure my roof?

    Yes, tools like Google Earth or specialized roofing software (like EagleView) can provide satellite-based measurements. However, these are estimates. For purchasing materials, it is always safer to verify with physical measurements or a professional inspection.

    Q2: Do I need to subtract skylights from the square footage?

    Generally, no. Skylights are small relative to the total roof area. It is standard practice to ignore them in the total square footage calculation and use the extra material for cutting around them and other waste.

    Q3: What if my roof has multiple stories?

    Measure each level separately. A two-story house might have a lower roof section and an upper roof section. Calculate the square footage for each distinct plane and sum them up. Do not assume the upper floor footprint matches the lower roof area.

    Q4: How accurate does the measurement need to be?

    For material ordering, being within 5% is ideal. However, since you add a waste factor, being slightly over is better than being under. Most suppliers allow you to return unopened bundles, so buying an extra square is a safe insurance policy.

    Q5: Is there an app that can help me calculate this?

    Yes, there are several apps available for iOS and Android that use augmented reality (AR) or photo analysis to estimate roof size. While convenient, treat these as preliminary estimates rather than final order quantities.

    Q6: What is the difference between roof area and floor area?

    Floor area is the horizontal footprint of the house. Roof area is the actual surface area of the sloped shingles. Because of the slope, the roof area is always larger than the floor area.

    Conclusion

    Knowing how do you get the square footage of a roof empowers you to budget effectively and communicate confidently with contractors. By breaking the roof into simple shapes, accounting for pitch, and adding a proper waste factor, you can arrive at a number that ensures your project runs smoothly.

    Remember, safety comes first. If your roof is steep or complex, do not hesitate to hire a professional for the measurement. It is a small cost compared to the risk of injury or costly material errors.

    Did you find this guide helpful? Share it with your friends on social media who might be planning their own home improvements!

  • How to Calculate Roof Square Footage Accurately

    How to Calculate Roof Square Footage Accurately

    Have you ever stared up at your home’s roof, wondering just how much material you actually need for a repair or replacement? It is a common dilemma for homeowners, as guessing wrong can lead to wasted money on excess shingles or dangerous delays due to shortages. Knowing how do you calculate the square footage of a roof is the critical first step in any roofing project, ensuring you budget correctly and hire contractors with confidence.

    Why Accurate Roof Measurements Matter

    Before we dive into the math, it is essential to understand why precision is non-negotiable. Roofing materials are expensive. Asphalt shingles, metal panels, and tiles are typically sold by the “square,” which is a industry term for 100 square feet. If you underestimate your needs, you risk color mismatches if you have to buy a second batch later. If you overestimate, you are throwing money away on returns or disposal fees.

    Furthermore, accurate measurements protect you during contractor negotiations. Many homeowners rely solely on a roofer’s quote, but having your own baseline calculation prevents being upsold on unnecessary materials. According to industry standards, a precise measurement also helps in calculating the correct amount of underlayment, ice and water shield, and ventilation components required for a durable system.

    Understanding the Difference: Floor Plan vs. Roof Area

    A common mistake beginners make is assuming the roof’s square footage is the same as the home’s living area. This is rarely true. Your roof covers more than just the footprint of your house; it includes overhangs, eaves, and often extends beyond the exterior walls.

    Additionally, the pitch (slope) of your roof significantly increases the surface area. A flat roof might closely match your home’s footprint, but a steeply pitched roof will have a much larger surface area. Ignoring the slope is the number one reason for calculation errors. To get an accurate number, you must account for both the horizontal footprint and the vertical rise.

    Step-by-Step Guide: How Do You Calculate The Square Footage Of A Roof

    Calculating your roof’s area doesn’t require a degree in engineering, but it does require attention to detail. Follow these steps to get a reliable estimate.

    Step 1: Measure the Footprint

    Start by measuring the length and width of your home from the ground. Use a laser measurer for accuracy, or a standard tape measure if necessary. Include any attached structures like garages or porches that share the same roofline.

    • Length: Measure the longest side of the house.
    • Width: Measure the widest side.
    • Calculate Base Area: Multiply Length × Width.

    Example: If your home is 40 feet long and 30 feet wide, your base footprint is 1,200 square feet.

    Step 2: Account for Overhangs

    Roofs rarely end exactly at the wall. Most have eaves that extend 1 to 2 feet beyond the exterior walls. To be safe, add 1 foot to each side of your length and width measurements before multiplying.

    • Adjusted Length: 40 + 2 = 42 feet
    • Adjusted Width: 30 + 2 = 32 feet
    • New Base Area: 42 × 32 = 1,344 square feet

    This small adjustment ensures you have enough material for the edges, which are crucial for water diversion.

    Step 3: Determine the Roof Pitch

    The pitch is the slope of the roof, expressed as a ratio of vertical rise to horizontal run (e.g., 6:12). This means for every 12 inches you go horizontally, the roof rises 6 inches vertically.

    If you don’t know your pitch, you can estimate it:

    1. Place a level against the roof rake (edge) or in the attic against a rafter.
    2. Measure 12 inches along the level.
    3. Measure the vertical distance from the 12-inch mark to the roof surface.

    If that vertical distance is 6 inches, your pitch is 6:12.

    Step 4: Apply the Pitch Multiplier

    Once you have the pitch, you need to apply a multiplier to your base area. This accounts for the extra surface area created by the slope. You can find these multipliers in standard roofing charts.

    Roof PitchMultiplier
    4:121.054
    6:121.118
    8:121.202
    10:121.302
    12:121.414

    Using our example: If your pitch is 6:12, the multiplier is 1.118. Calculation: 1,344 sq ft (Base Area) × 1.118 = 1,502.59 square feet.

    Step 5: Add Complexity Factors

    Does your roof have dormers, chimneys, or valleys? These features add surface area and complexity. For simple gable roofs, the calculation above is usually sufficient. However, for complex roofs with multiple intersecting planes, it is best to break the roof into smaller rectangular sections, calculate each individually, and sum them up.

    For a general DIY estimate, adding 10% to your total is a safe buffer for waste, cuts, and complex geometry.

    Final Estimate: 1,502.59 × 1.10 = 1,652.85 square feet.

    How Do You Calculate The Square Footage Of A Roof

    Converting Square Footage to Roofing Squares

    In the roofing industry, materials are not sold by the square foot but by the “square.” One roofing square equals 100 square feet.

    To find out how many squares you need:

    1. Take your total square footage (1,652.85).
    2. Divide by 100.
    3. Result: 16.53 squares.

    Since you cannot buy partial bundles easily, you would round up to 17 squares. Always confirm with your supplier how many bundles make up a square, as this varies by material type (e.g., 3 bundles per square for standard asphalt shingles).

    Tools and Technology for Modern Measurement

    While manual calculation is reliable, technology has made the process easier and safer. You no longer need to climb a ladder with a tape measure.

    • Satellite Imagery Apps: Tools like Google Earth or specialized roofing apps allow you to trace your roof’s perimeter digitally. These programs often include built-in pitch estimators.
    • Laser Measurers: Handheld laser devices provide instant distance readings with high precision, reducing human error associated with tape measures.
    • Drone Surveys: For large or complex commercial roofs, drones can create 3D models that provide exact surface areas.

    For more information on traditional construction measurement standards, you can refer to resources on building measurement techniques to understand the historical context of these practices.

    Common Mistakes to Avoid

    Even with a guide, errors happen. Here are the most frequent pitfalls:

    • Ignoring Waste Factor: Never order the exact calculated amount. Shingles need to be cut for hips, ridges, and valleys. A 10-15% waste factor is standard.
    • Misidentifying Pitch: Guessing the pitch can lead to a 10-20% error in material costs. Always measure or check blueprints.
    • Forgetting Accessories: Square footage only covers shingles. Don’t forget to calculate linear feet for ridge caps, drip edges, and flashing.

    FAQ Section

    1. Can I calculate roof square footage from inside the attic?

    Yes, this is often safer and easier. Measure the length and width of the attic floor. Then, measure the rise of the rafters to determine the pitch. This method avoids the dangers of climbing onto the roof.

    2. Does the chimney affect the square footage calculation?

    Technically, yes, but the surface area of a chimney is negligible compared to the whole roof. Instead of subtracting it, most professionals leave it as part of the waste factor. It is better to have slightly too much material than too little.

    3. What if my roof has multiple levels?

    Treat each level as a separate rectangle. Calculate the square footage for each section individually using the steps above, then add them together. Ensure you apply the correct pitch multiplier for each section if they differ.

    4. Is there a difference between “square feet” and “squares”?

    Yes. “Square feet” is the actual area measurement. A “square” is a unit of measure used in roofing equal to 100 square feet. Always clarify which unit your contractor is using to avoid confusion.

    5. How accurate are online roof calculators?

    Online calculators using satellite data are generally within 5-10% accuracy. They are excellent for preliminary estimates but should not replace professional measurements for final material orders, especially for complex roofs.

    Conclusion

    Learning how do you calculate the square footage of a roof empowers you to take control of your home improvement projects. By measuring your footprint, accounting for overhangs, applying the correct pitch multiplier, and adding a waste factor, you can arrive at a highly accurate estimate. This knowledge not only saves money but also ensures your roof is installed with the right amount of material for maximum longevity.

    Don’t let the math intimidate you. Take your time, double-check your numbers, and use the tools available to you. If you found this guide helpful, please share it with friends or family who might be planning their own roofing projects. Accurate information is the foundation of a successful home renovation!

  • How to Measure Roof Square Footage Accurately

    How to Measure Roof Square Footage Accurately

    Have you ever stared at your home’s silhouette, wondering just how much material you’d need for a replacement or repair? It is a common dilemma for homeowners, as guessing wrong can lead to wasted money on excess materials or dangerous delays due to shortages. Knowing how do you measure the square footage of a roof is the critical first step in any roofing project, ensuring you budget correctly and hire contractors with confidence.

    Why Accurate Roof Measurement Matters

    Before we dive into the tape measures and calculators, it is vital to understand why precision is non-negotiable. Roofing materials are not cheap. Asphalt shingles, metal panels, and clay tiles are typically sold by the “square,” a roofing term equal to 100 square feet.

    If you underestimate your roof’s size by even 10%, you might face mid-project price hikes for additional materials. Overestimating leads to waste, which is both financially inefficient and environmentally unfriendly. Furthermore, accurate measurements provide leverage when negotiating with contractors. If you know your roof’s approximate size, you can spot inflated quotes immediately.

    According to industry standards, a precise measurement also helps in calculating the correct load-bearing requirements for your home’s structure, especially if you are switching from lightweight asphalt to heavier slate or tile.

    Ground-Level Measurement: The Safer Alternative

    Climbing onto a roof can be dangerous, especially for those without proper safety gear or experience. Fortunately, you can get a remarkably accurate estimate from the ground. This method relies on geometry and basic observations of your home’s footprint.

    Step 1: Measure Your Home’s Footprint

    Start by measuring the length and width of your house from the ground. If your home is a simple rectangle, this is straightforward. Multiply the length by the width to get the base area.

    • Example: A house that is 40 feet long and 30 feet wide has a footprint of 1,200 square feet.

    Step 2: Account for Overhangs

    Roofs rarely end exactly at the exterior walls. Most roofs have eaves or overhangs that extend beyond the siding. Add approximately 1–2 feet to each side of your length and width measurements to account for this.

    Step 3: Determine the Roof Pitch

    This is where many DIYers make mistakes. A flat roof has the same square footage as its footprint. However, most US homes have sloped roofs. The steeper the pitch, the more surface area there is.

    You can estimate the pitch by looking at the gable end of your house or using a level and tape measure in the attic. Pitch is expressed as a ratio, such as 4/12, meaning the roof rises 4 inches for every 12 inches of horizontal run.

    Step 4: Apply the Pitch Multiplier

    Once you have the pitch, use a multiplier to adjust your base area. Here is a quick reference table for common pitches:

    Roof PitchMultiplierComplexity Level
    3/121.03Low
    4/121.06Low-Medium
    6/121.12Medium
    8/121.20High
    12/121.42Very High

    Calculation Example: If your adjusted footprint is 1,250 sq ft and your pitch is 6/12: 1,250 sq ft×1.12=1,400 sq ft1,250 sq ft×1.12=1,400 sq ft

    This method provides a solid estimate for simple roof structures. For complex roofs with multiple valleys, dormers, and turrets, this method may understate the actual area.

    How Do You Measure The Square Footage Of A Roof

    On-Roof Measurement: The Precise Method

    If you are comfortable working at heights and have the necessary safety equipment—such as a harness, non-slip shoes, and a stable ladder—you can measure the roof directly. This method yields the highest accuracy.

    Safety Warning: Never walk on a wet, icy, or moss-covered roof. Always have a spotter on the ground.

    Step 1: Break Down the Roof into Planes

    Visualize your roof as a collection of simple geometric shapes, primarily rectangles and triangles. Ignore the small details like vents for now; focus on the large planes.

    Step 2: Measure Each Plane

    Use a long tape measure (at least 25–50 feet).

    1. Measure the Length: Run the tape along the ridge or the eave.
    2. Measure the Width: Run the tape from the eave to the ridge (the slope distance, not the horizontal run).

    Repeat this for every distinct section of the roof.

    Step 3: Calculate Individual Areas

    For rectangular sections, multiply length by width. For triangular sections (like gables), use the formula: Area=Base×Height2Area=2Base×Height​

    Sum up the areas of all sections to get the total square footage.

    Step 4: Add Waste Factor

    Even with precise measurements, you will lose material to cuts and overlaps. Industry experts recommend adding a waste factor:

    • Simple Roofs: Add 10%
    • Complex Roofs: Add 15–20%

    If your calculated area is 1,400 sq ft, adding 10% waste brings you to 1,540 sq ft. Since roofing is sold in squares (100 sq ft), you would order 16 squares.

    Understanding Complex Roof Features

    Not all roofs are simple gables. Modern architecture and historic homes often feature complex elements that drastically change the surface area.

    Dormers and Valleys

    A dormer is a window structure that projects vertically from a sloping roof. While it adds living space, it adds significant roofing surface area. You must measure the sides and top of the dormer separately and add them to your total.

    Valleys, where two roof slopes meet, require extra attention. They often need wider metal flashing and careful shingle weaving, which increases material usage. When measuring, ensure you capture the full width of the valley area.

    Chimneys and Skylights

    While these features subtract from the shingled area, the amount is usually negligible compared to the waste generated by cutting around them. It is generally safer to ignore their subtraction and let the waste factor cover the loss. However, you will need specific flashing materials for these penetrations, which should be quoted separately.

    Digital Tools and Satellite Technology

    In the modern era, you don’t always need a ladder. Several digital tools can help you answer how do you measure the square footage of a roof with high precision.

    Satellite Imagery Services

    Companies like Google Earth allow you to trace roof lines manually. While free, this method requires you to know the exact scale and can be tricky with tree cover.

    Professional Roofing Software

    Contractors often use software such as EagleView or Hover. These platforms use aerial imagery and AI to generate 3D models of your roof. They can detect pitch, obstacles, and square footage with near-perfect accuracy. Some of these services offer reports for a fee, which can be worth the cost if you are planning a major renovation and want an unbiased third-party measurement.

    For a deeper understanding of how building dimensions are standardized, you can refer to general construction principles outlined on Wikipedia.

    Common Mistakes to Avoid

    Even with the best intentions, errors happen. Here are the most frequent pitfalls:

    1. Ignoring the Pitch: Treating a steep roof as flat is the number one cause of material shortage. Always apply the multiplier.
    2. Measuring Only the Floor Plan: Your interior square footage is irrelevant to your roof size. A two-story house has the same roof footprint as a one-story house of the same width and length, but the roof area depends on the pitch, not the number of floors.
    3. Forgetting Waste: Buying exactly the calculated amount leaves no room for error. Broken shingles and mis-cuts are inevitable.
    4. Misidentifying Squares: Remember, 1 roofing square = 100 sq ft, not a 10×10 foot physical square on the roof. It is a unit of area, not shape.

    FAQ Section

    1. What is the difference between roof square footage and home square footage?

    Home square footage refers to the livable interior space, measured from the exterior walls on the ground floor. Roof square footage is the total surface area of the roofing material, which includes slopes, overhangs, and multiple levels. The roof area is almost always larger than the home’s footprint due to pitch and overhangs.

    2. How many squares of shingles do I need for a 2,000 sq ft roof?

    First, clarify if 2,000 sq ft is the footprint or the actual roof area. If it is the actual sloped area, divide by 100. You need 20 squares. However, always add 10–15% for waste. So, for a 2,000 sq ft roof, you should buy 22–23 squares of shingles.

    3. Can I measure my roof from the inside?

    Yes, partially. You can measure the attic floor to get the footprint dimensions. You can also measure the rise and run of the rafters to determine the pitch. However, you cannot measure overhangs or complex external features like dormers from the inside, so this method should be combined with exterior observations.

    4. Does the type of shingle affect the measurement?

    No, the square footage remains the same regardless of material. However, different materials have different coverage per bundle. Asphalt shingles typically cover 33.3 sq ft per bundle (3 bundles per square), while metal panels vary by profile. Always check the manufacturer’s specifications for coverage rates.

    5. Is it better to hire a professional for measurement?

    If your roof is simple (low pitch, few valleys), DIY measurement is feasible. For steep, multi-level, or historic roofs, hiring a professional is recommended. They have the safety gear, experience, and insurance to handle the job. Plus, their measurements are often required for warranty validation.

    Conclusion

    Learning how do you measure the square footage of a roof empowers you to take control of your home maintenance projects. Whether you choose the ground-level estimation method or the precise on-roof approach, the key is consistency and accounting for pitch and waste. By avoiding common mistakes and utilizing the right tools, you can ensure your roofing project stays on budget and on schedule.

    Accurate measurement is the foundation of a durable roof. Don’t let guesswork compromise your home’s protection. If you found this guide helpful, please share it with friends or family who might be planning their own roofing upgrades. Knowledge is the best tool in your DIY toolkit!