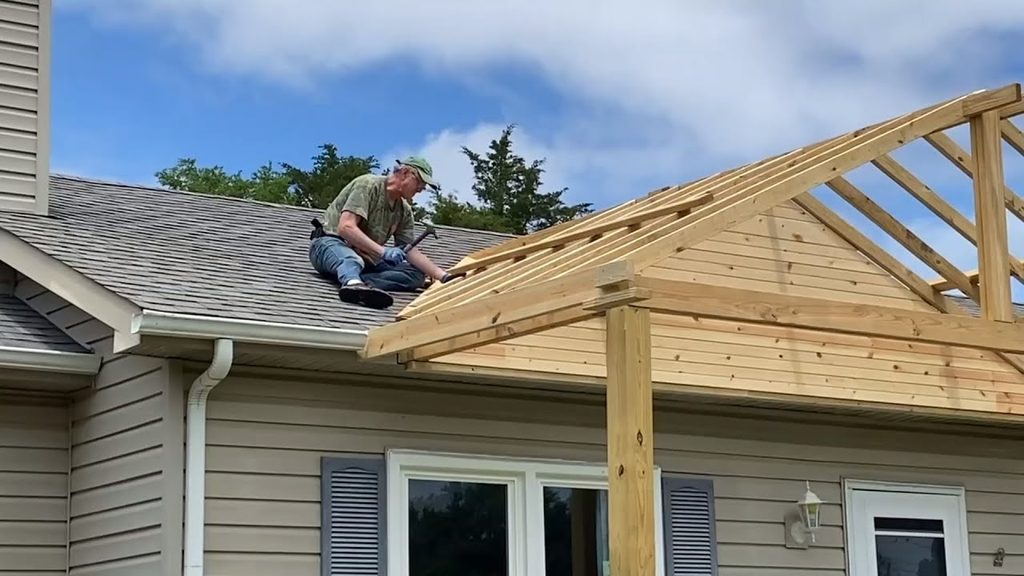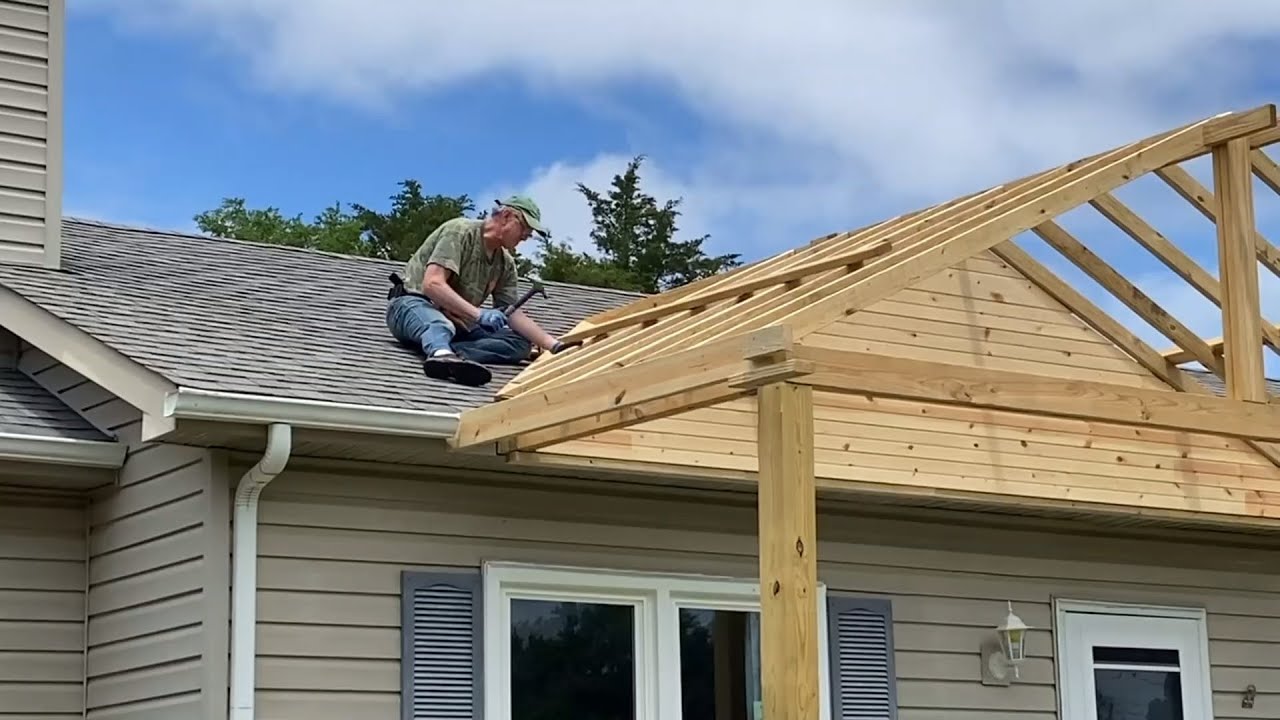
Tag: DIY porch construction

  • How to Add a Porch Roof to an Existing Roof

    How to Add a Porch Roof to an Existing Roof

    Adding extra living space to your home doesn’t always require a massive renovation. Often, homeowners simply want a sheltered area to enjoy their morning coffee or protect their front door from the elements. However, integrating a new structure with your current home can feel daunting. If you are wondering how to add a porch roof to an existing roof, you are not alone. This project requires precision, but with the right guidance, it is entirely achievable.

    In this guide, we will walk you through the process, ensuring your new porch is safe, weatherproof, and aesthetically pleasing. We will focus on practical steps that prioritize structural integrity and long-term durability.

    Is It Possible to Attach a New Roof to an Old One?

    Before picking up a hammer, you must understand the structural implications. The short answer is yes, but it depends on your existing roof’s condition and local building codes.

    When you attach a new roof to an existing one, you are creating what builders call a “valley.” This is where two roof slopes meet. Valleys are critical because they channel large volumes of water. If not sealed correctly, they are the number one cause of leaks in home additions.

    According to general construction principles, your existing roof must be in good shape. If your current shingles are curling or the decking is soft, you need to repair the main roof first. You cannot build a stable addition on a failing foundation.

    Pro Tip: Always check with your local building department. Most jurisdictions require a permit for structural changes. Ignoring this can lead to fines or issues when selling your home.

    What Are the Best Design Options for a Porch Roof?

    Choosing the right style affects both cost and complexity. Here are the three most common designs for attaching a porch roof:

    1. The Shed Roof (Single Slope)

    This is the easiest design for DIYers. It slopes in one direction, away from the house.

    • Pros: Simple framing, easier drainage, lower cost.
    • Cons: May look less traditional on certain architectural styles.

    2. The Gable Roof

    This creates a triangular peak. It often matches the main house’s roofline.

    • Pros: Aesthetically pleasing, excellent ventilation potential.
    • Cons: Complex framing, requires precise cutting of rafters.

    3. The Hip Roof

    All sides slope downwards to the walls.

    • Pros: Very stable in high winds, elegant appearance.
    • Cons: Most difficult to frame, higher material waste.

    For most beginners asking how to add a porch roof to an existing roof, the shed roof is the recommended starting point due to its simplicity.

    Essential Tools and Materials Checklist

    Preparation is half the battle. Gathering everything beforehand prevents mid-project delays.

    Tools Needed:

    • Circular saw and miter saw
    • Drill/driver with assorted bits
    • Level (4-foot minimum)
    • Chalk line
    • Ladder and safety harness
    • Caulking gun

    Materials Needed:

    • Pressure-treated lumber (2x6s or 2x8s for rafters)
    • Ledger board (same width as rafters)
    • Roofing shingles (match existing if possible)
    • Ice and water shield (for the valley)
    • Step flashing and valley metal
    • Structural screws or lag bolts
    • Drip edge
    How To Add A Porch Roof To An Existing Roof

    Step-by-Step Guide: How to Build the Frame

    Follow these steps carefully. Safety is paramount; always use proper fall protection when working on roofs.

    Step 1: Install the Ledger Board

    The ledger board attaches directly to your house’s wall and supports the inner ends of the porch rafters.

    1. Determine the height of your porch roof. It should slope down at least 1/4 inch per foot for proper drainage.
    2. Mark a level line on the house wall where the top of the ledger will sit.
    3. Cut a piece of pressure-treated lumber to length.
    4. Secure the ledger to the house studs using lag bolts or structural screws. Do not just nail it. You need deep penetration into the framing studs for safety.

    Step 2: Set the Outer Beam

    You need support on the outer edge of the porch.

    1. Install vertical posts (4×4 or 6×6) on concrete footings. Check your local code for footing depth—usually below the frost line.
    2. Place a horizontal beam across the tops of these posts.
    3. Ensure this beam is perfectly level and parallel to the ledger board.

    Step 3: Install the Rafters

    Rafters bridge the gap between the ledger board and the outer beam.

    1. Cut your rafters to size. Remember to account for the overhang (usually 6–12 inches).
    2. Space them 16 inches or 24 inches on center, matching your existing roof spacing if possible.
    3. Use joist hangers to attach rafters to the ledger board and the outer beam. This provides a strong mechanical connection.

    How to Flash the Connection Properly

    This is the most critical technical step. Poor flashing leads to water damage inside your walls.

    1. Remove Shingles: Carefully remove the shingles on the existing roof where the new porch roof will tie in. Expose about 12–18 inches of the roof deck.
    2. Install Ice and Water Shield: Apply a self-adhering waterproof membrane over the exposed deck and up the wall slightly. This acts as a secondary barrier against water.
    3. Install Valley Metal: Place a W-shaped metal valley liner over the joint where the two roofs meet. This channels water away efficiently.
    4. Step Flashing: As you lay new shingles on the porch roof, interweave them with step flashing pieces that tuck under the existing shingles of the main house. This ensures water flows over the flashing, not under it.

    For more detailed information on roofing materials and standards, you can refer to Wikipedia’s article on Roofing.

    Choosing the Right Roofing Material

    Should you match your existing roof? Ideally, yes. Consistency looks better and maintains home value.

    MaterialDurabilityCostDifficulty to Install
    Asphalt Shingles15–30 YearsLowEasy
    Metal Roofing40–70 YearsMedium-HighModerate
    Clay Tiles50+ YearsHighHard

    If you cannot find an exact match for your asphalt shingles, choose a complementary color. Avoid clashing tones that make the addition look like an afterthought.

    Common Mistakes to Avoid

    Even experienced DIYers make errors. Here is what to watch out for:

    • Insufficient Slope: If the roof is too flat, water will pool. Always maintain a minimum slope of 1:12 (1 inch drop per 12 inches of run).
    • Ignoring Ventilation: Trapped heat can damage shingles and increase energy bills. Consider adding soffit vents or a ridge vent if the design allows.
    • Weak Connections: Never rely solely on nails for structural connections. Use approved metal connectors and structural screws.
    • Skipping Permits: This cannot be stressed enough. Unpermitted work can void your homeowner’s insurance.

    FAQ Section

    Do I need a permit to add a porch roof?

    In most US municipalities, yes. Any structural alteration to your home’s envelope typically requires a building permit. Check with your local planning department before starting.

    Can I tie a new roof into old shingles?

    No. You must remove the existing shingles in the connection area to install proper flashing and ice/water shield. Tying directly into old shingles guarantees leaks.

    How much does it cost to add a porch roof?

    Costs vary widely by size and material. A small, simple shed-style porch roof might cost $1,500–$3,000 in materials. Hiring a professional can double or triple this cost.

    What is the best slope for a porch roof?

    A slope of 3:12 to 4:12 is ideal for asphalt shingles. It provides good drainage while remaining easy to walk on during maintenance.

    Can I do this project alone?

    While possible, it is highly recommended to have at least one helper. Handling long lumber and aligning rafters is difficult and dangerous for a single person.

    Conclusion

    Learning how to add a porch roof to an existing roof is a rewarding project that enhances your home’s functionality and curb appeal. By focusing on proper flashing, solid structural connections, and correct slope, you can build a durable extension that lasts for decades.

    Remember, patience is key. Take your time with the flashing details, as this is where most failures occur. If you feel unsure about any structural aspect, consult a professional engineer or contractor.

    Did you find this guide helpful? Share it with your friends on social media who might be planning their own home improvements! Happy building!
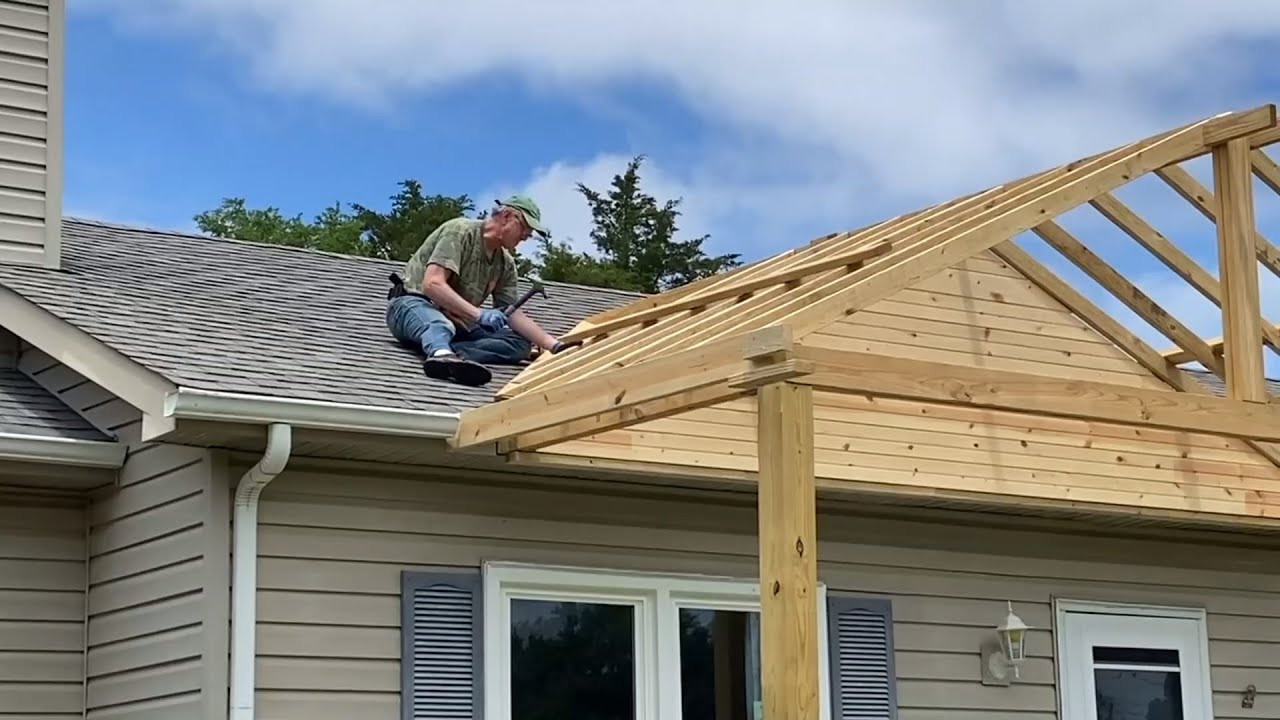
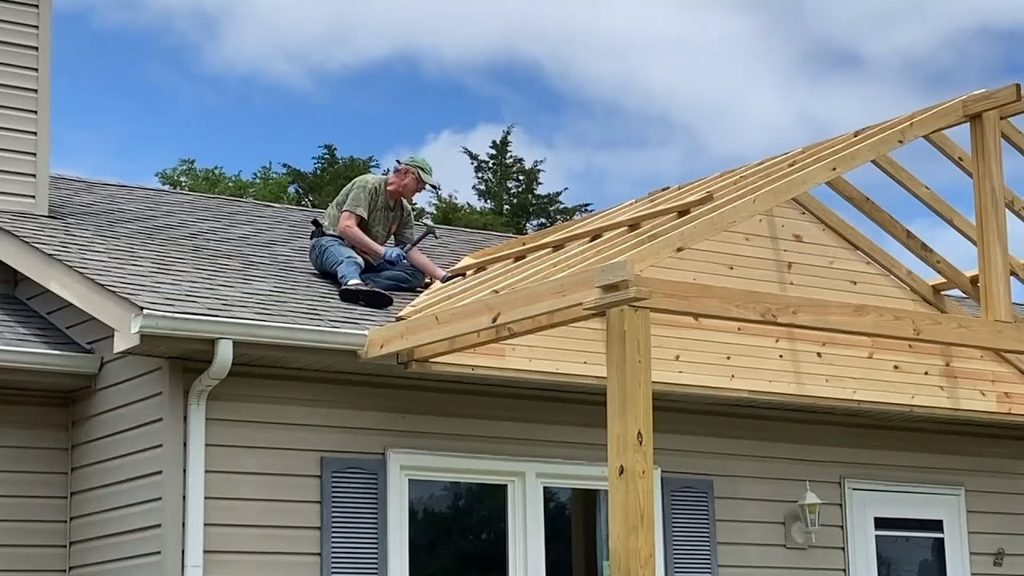
  • How To Add A Gable Porch Roof To Existing House

    How To Add A Gable Porch Roof To Existing House

    Adding a covered entrance is one of the most effective ways to boost your home’s curb appeal and protect your front door from the elements. However, many homeowners hesitate because they believe integrating a new structure with an old one is too complex or risky. If you are wondering how to add a gable porch roof to existing house structures without compromising integrity, you are in the right place.

    This guide breaks down the process into manageable steps, ensuring you understand the structural requirements, material choices, and aesthetic considerations needed for a professional-looking result. Whether you are a seasoned DIYer or planning to hire a contractor, understanding these fundamentals will save you time, money, and potential headaches.

    Why Choose a Gable Roof for Your Porch?

    Before diving into the construction, it is essential to understand why a gable roof is often the preferred choice for porch additions. A gable roof features two sloping sides that meet at a ridge, creating a triangular extension at each end. This design is not only classic and aesthetically pleasing but also highly functional.

    Advantages vs. Disadvantages

    FeatureGable Porch RoofFlat/Shed Porch Roof
    Water DrainageExcellent; sheds water quicklyModerate; requires precise slope
    Aesthetic AppealTraditional, adds height and grandeurModern, minimalist
    Construction ComplexityModerate; requires precise cuttingLower; simpler framing
    VentilationNatural airflow via gable endsLimited; may need mechanical vents
    CostMid-rangeGenerally lower

    According to architectural trends, gable roofs complement most traditional American home styles, including Colonial, Craftsman, and Farmhouse designs. They provide better ventilation and reduce the risk of water pooling, which is crucial for longevity.

    What Permits and Preparations Are Needed?

    One of the most critical steps in learning how to add a gable porch roof to existing house frameworks is navigating local building codes. Ignoring this step can lead to fines or forced removal of your new structure.

    Checking Local Zoning Laws

    Most municipalities require a building permit for structural additions. You will likely need to submit:

    • Site plans showing the porch location.
    • Structural drawings detailing beam sizes and footing depths.
    • Proof of insurance if hiring a contractor.

    Assessing the Existing Structure

    You must determine where the new roof will attach to your house. There are two primary methods:

    1. Attached to the Wall: The roof ledger board is bolted directly to the house’s framing.
    2. Freestanding: The porch stands independently, merely touching the house. This is often easier for permitting as it doesn’t alter the main home’s structural load.

    Pro Tip: Always consult a structural engineer if you are attaching heavy loads to an older home. Older framing may not support the additional weight without reinforcement.

    How To Add A Gable Porch Roof To Existing House

    Step-by-Step Guide: Building the Foundation and Frame

    The stability of your gable porch depends entirely on its foundation. Even a small porch needs solid footings to prevent sinking or shifting during freeze-thaw cycles.

    Step 1: Pouring Concrete Footings

    For a standard wooden porch, you will typically need concrete footings that extend below the frost line in your area.

    • Digging: Use a post-hole digger to create holes approximately 12–16 inches in diameter. Depth varies by region (e.g., 36 inches in northern US states).
    • Mixing: Use pre-mixed concrete bags. For each footing, you might need roughly 2–3 bags depending on depth.
    • Setting Posts: Insert pressure-treated 4×4 or 6×6 posts into wet concrete. Use a level to ensure they are perfectly plumb. Allow 48 hours for curing before adding weight.

    Step 2: Installing the Beam and Ledger

    Once the posts are set, you will install the main support beam across the front posts. If attaching to the house:

    • Locate the wall studs using a stud finder.
    • Install a pressure-treated ledger board using lag screws or through-bolts. Do not rely on nails alone.
    • Ensure the ledger is level with the top of your outer posts.

    Step 3: Framing the Rafters

    This is where the “gable” shape comes to life.

    • Cutting Rafters: Use 2×6 or 2×8 lumber for rafters, depending on the span. The angle of the cut (pitch) should match your main house roof if possible, or be slightly steeper for better drainage. A common pitch is 4:12 (4 inches of rise for every 12 inches of run).
    • Installing Ridge Board: The ridge board runs along the peak. It connects the tops of the opposing rafters.
    • Securing Connections: Use metal rafter ties and hurricane clips to secure rafters to the ledger and beam. These small metal pieces provide crucial resistance against wind uplift.

    For more detailed information on roof framing standards, you can refer to general construction principles outlined on Wikipedia’s Roof page.

    Choosing Materials for Durability and Style

    Selecting the right materials ensures your porch lasts for decades with minimal maintenance.

    Roofing Materials

    • Asphalt Shingles: Cost-effective and easy to match with your existing house roof.
    • Metal Roofing: Highly durable, excellent for shedding snow, and offers a modern farmhouse look.
    • Polycarbonate Panels: Great for letting light through while keeping rain out, though less traditional.

    Trim and Soffits

    Don’t forget the finishing touches. Fascia boards cover the ends of the rafters, while soffits cover the underside. Ventilated soffits are recommended to prevent moisture buildup in the attic space of the porch.

    Common Mistakes to Avoid

    Even experienced DIYers can stumble when figuring out how to add a gable porch roof to existing house structures. Here are the most frequent errors:

    1. Incorrect Pitch: If the porch roof pitch is too flat, water will pool. If it’s too steep, it may look disproportionate to the house.
    2. Poor Flashing: Where the new roof meets the house wall, improper flashing leads to leaks. Use step flashing and counter-flashing integrated with the house siding.
    3. Ignoring Load Paths: Ensure the weight of the roof transfers directly down through the posts to the footings. Never let the weight rest solely on decorative columns.

    FAQ Section

    1. How much does it cost to add a gable porch roof?

    Costs vary widely based on size and materials. On average, homeowners spend between $2,500 and $7,000 for a basic wooden gable porch roof. High-end materials like cedar or metal can push this to $10,000+.

    2. Can I build a gable porch roof myself?

    Yes, if you have intermediate carpentry skills. However, working at heights and handling structural loads requires caution. If you are unsure about load calculations, hire a professional for the framing stage.

    3. Do I need a permit for a small porch roof?

    In most US jurisdictions, yes. Any structure attached to your home or over a certain square footage (often 30–50 sq. ft.) requires a permit. Always check with your local building department first.

    4. What is the best pitch for a porch gable roof?

    A 4:12 or 5:12 pitch is standard. It provides adequate water runoff and matches well with most residential architecture. Steeper pitches (6:12) are better for snowy climates.

    5. How do I seal the connection between the porch roof and the house?

    Use high-quality ice and water shield underlayment beneath the shingles at the junction. Install metal step flashing woven into the siding or brickwork, and finish with a bead of exterior-grade polyurethane caulk.

    6. Will adding a porch roof increase my home value?

    Yes. Curb appeal improvements like a covered porch can offer a high return on investment, often recouping 50–80% of the cost upon sale, according to real estate staging experts.

    Conclusion

    Learning how to add a gable porch roof to existing house structures is a rewarding project that enhances both the functionality and beauty of your home. By carefully planning your foundation, adhering to local codes, and choosing durable materials, you can create a welcoming entrance that stands the test of time.

    Remember, precision in framing and attention to waterproofing details are the keys to success. Take your time, measure twice, and don’t hesitate to seek professional advice for structural concerns.

    Did you find this guide helpful? Share it with your friends on Facebook or Pinterest who might be planning their own home improvement projects! Let’s inspire others to build smarter and safer.