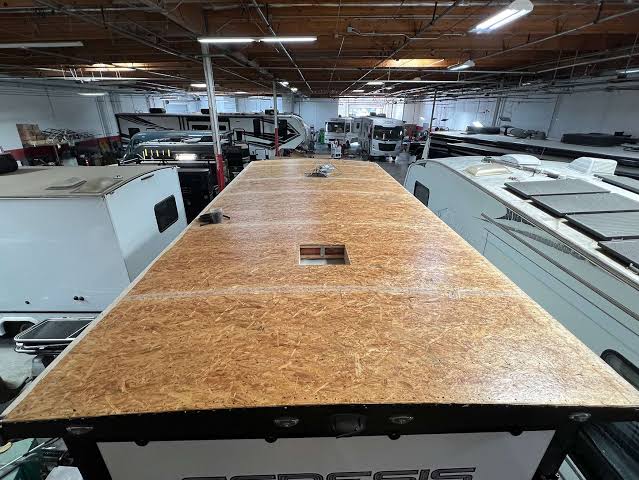
Tag: Camper Roof Repair

  • How Much Does It Cost To Replace A Camper Roof?

    How Much Does It Cost To Replace A Camper Roof?

    Leaking roofs are every RVer’s nightmare. One small drip can quickly turn into thousands of dollars in water damage if left unchecked. If you are staring at a sagging ceiling or pooling water, you are likely asking the critical question: How much does it cost to replace a camper roof?

    The answer isn’t a single number, but understanding the variables can save you from overpaying. In this guide, we will break down the costs by material type, labor fees, and hidden expenses so you can make an informed decision for your rig.

    Understanding the Average Cost Range

    Before diving into specific materials, it is essential to establish a baseline. In 2026, the national average for a full camper roof replacement ranges between $3,000 and $15,000.

    This wide variance exists because “camper” covers everything from a small pop-up trailer to a 40-foot Class A motorhome. The size of your vehicle, the complexity of the roof structure (such as slide-outs or skylights), and your geographic location all play pivotal roles in the final bill.

    According to industry data, most mid-sized travel trailers fall into the $4,500 to $7,500 range for a professional replacement. However, DIY enthusiasts might reduce this cost by 40-50%, provided they have the necessary skills and tools.

    Cost Breakdown by Roof Material

    The material you choose is the single biggest factor influencing price. Each type offers different benefits regarding durability, weight, and insulation.

    1. EPDM Rubber Roofing

    EPDM (Ethylene Propylene Diene Monomer) is the most common roofing material for modern travel trailers. It is lightweight, flexible, and relatively affordable.

    • Average Cost: $1,500 – $4,500 (Materials + Labor)
    • Lifespan: 10–15 years
    • Best For: Budget-conscious owners and smaller trailers.

    Pros:

    • Lightweight, improving fuel efficiency.
    • Easy to repair with patch kits.
    • Resistant to UV radiation and ozone.

    Cons:

    • Can be punctured by sharp branches.
    • Seams may require regular sealing.

    2. TPO (Thermoplastic Polyolefin)

    TPO is often considered the premium upgrade from EPDM. It is more durable, resistant to tears, and typically comes in white, which reflects heat.

    • Average Cost: $2,500 – $6,000 (Materials + Labor)
    • Lifespan: 15–20 years
    • Best For: Owners in hot climates who want better energy efficiency.

    Pros:

    • Higher tear strength than EPDM.
    • Reflects sunlight, keeping the interior cooler.
    • Environmentally friendly and recyclable.

    Cons:

    • Slightly more expensive upfront.
    • Requires specialized adhesives for installation.

    3. Fiberglass Roofing

    Fiberglass is standard on higher-end motorhomes and fifth wheels. It is rigid, durable, and provides a smooth finish that looks sleek.

    • Average Cost: $5,000 – $12,000+ (Materials + Labor)
    • Lifespan: 20+ years
    • Best For: Large motorhomes and permanent installations.

    Pros:

    • Extremely durable and impact-resistant.
    • Low maintenance once installed.
    • Excellent structural integrity.

    Cons:

    • Heavy, which may affect payload capacity.
    • Prone to cracking if the frame flexes significantly.
    • Most expensive option.

    Comparison Table: Quick View

    MaterialAvg. Cost RangeLifespanMaintenance LevelWeight
    EPDM Rubber$1,500 – $4,50010-15 YearsMediumLight
    TPO$2,500 – $6,00015-20 YearsLowLight
    Fiberglass$5,000 – $12,000+20+ YearsLowHeavy
    How Much Does It Cost To Replace A Camper Roof

    Labor Costs vs. DIY Savings

    If you are handy with tools, you might consider doing the job yourself. However, roof replacement is not a beginner-level project.

    Professional Installation Costs

    Labor typically accounts for 40% to 60% of the total cost. Mechanics charge between $75 and $150 per hour, depending on their expertise and location. A full roof replacement usually takes 1–3 days.

    • Small Trailer: 8–12 hours of labor.
    • Large Motorhome: 20–30 hours of labor.

    DIY Potential Savings

    By buying materials directly, you can save significantly. For example, a roll of EPDM rubber might cost $800–$1,200, whereas a shop charges $2,500+ for the same material installed.

    Warning: Improper installation can lead to leaks that cause rot in the wooden subfloor. This secondary damage can cost $5,000 to $10,000 to fix. If you are unsure about sealing edges or handling adhesives, hire a professional.

    Hidden Costs You Must Consider

    When budgeting for how much does it cost to replace a camper roof, do not forget these additional expenses:

    1. Subfloor Repair: If water has leaked in, the plywood underneath may be rotted. Replacing rotten wood adds $500–$2,000 to the bill.
    2. Removal of Fixtures: Skylights, air conditioners, and solar panels must be removed and resealed. Some shops charge extra for each fixture.
    3. Disposal Fees: Old roofing materials must be disposed of properly, which can cost $100–$300.
    4. Insulation Upgrade: While the roof is off, it is the perfect time to add extra insulation. This costs an additional $200–$500 but improves comfort.

    Step-by-Step Overview of the Replacement Process

    Understanding the workflow helps you verify if a contractor is doing the job correctly. Here is what a professional replacement entails:

    1. Removal: All old roofing material, sealants, and fixtures (AC units, vents) are stripped away.
    2. Inspection: The underlying wood structure is inspected for rot or mold. Any damaged sections are cut out and replaced with new marine-grade plywood.
    3. Cleaning: The surface is thoroughly cleaned and dried. Moisture meters are used to ensure no dampness remains.
    4. Installation: The new membrane (EPDM/TPO) or fiberglass sheets are laid out. Adhesives are applied evenly to prevent bubbles.
    5. Sealing: All seams, edges, and penetrations (where screws or vents go through) are sealed with high-quality lap sealant.
    6. Reassembly: Fixtures are reinstalled with new gaskets and sealant to ensure a watertight fit.

    For more detailed technical standards on recreational vehicle construction, you can refer to general industry guidelines available on Wikipedia.

    FAQ: Common Questions About Camper Roof Replacement

    1. Can I just patch my roof instead of replacing it?

    Yes, if the damage is localized (e.g., a small tear or crack). Patch kits cost under $50. However, if the roof is older than 10 years or has multiple weak spots, a full replacement is more cost-effective in the long run.

    2. How often should I replace my camper roof?

    Most rubber roofs last 10–15 years, while fiberglass can last 20+ years. Regular inspections twice a year can extend these lifespans. If you see widespread cracking, bubbling, or soft spots, it is time for a replacement.

    3. Does insurance cover roof replacement?

    It depends on your policy. Standard auto/RV insurance usually covers damage from accidents, falling objects, or storms. However, it typically does not cover wear and tear or lack of maintenance. Check your policy for “comprehensive coverage.”

    4. What is the best time of year to replace a roof?

    Spring and early fall are ideal. Temperatures between 50°F and 80°F (10°C–27°C) allow adhesives to cure properly. Avoid extreme heat or cold, as these can affect the bonding process.

    5. Will a new roof increase my RV’s resale value?

    Absolutely. A new roof is a major selling point. Buyers are often wary of water damage, so having a recently replaced roof with a warranty can increase your RV’s value by $1,000–$3,000 and make it sell faster.

    Conclusion

    Knowing how much does it cost to replace a camper roof empowers you to budget effectively and avoid scams. While the upfront cost of $3,000 to $15,000 may seem steep, it is an investment in the longevity of your home on wheels. Ignoring a failing roof leads to far more expensive structural repairs down the line.

    Whether you choose durable fiberglass or cost-effective EPDM, prioritize quality installation. If you found this guide helpful, please share it with your fellow RVers on social media. A well-maintained roof means more adventures and fewer worries!
  • How Much Does It Cost To Reseal A Camper Roof?

    How Much Does It Cost To Reseal A Camper Roof?

    Leaking roofs are the number one nightmare for any RV owner. A small drip can quickly turn into thousands of dollars in water damage if ignored. If you are wondering how much does it cost to reseal a camper roof, you are not alone; understanding these costs is crucial for budgeting your next maintenance trip and keeping your home-on-wheels dry.

    Understanding the Average Cost Breakdown

    The cost to reseal a camper roof varies significantly based on whether you choose to do it yourself or hire a professional. Generally, you can expect to pay between $300 and $1,500 for a complete resealing job.

    For those opting for a DIY approach, the cost is primarily for materials. You will likely spend between $100 and $300. This covers high-quality sealant, cleaning supplies, primers, and tools like brushes or caulking guns. The price fluctuates depending on the size of your RV and the type of sealant chosen.

    If you hire a professional service, labor becomes the biggest expense. Professional rates typically range from $50 to $100 per hour, with most jobs taking 4 to 8 hours. Consequently, total professional costs often land between $600 and $1,500. While this is more expensive upfront, it comes with the benefit of expertise and warranty coverage.

    Service TypeEstimated Cost RangeWhat’s Included
    DIY Resealing$100 – $300Sealant, cleaner, primer, tools
    Professional Resealing$600 – $1,500Labor, materials, inspection, warranty

    Factors That Influence Resealing Prices

    Several variables affect the final bill. Understanding these helps you predict expenses more accurately.

    1. Size and Type of Your RV

    A small teardrop trailer requires far less material than a 40-foot Class A motorhome. Larger roofs have more surface area, seams, and fixtures (like AC units and vents) that need careful sealing.

    2. Condition of the Existing Roof

    If your roof has minor cracks, a simple reseal suffices. However, if there is significant delamination, rot, or structural damage, you may need repairs before sealing. This adds to the cost. Always inspect thoroughly before starting.

    3. Type of Sealant Used

    Not all sealants are created equal. Silicone-based sealants are cheaper but harder to remove later. Polyurethane and acrylic-based sealants offer better flexibility and longevity but come at a higher price point. Self-leveling lap sealants are popular for horizontal surfaces, while non-sag formulas are best for vertical edges.

    4. Geographic Location

    Labor costs vary by region. Services in urban areas or states with high living costs (like California or New York) will charge more than those in rural areas. Additionally, weather conditions can delay work, potentially increasing labor time.

    DIY vs. Professional: Which Is Right for You?

    Deciding between doing it yourself and hiring a pro depends on your skill level, budget, and time.

    The DIY Route

    Pros:

    • Cost-Effective: You save hundreds on labor.
    • Control: You choose the exact products used.
    • Satisfaction: Completing the job yourself feels rewarding.

    Cons:

    • Time-Consuming: Proper preparation takes days due to drying times.
    • Risk of Error: Missing a spot can lead to leaks.
    • Physical Effort: Working on a roof is physically demanding and potentially dangerous.

    Hiring a Professional

    Pros:

    • Expertise: Professionals spot issues amateurs might miss.
    • Warranty: Many shops offer guarantees on their work.
    • Convenience: You save time and avoid physical strain.

    Cons:

    • Higher Cost: Labor fees add up quickly.
    • Scheduling: You may need to wait weeks for an appointment.

    For most beginners, if the roof is in good condition and only needs routine maintenance, DIY is feasible. However, if you notice soft spots or extensive cracking, consult a professional.

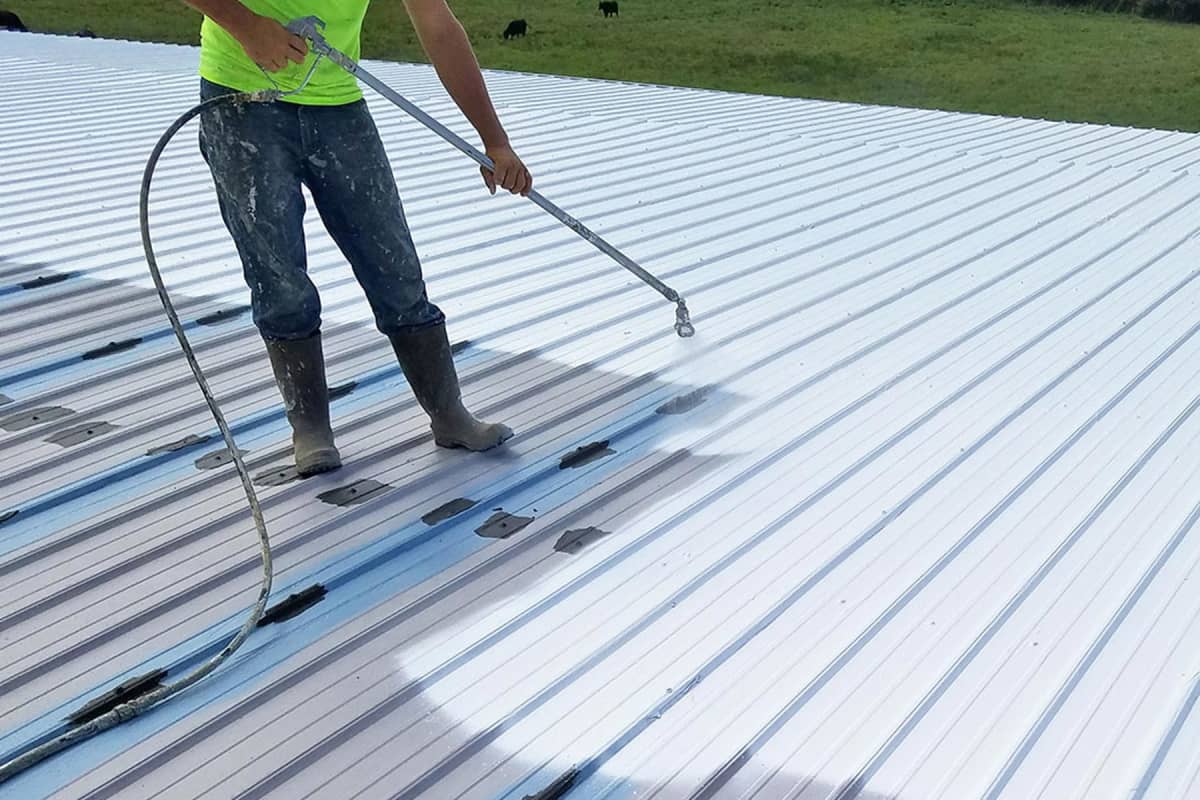
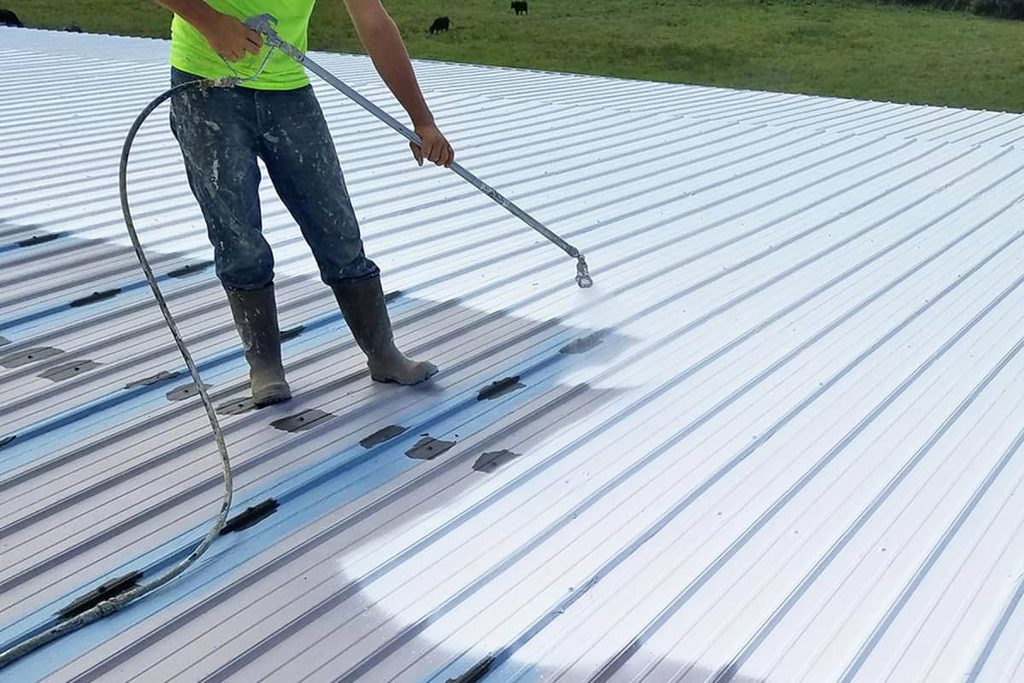
    How Much Does It Cost To Reseal A Camper Roof

    Step-by-Step Guide to Resealing Your Camper Roof

    If you decide to tackle this project yourself, follow these steps for a durable finish.

    Step 1: Gather Your Supplies

    You will need:

    • RV roof sealant (polyurethane or acrylic recommended)
    • Rubber roof cleaner or mild soap
    • Stiff brush and rags
    • Painter’s tape
    • Caulking gun
    • Primer (if required by sealant manufacturer)

    Step 2: Clean the Roof Thoroughly

    Cleanliness is critical for adhesion. Wash the entire roof with a specialized RV roof cleaner. Scrub away dirt, mold, and old sealant residue. Rinse well and let it dry completely. Note: Do not proceed if the roof is damp. Moisture trapped under sealant causes failure.

    Step 3: Inspect and Prepare Surfaces

    Check for cracks, bubbles, or loose seams. Remove old, failing sealant using a plastic scraper to avoid damaging the roof membrane. Apply painter’s tape around vents, AC units, and edges to create clean lines.

    Step 4: Apply Primer (If Needed)

    Some sealants require a primer for optimal bonding. Apply a thin, even coat according to the product instructions. Let it dry for the recommended time, usually 1–2 hours.

    Step 5: Apply the Sealant

    Load your caulking gun. Apply a generous bead of sealant along all seams, edges, and around fixtures. Use a putty knife or gloved finger to smooth the bead, ensuring it fills all gaps. Aim for a uniform thickness of about 1/8 inch.

    Step 6: Let It Cure

    Allow the sealant to cure fully before exposing it to rain or walking on it. Curing times vary by product and temperature but typically range from 24 to 48 hours. Check the manufacturer’s label for specific details.

    When Should You Reseal Your Camper Roof?

    Prevention is cheaper than repair. Most experts recommend resealing your RV roof every 1 to 2 years. However, this depends on usage and exposure.

    Signs you need immediate attention include:

    • Visible cracks or peeling sealant.
    • Water stains on interior ceilings.
    • Soft spots when walking on the roof.
    • Mold or mildew smells inside the camper.

    Regular inspections twice a year—spring and fall—are ideal. Catching small issues early prevents costly water damage. For more detailed information on roof materials, you can refer to Wikipedia’s page on roofing, which provides a broad overview of material properties relevant to various structures, including RVs.

    FAQ Section

    How long does RV roof sealant last?

    Most high-quality RV roof sealants last between 1 to 3 years before needing reapplication. Factors like UV exposure, temperature fluctuations, and physical wear affect longevity. Regular inspections help extend its life.

    Can I reseal over old sealant?

    It is not recommended. Old sealant often loses adhesion and traps moisture. For a lasting fix, remove old sealant completely before applying new material. This ensures a strong bond and prevents future leaks.

    What is the best sealant for EPDM rubber roofs?

    For EPDM rubber roofs, use sealants specifically designed for rubber membranes. Acrylic-based or polyurethane sealants are excellent choices. Avoid silicone unless the manufacturer explicitly approves it, as it can be difficult to remove later.

    Does insurance cover roof resealing?

    Generally, no. Insurance considers resealing routine maintenance, which is the owner’s responsibility. However, if water damage occurs due to a sudden, covered peril (like a storm), insurance might cover the resulting interior damage, but not the roof repair itself.

    How often should I check my camper roof?

    Inspect your roof at least twice a year. Check it in the spring before camping season and in the fall before storage. Also, inspect after any severe weather events or long trips.

    Is it safe to walk on my camper roof?

    Yes, but with caution. Walk softly and avoid sharp objects. Distribute your weight evenly, preferably by kneeling or using a board. Never jump or stand on weak spots. Always ensure the roof is dry and clean to prevent slipping.

    Conclusion

    Knowing how much does it cost to reseal a camper roof empowers you to make smart financial decisions for your RV. Whether you choose the DIY route for savings or hire a pro for peace of mind, regular maintenance is key. Spending a few hundred dollars now can save you thousands in water damage repairs later.

    Don’t wait for a leak to appear. Inspect your roof today, gather your supplies, and keep your adventures dry and worry-free. If you found this guide helpful, please share it with fellow RV enthusiasts on social media! Happy camping!