Moisture buildup in your bathroom isn’t just uncomfortable; it’s a silent destroyer of your home’s structural integrity. If you are tired of peeling paint and moldy caulking, learning how to install a roof vent for a bathroom fan is the most effective long-term solution. This guide will walk you through the process with clarity and confidence, ensuring your home stays dry and your ventilation system works efficiently.
Why Roof Venting Is Superior to Side-Wall Venting
Before we pick up our tools, it is crucial to understand why routing your exhaust through the roof is often the best choice. Many homeowners opt for side-wall vents because they seem easier, but this can lead to significant issues over time.
According to building science principles, hot, moist air rises. By venting through the roof, you utilize natural convection to help expel humid air more effectively. Furthermore, side-wall vents are prone to staining the exterior siding of your house with mineral deposits from the condensation. A roof vent keeps this moisture away from your home’s facade.
However, the primary concern for most DIYers is the fear of leaks. It is a valid concern. A poorly installed roof penetration is a recipe for water damage. But with the right materials and technique, a roof vent can be just as watertight as the shingles surrounding it. The key lies not in the hole you cut, but in how you seal it.
Essential Tools and Materials You Will Need
Preparation is half the battle. Having the right tools on hand before you climb onto the roof ensures safety and efficiency. Do not attempt this project if the roof is wet or if winds exceed 15 mph.
The Tool Kit
- Reciprocating Saw (Sawzall): For cutting through roofing nails and sheathing.
- Hammer and Pry Bar: To remove existing shingles carefully.
- Utility Knife: For trimming shingles and opening packaging.
- Caulking Gun: Loaded with high-quality roofing cement or polyurethane sealant.
- Tape Measure and Pencil: For precise markings.
- Safety Gear: Non-slip shoes, a sturdy extension ladder, and a safety harness if your roof pitch is steep.
The Materials
- Roof Vent Cap: Choose a model compatible with your duct size (usually 4-inch or 6-inch). Look for one with a built-in backdraft damper.
- Flashing Kit: Ideally, use a “step flashing” kit or a specialized pipe boot flashing designed for your specific vent diameter.
- Rigid Metal Ductwork: Avoid flexible plastic or foil ducts inside the attic if possible, as they trap moisture and restrict airflow. Rigid metal is smoother and more durable.
- Roofing Nails: Galvanized nails that match your existing roof nails.
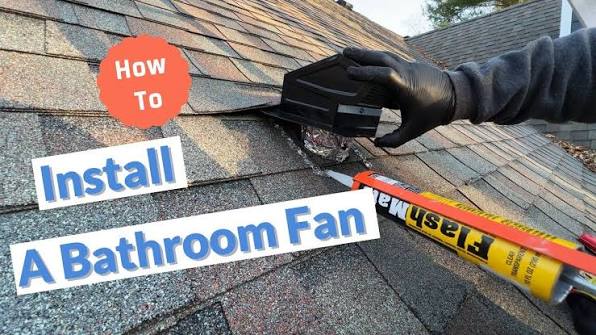
Step-by-Step Guide: How To Install A Roof Vent For A Bathroom Fan
This process involves working in two distinct areas: the attic and the roof surface. We will start from the inside out.
Step 1: Plan Your Route in the Attic
Locate your bathroom fan housing in the attic. You need to determine the shortest, straightest path to the roof. Remember, every bend in the duct reduces airflow efficiency.
- Identify a rafter bay where you can cut a hole without hitting structural beams.
- Measure the distance from the fan outlet to the proposed roof exit point.
- Ensure there are no electrical wires, plumbing pipes, or HVAC ducts in the way.
If your current fan uses a flexible duct, replace it with rigid galvanized steel or aluminum ducting. Secure all joints with metal foil tape (not duct tape, which degrades over time).
Step 2: Mark and Cut the Roof Hole
This is the most critical step for accuracy. Go up onto the roof with a helper if possible.
- From the attic, drive a long nail up through the center of the chosen rafter bay. This nail will poke through the roof deck, marking your exact center point from above.
- On the roof, locate the protruding nail tip.
- Place your vent cap or flashing template over the nail. Trace the outline of the required hole with a pencil.
- Using your reciprocating saw, cut along the traced line. Be careful to cut only through the sheathing and shingles, avoiding any underlying rafters.
Pro Tip: If you hit a rafter, do not cut it. Shift your hole location slightly to the next bay. Structural integrity is non-negotiable.
Step 3: Prepare the Shingle Bed
Water flows down the roof, so we must layer our materials like shingles do—upper layers overlapping lower layers.
- Remove the shingles directly above the area where the vent will sit. You may need to gently lift and pull out the nails holding them.
- Clear away any debris from the exposed sheathing.
- Apply a generous bead of roofing cement around the perimeter of the hole you just cut. This creates an initial water-resistant barrier.
Step 4: Install the Flashing and Vent Pipe
Proper flashing is what separates a professional job from an amateur leak.
- Slide the vent pipe through the hole from the attic side.
- From the roof, slide the flashing base under the shingles above the hole. The top edge of the flashing must go under the upper row of shingles, while the sides and bottom go over the lower shingles.
- If you are using a step-flashing kit, interleave the metal strips with the shingles as you reinstall them.
- Secure the flashing base with roofing nails. Do not nail into the flat part of the flashing where water pools; nail only at the edges where shingles will cover the heads.
Step 5: Connect the Duct and Seal
Back in the attic, connect the rigid ductwork to the bottom of the roof vent pipe. Use metal screws or rivets to secure the connection, then seal the joint with foil tape.
Return to the roof. Apply a thick layer of roofing cement under the edges of the flashing and over any exposed nail heads. Smooth it out with a putty knife to ensure there are no gaps for water to seep in. Reinstall the shingles you removed earlier, nailing them down securely.
Common Mistakes to Avoid
Even experienced DIYers can stumble here. Here is a comparison of right vs. wrong approaches.
| Feature | The Right Way | The Wrong Way |
|---|---|---|
| Duct Material | Rigid metal ducting | Flexible plastic vinyl (crinkles trap moisture) |
| Sealing | Polyurethane roof sealant | Standard silicone caulk (fails under UV exposure) |
| Placement | Between rafters, clear of obstructions | Cutting through rafters or near chimneys |
| Insulation | Insulated duct in cold climates | Uninsulated duct leading to condensation drip |
Using the wrong sealant is a frequent error. Standard bathroom silicone cannot withstand the extreme temperature fluctuations of a roof. Always use a product rated for roofing applications. For more information on building standards regarding ventilation, you can refer to general guidelines on Wikipedia’s page on Mechanical Ventilation.
Maintenance and Long-Term Care
Once you have successfully learned how to install a roof vent for a bathroom fan, maintenance becomes simple but essential.
- Annual Inspection: Once a year, preferably in spring, check the vent cap for bird nests or debris.
- Check the Damper: Ensure the backdraft damper opens freely when the fan is on and closes tightly when it is off. This prevents cold air from entering your home in winter.
- Inspect Sealant: Look for cracking or shrinking in the roofing cement. Reapply if necessary to maintain the waterproof seal.
FAQ Section
1. Can I vent my bathroom fan into the attic instead of the roof?
No. Venting into the attic is a code violation in most jurisdictions. It releases moist air into the attic space, leading to mold growth, wood rot, and reduced insulation effectiveness. Always vent to the exterior.
2. What size roof vent do I need?
Most residential bathroom fans use a 4-inch or 6-inch duct. Check the outlet collar on your fan housing. If you are upgrading your fan, consider upsizing to a 6-inch duct for better airflow and quieter operation, provided your new fan supports it.
3. Is it difficult to install a roof vent on a metal roof?
It is more challenging than on asphalt shingles. You will need a specific metal roof flashing kit and possibly a rubber gasket seal. It is highly recommended to consult a professional if you have a standing-seam metal roof to avoid compromising the warranty.
4. How do I prevent ice dams around the vent?
In cold climates, ensure the duct running through the attic is well-insulated. This keeps the warm, moist air from cooling down too quickly and condensing inside the duct before it exits the roof. Also, ensure the vent cap has a thermal break or is designed for cold weather.
5. Do I need a permit to install a roof vent?
Regulations vary by location. Many municipalities require a permit for structural changes or electrical work associated with fan installation. Check with your local building department before starting. It ensures your work meets safety codes and protects your home insurance coverage.
Conclusion
Learning how to install a roof vent for a bathroom fan empowers you to protect your home from moisture damage while improving indoor air quality. While the task requires attention to detail—especially regarding flashing and sealing—it is entirely manageable for a diligent DIYer. By following these steps, you ensure a leak-free, efficient ventilation system that will serve your home for years.
Did you find this guide helpful? Share it with your friends on social media who might be tackling their own home improvement projects! Let’s build smarter, drier homes together.