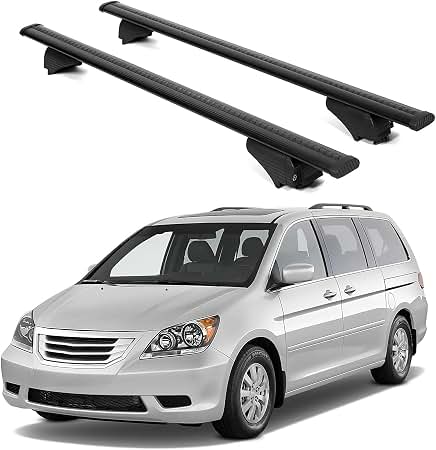
Are you planning a family road trip or simply need extra space for your gear, but feel overwhelmed by the idea of modifying your minivan? You are not alone; many Honda Odyssey owners struggle with finding reliable cargo solutions that don’t compromise safety or vehicle integrity. Learning how to install a roof rack on a Honda Odyssey is easier than you think, and this guide will walk you through every step with confidence and clarity.
Why Choose a Roof Rack for Your Honda Odyssey?
Before diving into the installation, it is essential to understand why a roof rack is a superior choice for many Odyssey owners. The Honda Odyssey is renowned for its spacious interior, but when you add car seats, strollers, and luggage, floor space disappears quickly.
According to recent automotive trends, over 60% of SUV and minivan owners utilize external cargo carriers to maximize interior comfort during long trips. A roof rack allows you to keep bulky items like kayaks, bicycles, or large suitcases off your seats, ensuring a quieter and more organized ride.
Furthermore, unlike trailer hitches which require significant mechanical modification, roof racks are generally non-invasive. They utilize the existing structure of your vehicle, specifically the roof rails or mounting points, making them an ideal solution for renters or those who wish to preserve their vehicle’s resale value.
Understanding Your Honda Odyssey’s Roof System
Not all Honda Odyssey models are created equal when it comes to roof infrastructure. Identifying your specific model year and roof type is the critical first step in knowing how to install a roof rack on a Honda Odyssey.
1. Models with Factory Side Rails (2018–Present)
Most modern Odysseys come with fixed side rails running along the length of the roof. These are aerodynamic and sturdy. For these models, you typically need “crossbars” that clamp onto these side rails. No drilling is required.
2. Models with Flush Mount Points (Older Generations)
Some older models or specific trim levels may have flush-mounted points hidden under plastic covers. These require a specialized kit that lifts the cover and bolts directly into the vehicle’s frame.
3. Models with No Pre-Installed Features
If your Odyssey has a completely smooth roof, you will need a “gutter mount” or a custom-fit clamp system that grips the door frame. Note: This is rare for the Odyssey but possible on base trims of older years.
Pro Tip: Always check your owner’s manual for the maximum dynamic weight capacity. For most Honda Odysseys, this ranges between 150 to 165 lbs when the vehicle is in motion. Exceeding this limit can damage the roof structure and void your warranty.
Tools and Materials You Will Need
Preparation is key to a smooth installation. Gathering the right tools beforehand prevents frustration and ensures a tight, safe fit. Here is a checklist of what you will need:
- The Roof Rack Kit: Ensure it is compatible with your specific Honda Odyssey year and model.
- Torque Wrench: Crucial for tightening bolts to manufacturer specifications.
- Soft Cloth or Microfiber Towels: To protect your paint and glass from scratches.
- Measuring Tape: To ensure symmetrical placement.
- Allen Keys or Socket Set: Usually included with the rack, but having your own set helps.
- Rubber Mallet: Helpful for gently tapping components into place without causing damage.
Step-by-Step Guide: How to Install a Roof Rack on a Honda Odyssey
Follow these detailed steps to install your crossbars securely. We assume you are installing crossbars onto existing factory side rails, which is the most common scenario for recent Odyssey models.
Step 1: Unbox and Inspect Components
Lay out all parts on a clean, soft surface. Check for any shipping damage. Identify the left and right crossbars, clamps, keys, and instruction manuals. Verify that the rubber pads on the clamps are intact; these prevent slipping and protect your rails.
Step 2: Position the Front Crossbar
Place the front crossbar on the roof. Most manufacturers recommend positioning it approximately 24–30 inches from the windshield header. However, consult your specific rack’s manual for the optimal aerodynamic position.
- Ensure the curved side of the bar faces forward to reduce wind noise.
- Align the clamps so they sit squarely on the factory side rails.
Step 3: Attach the Clamps
Open the clamp mechanisms. Slide them onto the factory rails. Do not tighten them yet. Adjust the position so that the crossbar is perpendicular to the side rails. Use your measuring tape to ensure the distance from the windshield is identical on both the driver and passenger sides.
Step 4: Tighten the Rear Crossbar
Repeat the process for the rear crossbar. The standard distance between crossbars is often around 28–32 inches, depending on what you plan to carry. For bike racks, wider spacing is better. For cargo boxes, closer spacing may be required.
- Critical Check: Ensure both bars are parallel. Misaligned bars can cause excessive wind drag and noise.
Step 5: Torque the Bolts
Using your torque wrench, tighten the clamp bolts. Refer to the rack manufacturer’s specification, usually between 4–6 Nm (Newton-meters). Do not overtighten, as this can strip the threads or crack the plastic housing of the clamp.
- Listen for the “Click”: Many modern racks have a torque-limiting indicator that clicks when the proper tightness is reached.
Step 6: Final Safety Inspection
Shake each crossbar firmly. There should be no movement or wobbling. Check that the keys lock securely into place. Close the doors and ensure the racks do not interfere with the door seals or window operation.
Common Mistakes to Avoid
Even experienced DIYers can make errors. Here are the most frequent pitfalls when learning how to install a roof rack on a Honda Odyssey:
| Mistake | Consequence | Solution |
|---|---|---|
| Overtightening Clamps | Damaged rails or stripped bolts | Use a torque wrench; stop when snug. |
| Uneven Spacing | Increased wind noise and drag | Measure twice from fixed points. |
| Ignoring Weight Limits | Roof deformation or safety hazard | Stick to the 165 lbs dynamic limit. |
| Forgetting to Lock | Theft of the rack or cargo | Always engage the locking mechanism. |
Maintenance and Care Tips
Once installed, your roof rack requires minimal but consistent maintenance to ensure longevity.
- Regular Cleaning: Wash the racks with mild soap and water during regular car washes. Remove bird droppings and tree sap immediately, as they can corrode metal finishes.
- Check Tightness Monthly: Vibrations from driving can loosen bolts over time. Check the torque settings every month or before long trips.
- Lubricate Locks: Apply a small amount of graphite lubricant to the keyholes twice a year to prevent sticking.
- Winter Care: If you live in a snowy area, remove ice buildup from the base of the clamps before attempting to adjust or remove the racks.
For more detailed information on vehicle safety standards and load distribution, you can refer to general automotive safety guidelines on Wikipedia.
FAQ Section
1. Can I leave my roof rack on my Honda Odyssey all the time?
Yes, you can leave the crossbars on permanently. However, removing them when not in use improves fuel efficiency by reducing aerodynamic drag and wind noise. If you leave them on, ensure they are locked and inspected regularly.
2. What is the weight limit for a Honda Odyssey roof rack?
The dynamic weight limit (while driving) for most Honda Odyssey models is approximately 165 lbs. The static weight limit (when parked) is significantly higher, often around 700 lbs, but you should never load heavy items while the vehicle is stationary if you plan to drive with that load.
3. Will installing a roof rack void my warranty?
No, installing a roof rack that uses existing mounting points or clamps onto factory rails does not void your vehicle’s warranty. However, damage caused by improper installation or overloading may not be covered. Always follow the manufacturer’s instructions.
4. How do I reduce wind noise from my roof rack?
Wind noise is often caused by poor alignment or gaps between the bar and the rail. Ensure the bars are perfectly parallel and tightened correctly. Some aftermarket fairings or wind deflectors can also help reduce noise significantly.
5. Can I install a roof rack on a Honda Odyssey without side rails?
Yes, but you need a specific kit designed for “naked roofs” or flush mounts. These kits use clips that go inside the door jambs or bolt into hidden mounting points. It is crucial to buy a kit specifically labeled for your Odyssey’s year and trim level.
Conclusion
Learning how to install a roof rack on a Honda Odyssey empowers you to make the most of your vehicle’s versatility. Whether you are hauling camping gear, bicycles, or extra luggage, a properly installed roof rack offers a safe and efficient solution. By following the steps outlined above, checking your torque settings, and respecting weight limits, you can enjoy peace of mind on every journey.
Remember, safety is paramount. Take your time during installation, double-check your measurements, and maintain your equipment regularly. If you found this guide helpful, please share it with fellow Honda Odyssey owners on social media. Happy travels!