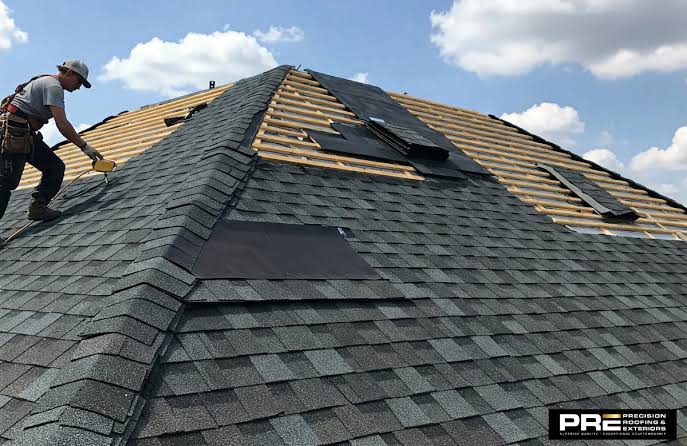
Have you ever looked up at your home’s roofline and noticed those vulnerable peaks where two slopes meet? These areas, known as hips and ridges, are the most susceptible points for water infiltration if not sealed correctly. Knowing how to install ridge cap shingles on a hip roof is essential for protecting your home from leaks while enhancing its architectural beauty.
Whether you are a seasoned DIY enthusiast or a homeowner looking to understand the process before hiring a pro, this guide will walk you through every step with clarity and precision. We prioritize safety, durability, and aesthetic perfection to ensure your roof stands strong against the elements.
Why Are Ridge Caps Critical for Roof Integrity?
Before diving into the tools and techniques, it is vital to understand why this specific component matters. The ridge and hips are not just decorative; they are functional barriers.
According to roofing industry standards, the intersection of roof planes creates a natural channel for wind-driven rain and snow melt. Without proper capping, water can seep under the standard field shingles, leading to rot, mold, and structural damage.
Expert Insight: “The ridge cap is the final seal of the roofing system. If installed incorrectly, even the best underlayment cannot prevent water intrusion during high-wind storms.” – National Roofing Contractors Association (NRCA)
For a deeper understanding of roof anatomy and terminology, you can refer to this comprehensive resource on Roof construction.
Tools and Materials You Will Need
Preparation is half the battle. Having the right tools on hand prevents mid-job trips to the hardware store and ensures a smoother workflow.
Essential Tools:
- Chalk Line: For creating straight guidelines.
- Utility Knife: With extra blades for clean cuts.
- Hammer or Pneumatic Nail Gun: A nail gun speeds up the process significantly.
- Tape Measure: For precise spacing.
- Ladder and Safety Harness: Non-negotiable for height work.
Materials:
- Ridge Cap Shingles: You can buy pre-cut caps or cut them from standard three-tab shingles.
- Roofing Nails: 1-¼ inch galvanized nails are standard.
- Asphalt Plastic Cement: For sealing edges in high-wind zones.
| Material Type | Pros | Cons |
|---|---|---|
| Pre-Cut Caps | Uniform size, faster installation, professional look. | More expensive per square foot. |
| Field Shingle Cuts | Cost-effective, uses leftover material. | Time-consuming, requires precise cutting skills. |
Step-by-Step Guide: How to Install Ridge Cap Shingles on a Hip Roof
Follow these detailed steps to ensure a watertight seal. We assume you have already installed the field shingles up to the hip line.
Step 1: Prepare the Hip Line
Ensure that the field shingles on both sides of the hip are trimmed evenly. There should be no overhang greater than ½ inch beyond the hip line. Use your chalk line to snap a straight guideline along the center of the hip. This visual aid ensures your caps remain aligned as you move upward.
Step 2: Start at the Bottom
Unlike ridge caps which often start from one end, hip caps typically start at the bottom eave and work their way up to the peak. This method allows each subsequent shingle to overlap the previous one, shedding water effectively like fish scales.
- Take your first ridge cap shingle.
- Align it so that it covers the joint between the two roof planes.
- Ensure the bottom edge of the cap aligns with the bottom edge of the last course of field shingles.
Step 3: Nailing Technique
Proper nailing is crucial for wind resistance.
- Place two nails on each side of the cap, approximately 1 inch from the edge and 1 inch above the exposure line.
- Do not nail too close to the edge, as this can cause the shingle to crack or tear in high winds.
- If using a nail gun, set the depth correctly so the nail head sits flush with the shingle surface—not driven in too deep to puncture the mat, nor too shallow to catch wind.
Step 4: Overlapping and Alignment
Place the second cap shingle over the first. The standard exposure for ridge caps is usually 5 inches. This means 5 inches of the shingle are visible, and the rest is covered by the next piece.
- Use your tape measure to verify the 5-inch exposure for the first few courses.
- Continue this pattern, moving up the hip line toward the peak.
- Keep the edges straight using your initial chalk line as a reference.
Step 5: Handling the Peak
When you reach the top of the hip where it meets the main ridge, you will need to trim the final cap shingle.
- Measure the remaining distance to the peak.
- Cut the shingle to fit, ensuring it overlaps the last full cap by at least 2 inches.
- Seal the cut edge with asphalt plastic cement if you live in an area prone to heavy rain or wind.
Common Mistakes to Avoid
Even experienced DIYers can stumble on these common pitfalls. Being aware of them saves time and money.
- Incorrect Nailing Position: Nailing too high exposes the nail head to the elements; nailing too low compromises the seal of the next shingle.
- Ignoring Wind Direction: In areas with prevailing winds, consider starting the installation on the side opposite the wind direction to prevent uplift.
- Poor Cutting: Using a dull knife results in jagged edges that look unprofessional and may not lay flat. Change blades frequently.
- Skipping the Starter Strip: Some manufacturers recommend a starter strip at the bottom of the hip for added protection. Check your specific shingle manufacturer’s instructions.
FAQ Section
1. Can I use regular shingles for ridge caps?
Yes, you can cut standard three-tab shingles into smaller pieces to create ridge caps. However, pre-cut ridge cap shingles are thicker and designed specifically for this purpose, offering better durability and a cleaner aesthetic. If you cut your own, ensure each piece is roughly 12×12 inches.
2. How many nails should I use per ridge cap shingle?
Typically, you should use four nails per cap shingle—two on each side. In high-wind zones (such as coastal areas), some manufacturers recommend six nails or the use of adhesive strips. Always consult the specific installation instructions provided by your shingle brand.
3. What is the difference between a hip and a ridge?
A ridge is the horizontal line at the very top of the roof where two sloping sides meet. A hip is the external angle formed by the meeting of two sloping ends of a roof. While the installation process is similar, hips run diagonally from the eave to the ridge, whereas ridges run horizontally.
4. Do I need to seal the ridge cap shingles?
In most standard residential applications, the weight of the overlapping shingles and the nails provide sufficient hold. However, applying a dab of asphalt plastic cement under the exposed corner of each cap can provide extra security against wind uplift, especially in storm-prone regions.
5. How long does it take to install ridge caps on an average house?
For a DIYer with moderate experience, installing ridge caps on an average-sized hip roof can take 4 to 8 hours. This depends on the complexity of the roofline, the number of hips, and weather conditions. Professional crews can often complete this in half the time.
Conclusion
Mastering how to install ridge cap shingles on a hip roof is a rewarding skill that protects your home’s most vital shield. By following the steps outlined above—preparing the surface, aligning carefully, and nailing precisely—you ensure a durable, leak-proof finish that enhances your home’s curb appeal.
Remember, safety is paramount. Never hesitate to use a harness or seek professional help if the roof pitch is steep or if you feel uncomfortable working at heights.
Did you find this guide helpful? Share it with your friends on social media who might be tackling their own home improvement projects! Let’s build safer, stronger homes together.